
Adding location information to photos on your iPhone allows you to find images in your collection faster by location. If you haven't enabled location services on your iPhone to automatically add location information to photos, you can manually add it using a very simple trick.
How to add location to photos on iPhone
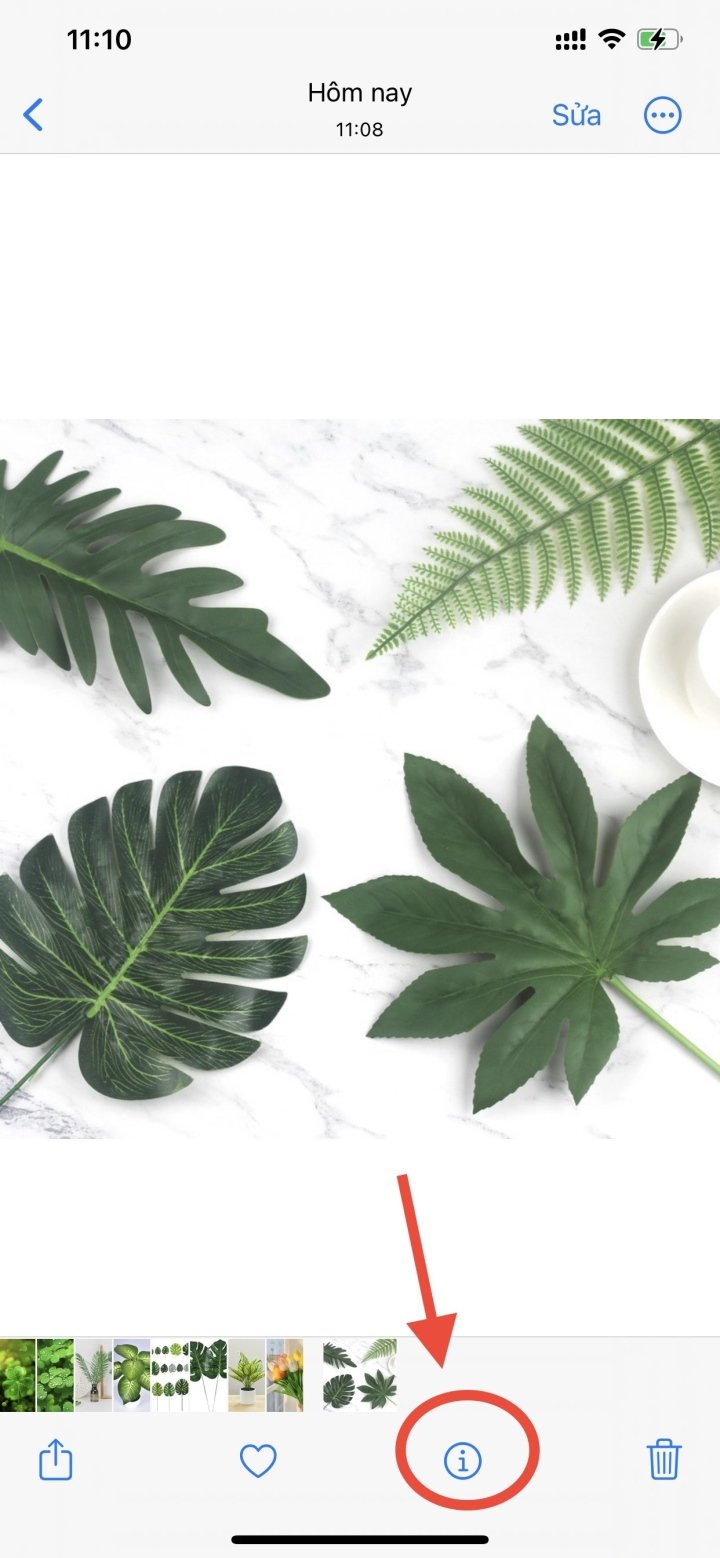
Step 1: Select the image you want to add a location to, then tap the "i" icon below to view the image information.
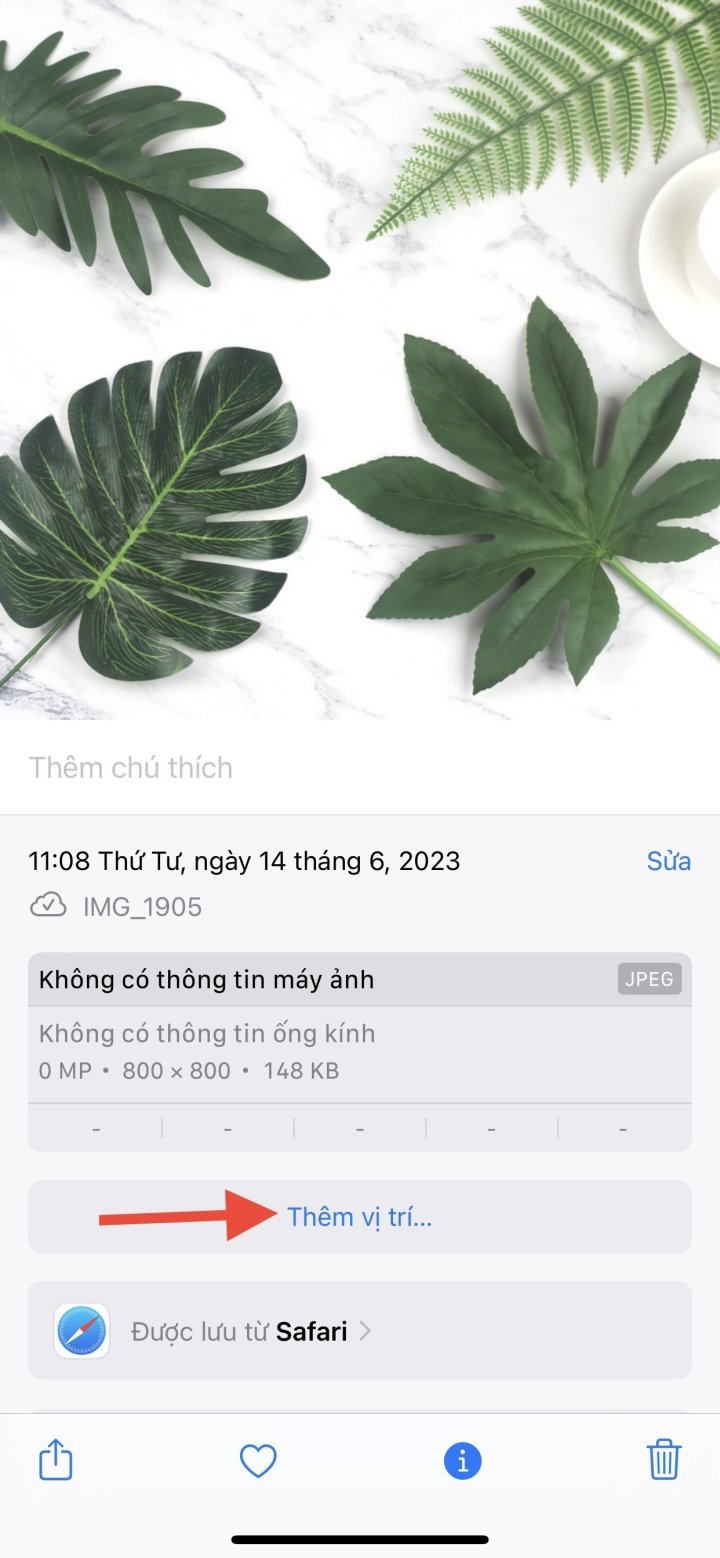
Step 2: When the interface displaying the image's basic information appears, click " Add location" to add a location to this image. Then enter the location you want to add to the image. The locations will be displayed in the list below for you to select and add to the image.

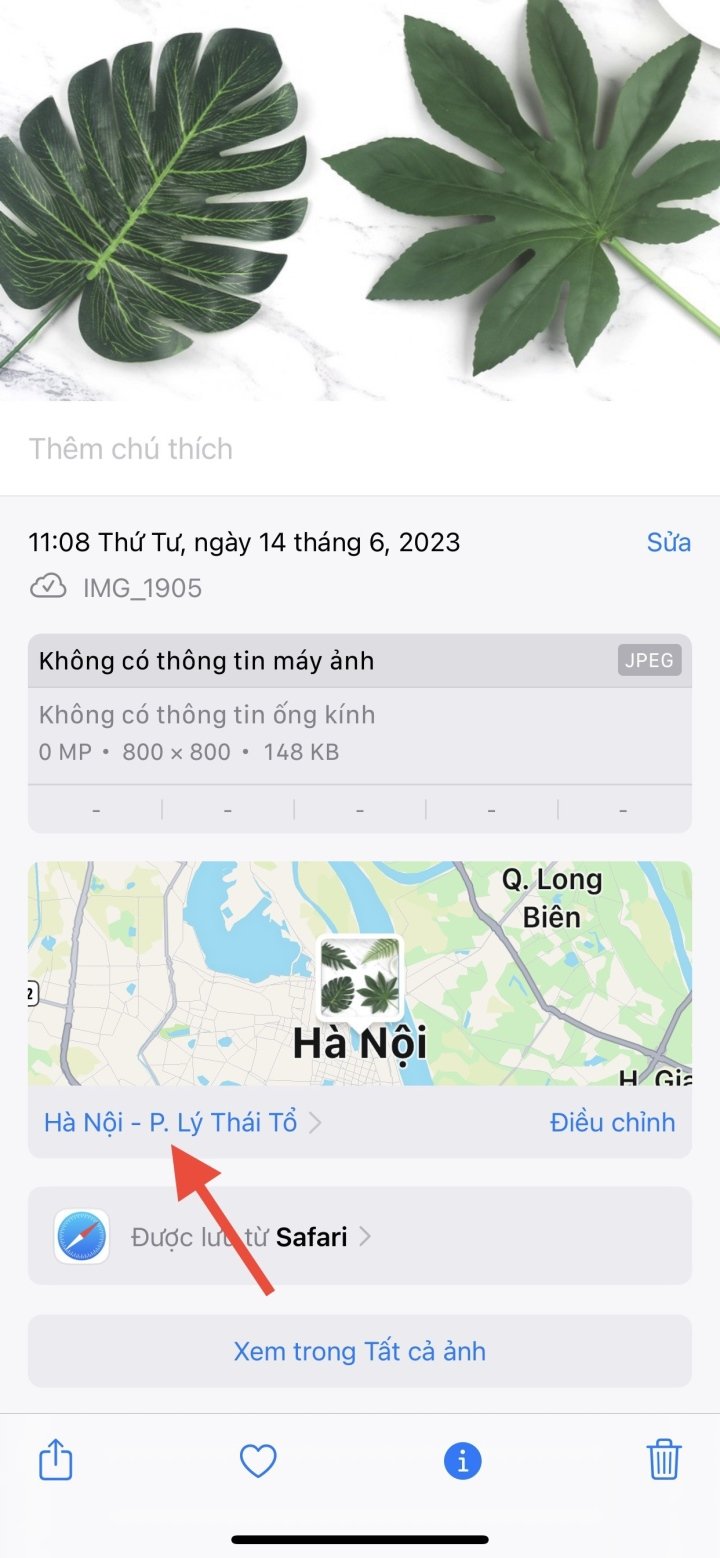
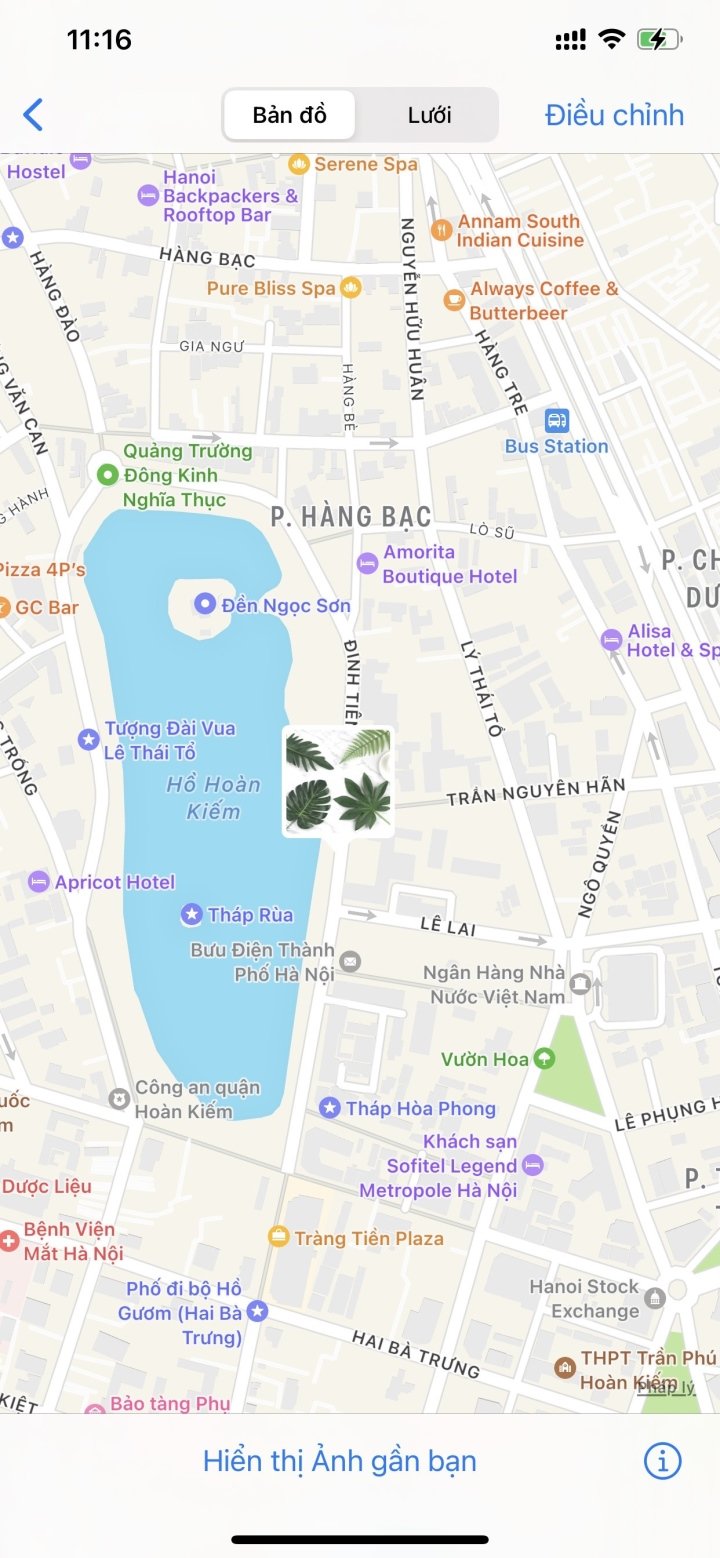
Step 3: The location has been inserted into the image with a map as shown below. Users can click on the map to view the location more clearly if needed. Or click Adjust to change the previously inserted location back into the image.
How to add locations to multiple iPhone photos
In addition to adding location information to a single image, iPhones also allow users to add multiple images at once to save time and effort. This article will guide you on how to add location information to photos on your iPhone.
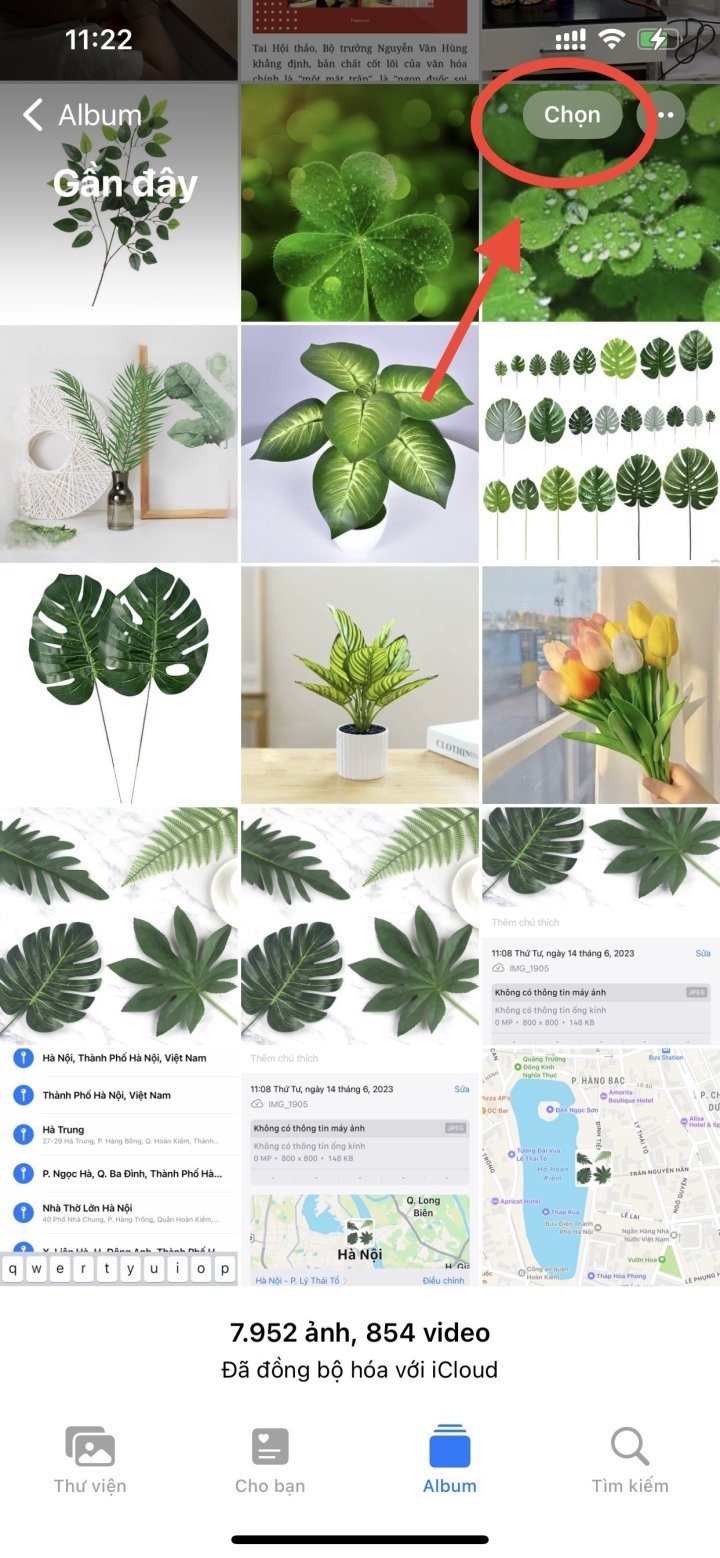
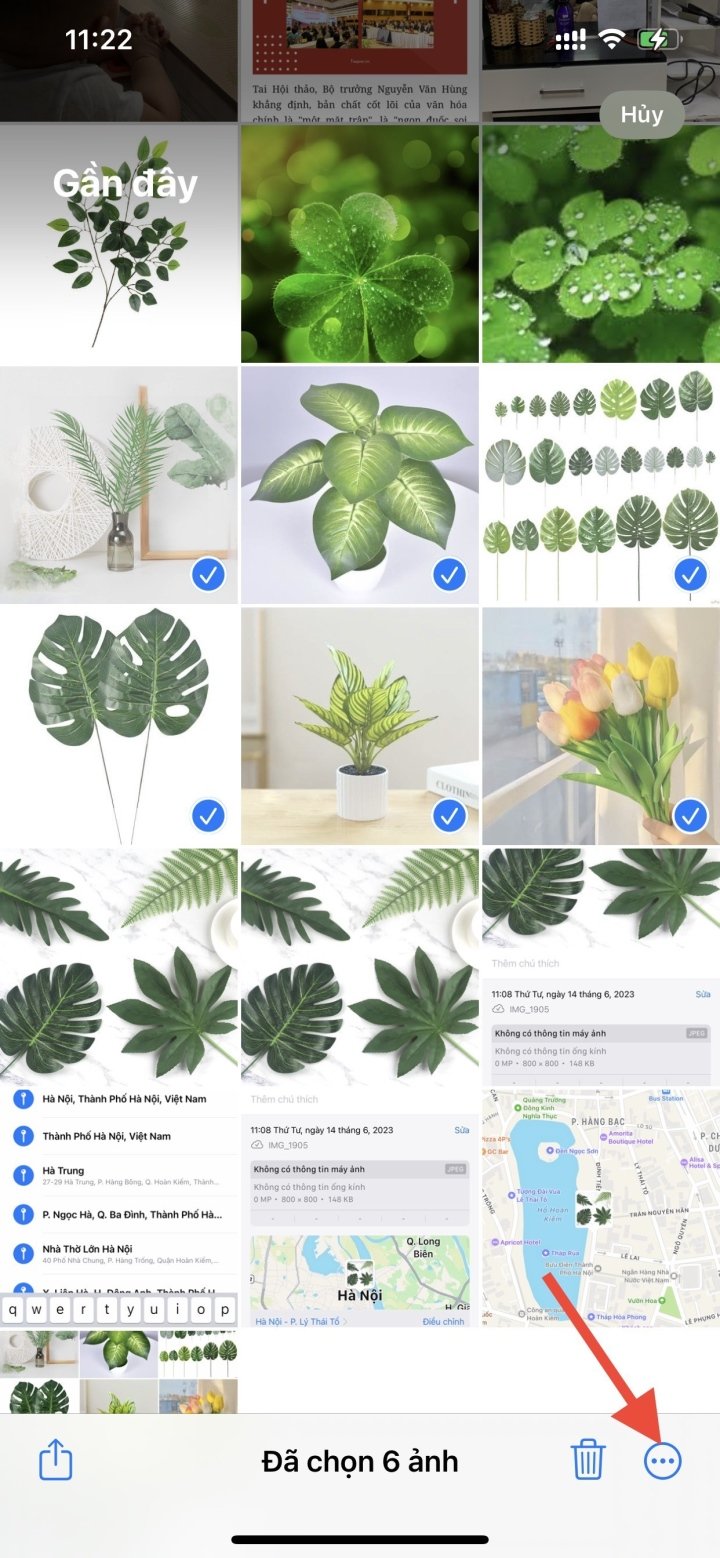
Step 1: On the albums interface on your iPhone, tap the Select button in the upper right corner of the screen. Then, check the boxes next to the images you want to add to the location.
Once you've selected the image, tap the three-dot icon in the bottom right corner of the screen.
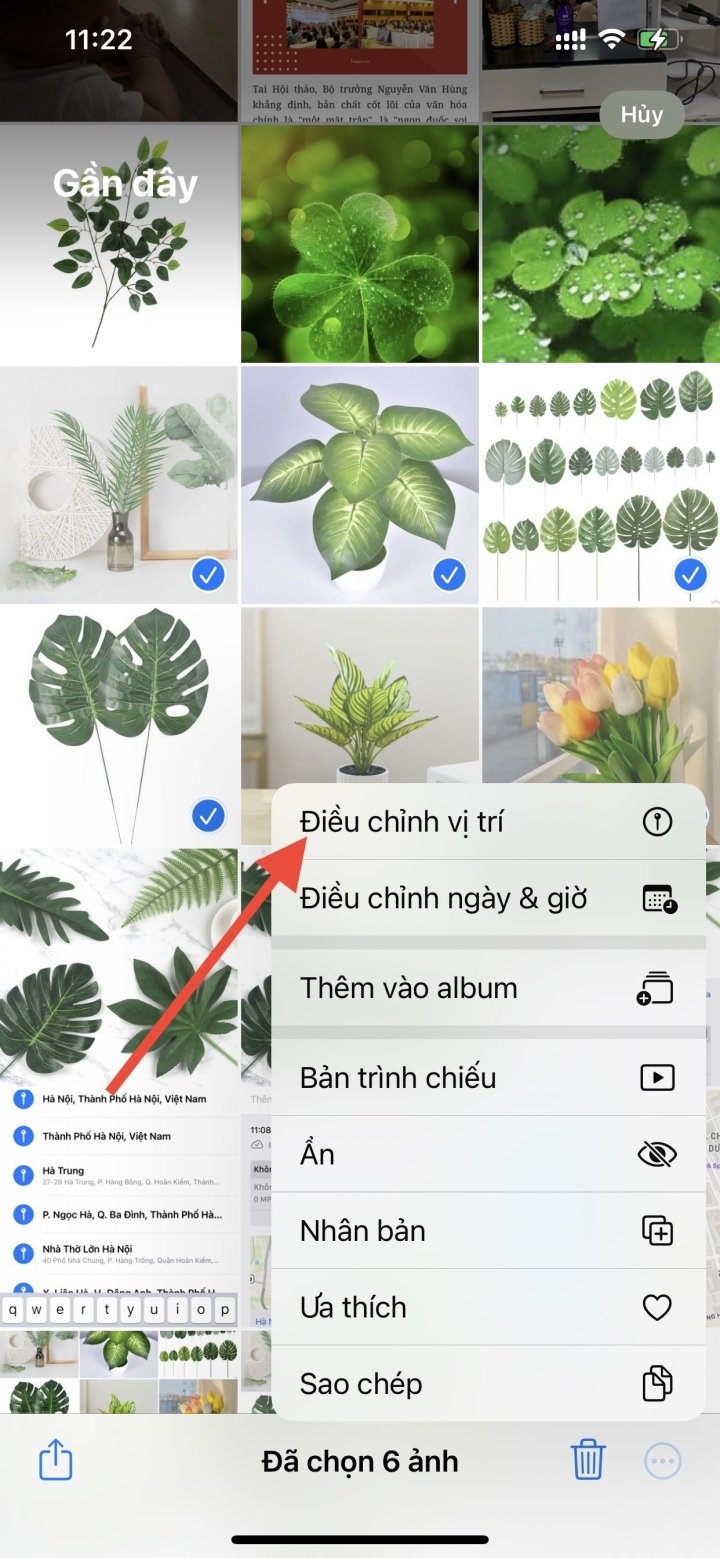
Step 2: The image customization interface will then appear. The user selects the "Adjust Position" option to add positions to the selected images. An interface will then appear allowing you to locate the desired insertion point.
Users enter the desired location into the search bar and then click on the result below to complete the search.

Video tutorial on how to add location information to photos on iPhone.
Nhat Thuy
Beneficial
Emotion
Creative
Unique
Source
![[Photo] General Secretary and President To Lam and his wife begin their official visit to Thailand.](https://vphoto.vietnam.vn/thumb/1200x675/vietnam/resource/IMAGE/2026/05/27/1779881249412_anh-man-hinh-2026-05-27-luc-18-10-51.png)


Comment (0)