
Apple has officially launched iOS 18 with many significant improvements to the interface and features. However, many iPhone users have encountered some issues with performance, battery life, and bugs during use. If you are dissatisfied with this new version and want to revert to iOS 17, the article below will guide you on how to downgrade without losing data.
Downgrade from iOS 18 to iOS 17.
Things to note before downgrading
1. Only downgrades to versions that are still open for signing are possible: Apple only allows users to downgrade to iOS 17 versions that are still open for signing. Once Apple stops signing, downgrading will no longer be possible.
2. Be prepared: You need a charging cable that supports data transfer (a USB-C to Lightning or USB-C to USB-C cable is recommended).
3. Suitable software: This article guides you through downgrading on a Mac via Finder. Windows users can use iTunes to perform the same process.
Steps to downgrade from iOS 18 to iOS 17
Step 1: Back up your data
Connect your iPhone to your computer using a charging cable, then open Finder on macOS (or iTunes on Windows). Select the connected iPhone, then click "Back Up Now" to back up your data.
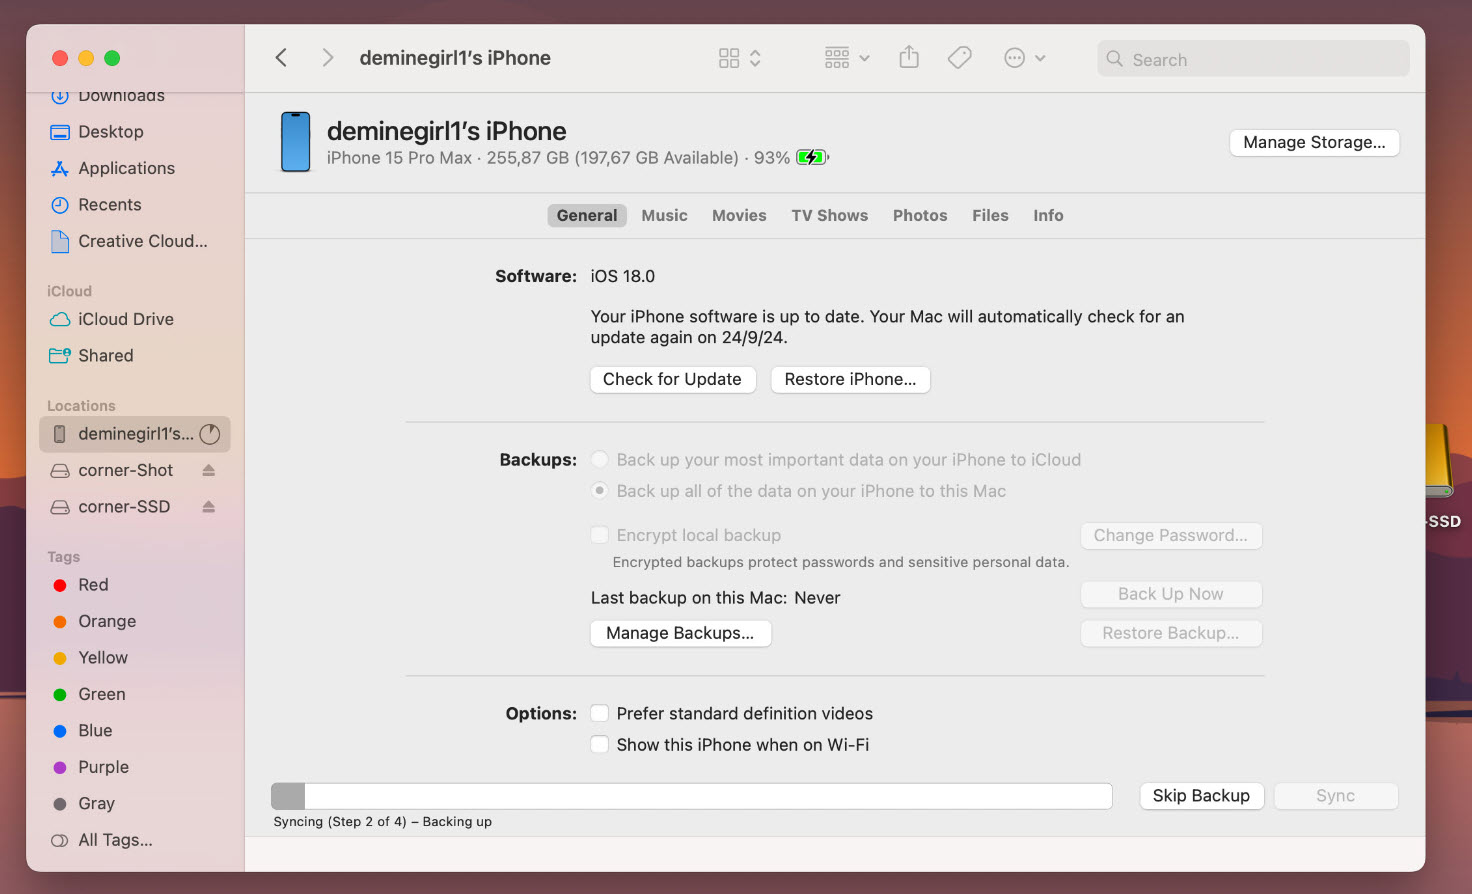
Note: You should create an additional iCloud backup of your iOS 18 in case the above method doesn't work.
Step 2: Access the backup file
To edit a backup, you need to access the folder containing the backup file:
On Windows: Access the following path: C:\Users\
On macOS: The path to access is: ~/Library/Application Support/MobileSync/Backup/0xxxxxxxxxxxxxxxxxxxxxxx
Step 3: Edit the backup file
Locate the Info.plist file in the backup folder and open it with a text editor such as Notepad or Visual Studio Code.
Step 4: Edit iOS version
Use the search tool (Ctrl+F or Cmd+F) and search for the keyword "Product Version". Below this line, you will see the current iOS version (e.g., 18.0). Edit it to the iOS 17 version you want to downgrade to (e.g., iOS 17.7), then save the changes.
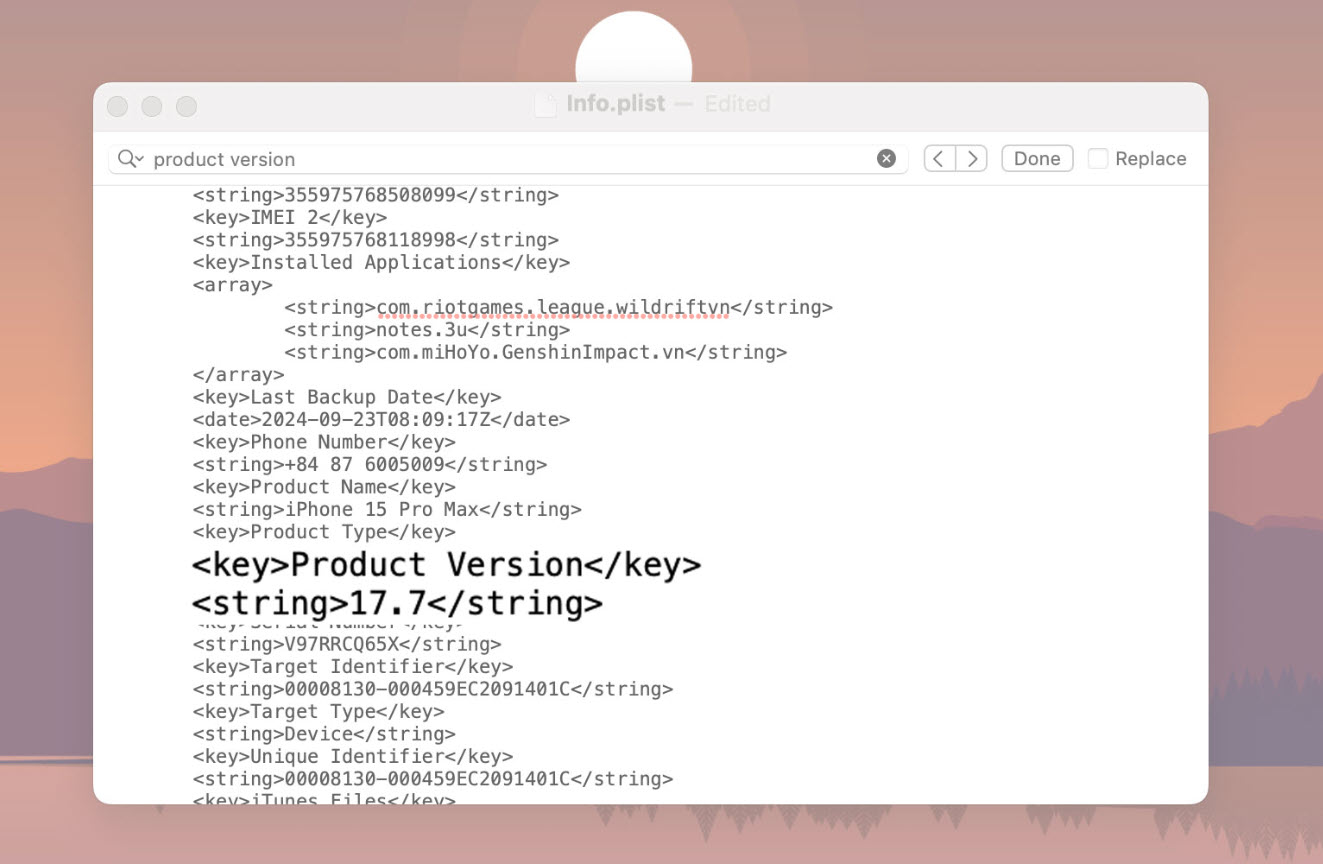
Modify the iOS version.
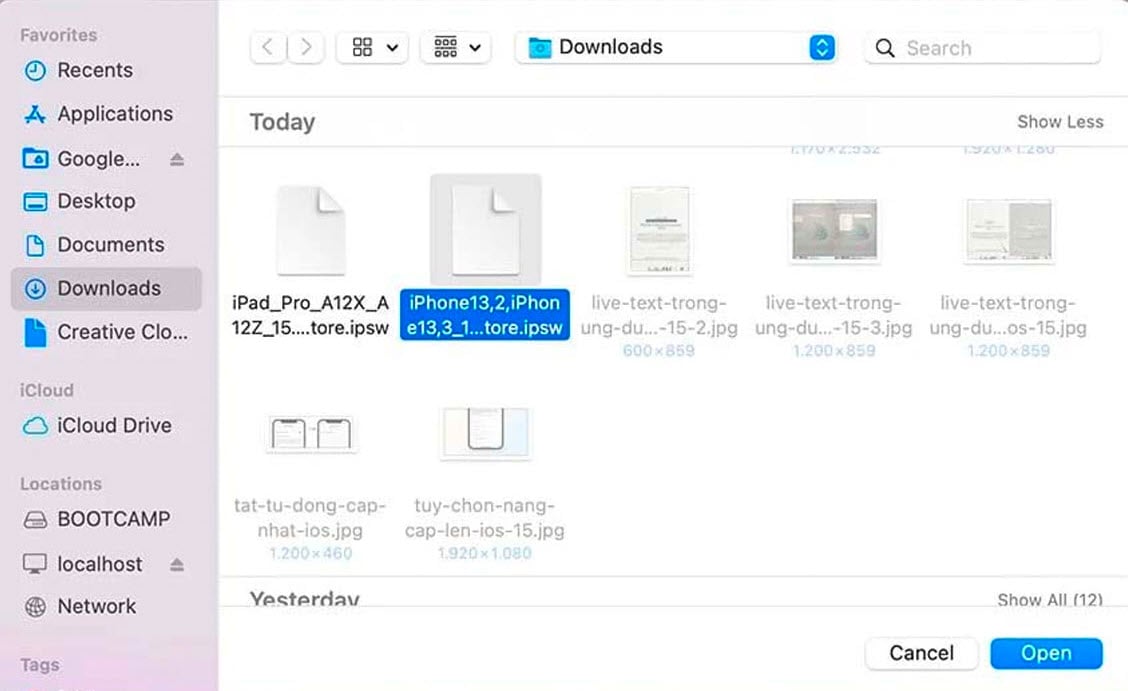
Step 5: Download iOS 17 firmware
Visit the website ipsw.me, select your device type, and download the iOS 17 version that is still open for signing (the version highlighted in blue). Make sure not to download iOS versions that are no longer signed (highlighted in red).
Step 6: Turn off the Find iPhone feature.
Before downgrading, you need to turn off the "Find My iPhone" feature. Go to Settings > [iCloud account name] > Find iPhone and turn this feature off.
Step 7: Connect your iPhone to your computer.
Connect your iPhone to your computer via a data cable. Open Finder (macOS) or iTunes (Windows), then select your iPhone from the main interface.
Connect your iPhone to your computer.
Step 8: Restore the old iOS version
Press and hold the Option key on a Mac (or the Shift key on Windows) and select Restore iPhone. A new window will appear; select the iOS 17 firmware file you downloaded in the previous step and click Open.
Step 9: Complete the restoration
iTunes or Finder will automatically restore your iPhone to iOS 17. Once the process is complete, your iPhone will restart and you will be prompted to set up the device again.
Step 10: Restore data from a backup.
During the iPhone setup process, when you reach the "Transfer Your Apps & Data" step, select "From Mac or PC". In Finder or iTunes, select "Restore Backup" and choose the modified backup from step 6 to restore your data.
Source: https://www.congluan.vn/huong-dan-ha-cap-tu-ios-18-ve-ios-17-ma-khong-mat-du-lieu-post313657.html


Comment (0)