
In this article, we will learn how to easily and effectively record audio on Windows 11, 10, and 8.1 computers.
1. How to record audio on a Windows 11 computer
a. How to record audio on a Windows 11 computer using Voice Recorder
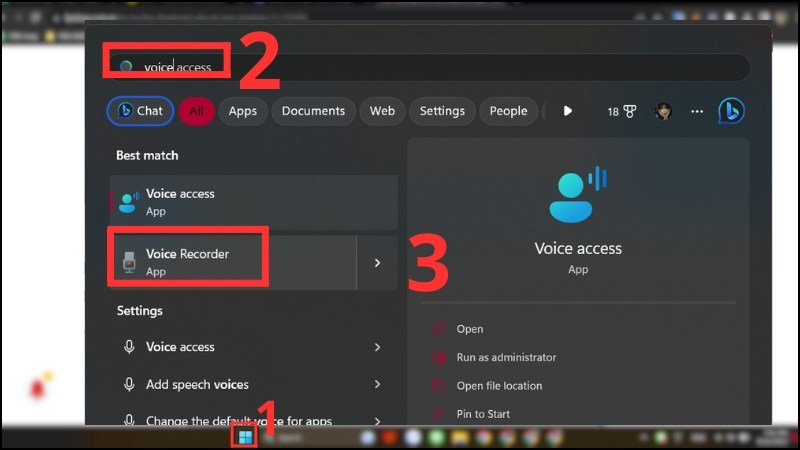
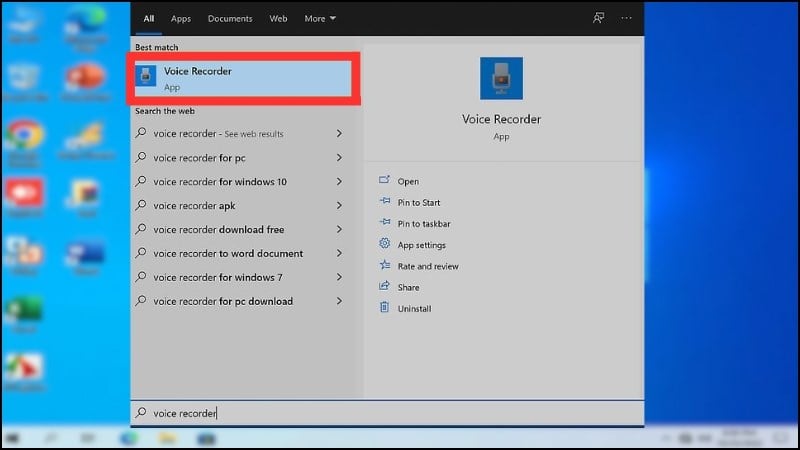
Step 1: Press the Windows key on your keyboard and type “Voice” or “Sound” > Click on Sound Recorder.
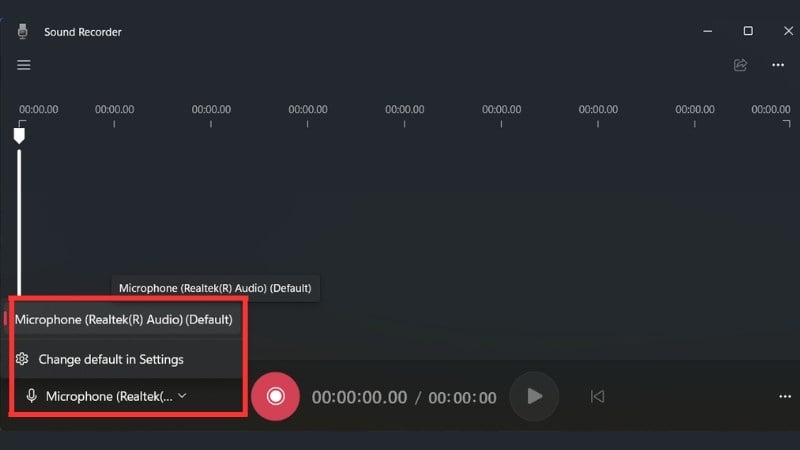
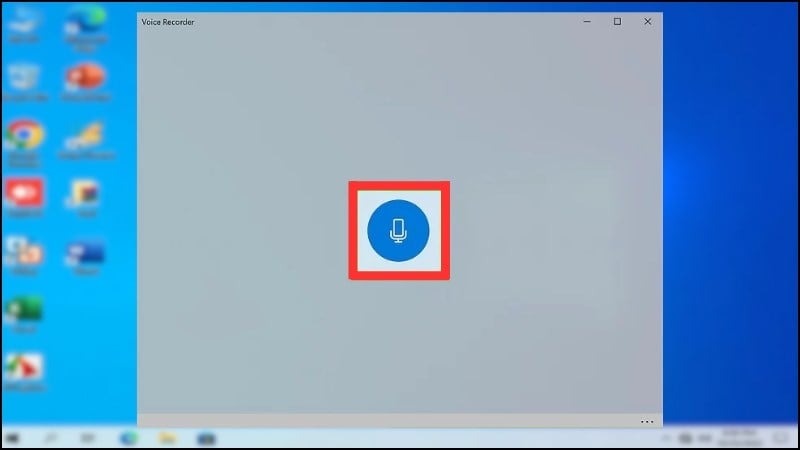
Step 2: Select the recording device in the bottom left corner (if there is more than one microphone).
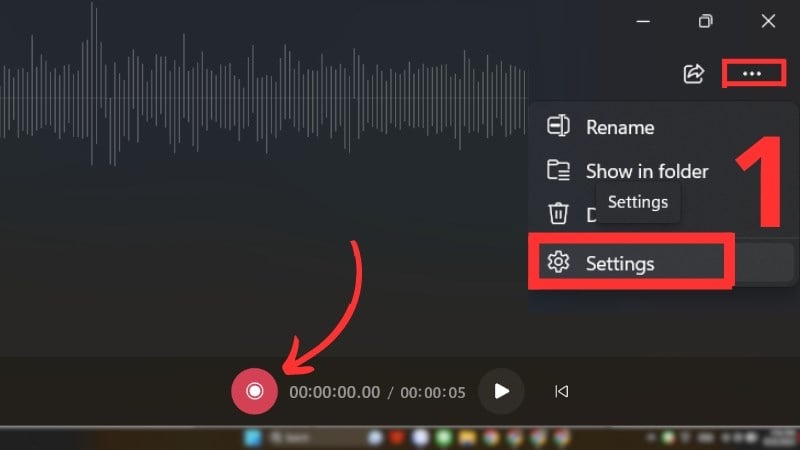
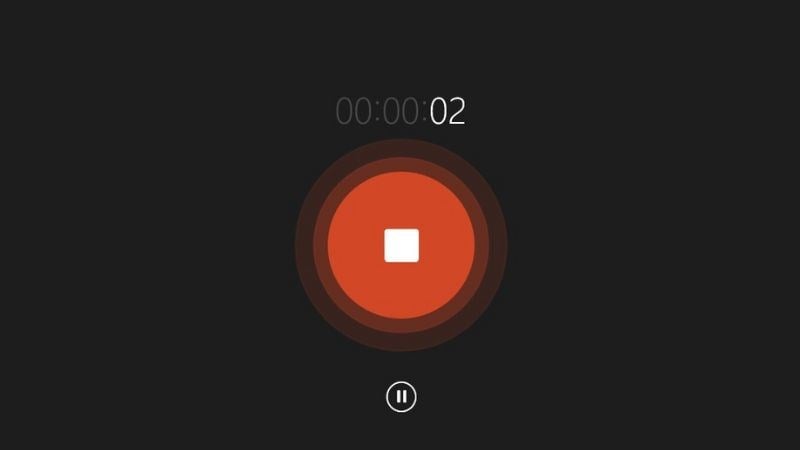
Step 3: Tap the three horizontal dots in the upper right corner > Access Settings to customize the format and quality of the recording file > Tap the red circle Start Recording button to begin recording.
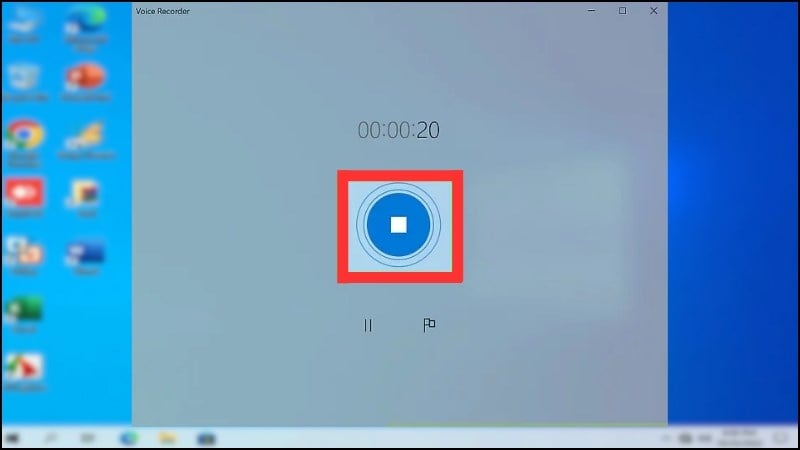
Step 4: Press the Stop Recording button (with a black square icon), or press the Esc key combination to stop recording.
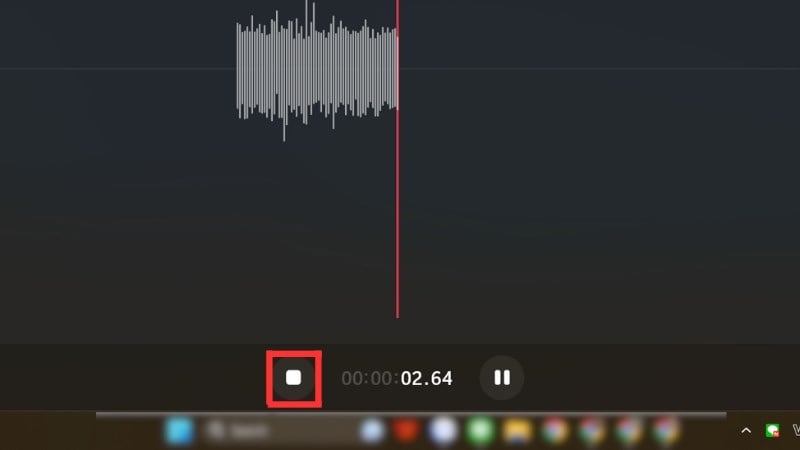
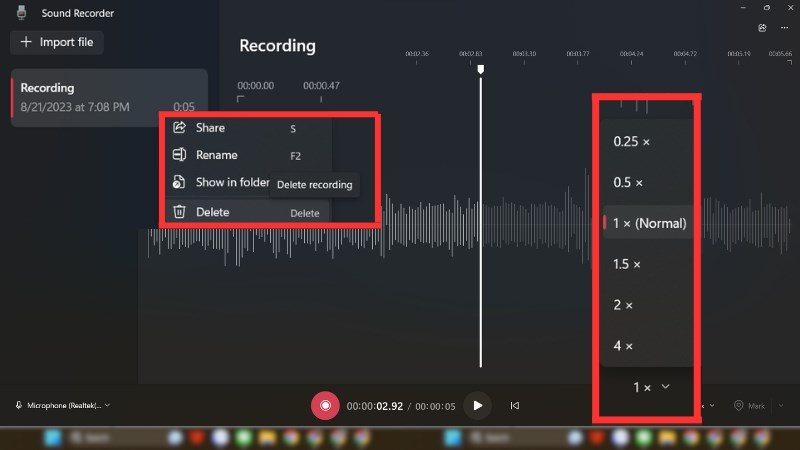
Step 5: Click on the left pane of the Sound Recorder app to listen to the recorded audio file, or you can rename it, view its location, delete it, and share it. Press 1x to adjust the playback speed of the recording (if needed).
b. How to record audio on a Windows 11 computer using Xbox Game Bar
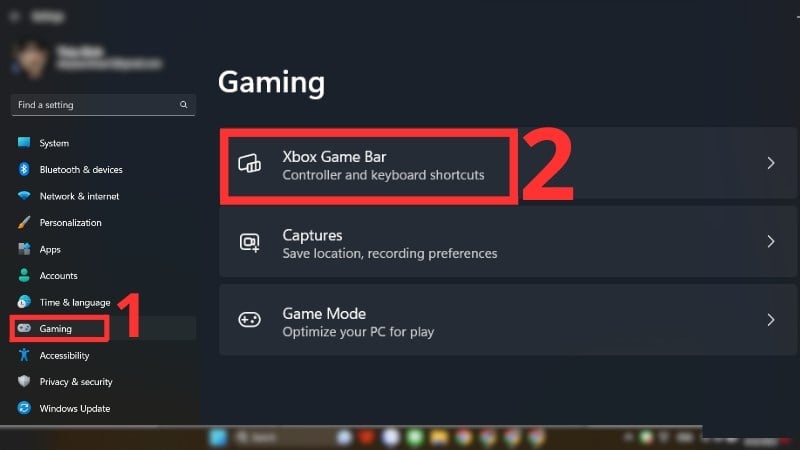
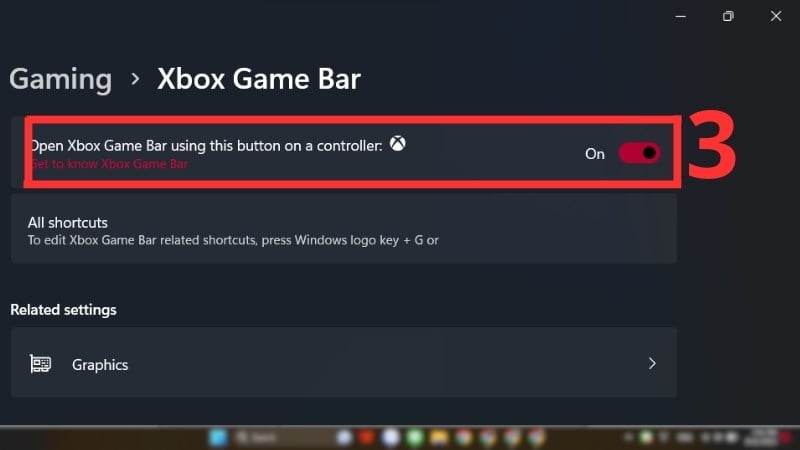
Step 1: Enable Xbox Game Bar on Windows 11 by clicking Start > Selecting Settings > Gaming > Xbox Game Bar.
Step 2: Switch the Xbox Game Bar to On.
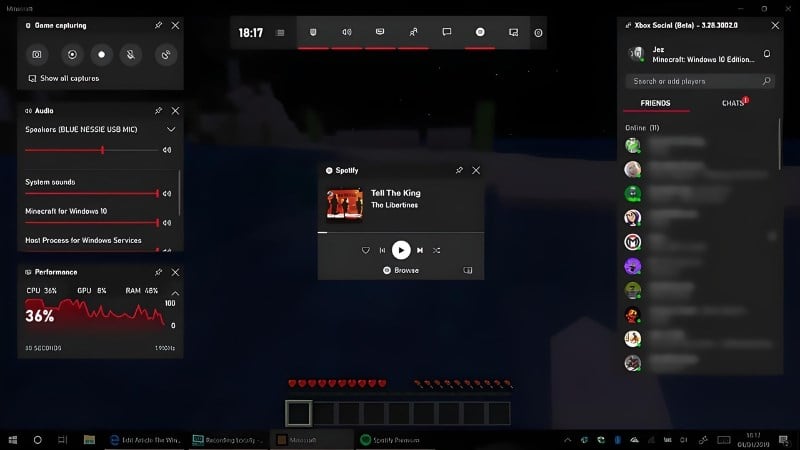
Step 3: Press the Windows key + G or press the Xbox button (if using an Xbox controller) to open the Game Bar > Click Record to start recording your screen and audio > Click Stop to end and save the recorded audio.
2. How to record audio on a Windows 10 computer using Voice Recorder
Step 1: Press the Windows key > Type Voice Recorder > Press Enter to open Voice Recorder on your computer.
Step 2: Select the microphone icon or press the CTRL + R key combination to start recording.
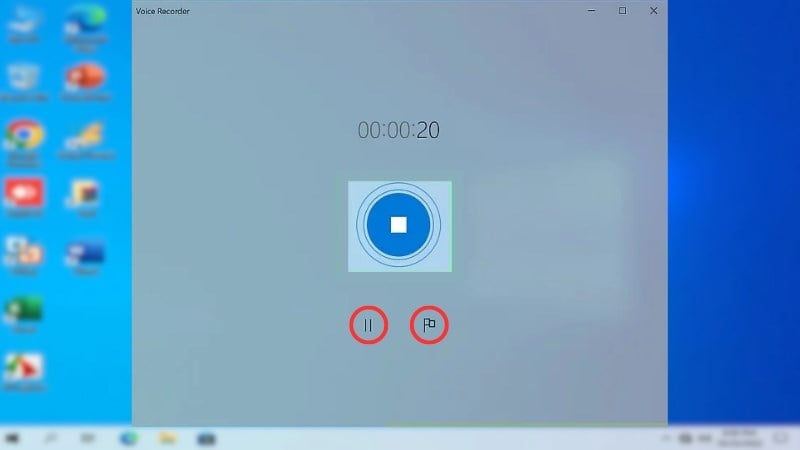
Step 3: Select the Pause button (icon with two vertical white lines) to pause recording. Click the flag icon to mark a specific point in the recording (if needed).
Step 4: Press the Stop button when you have finished recording.
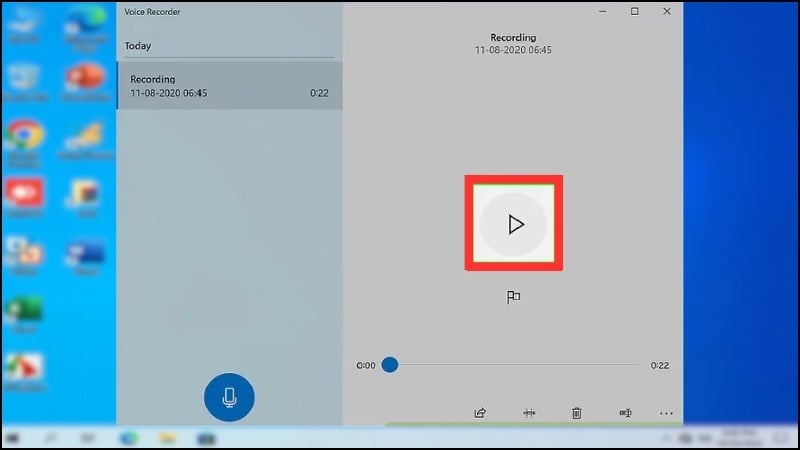
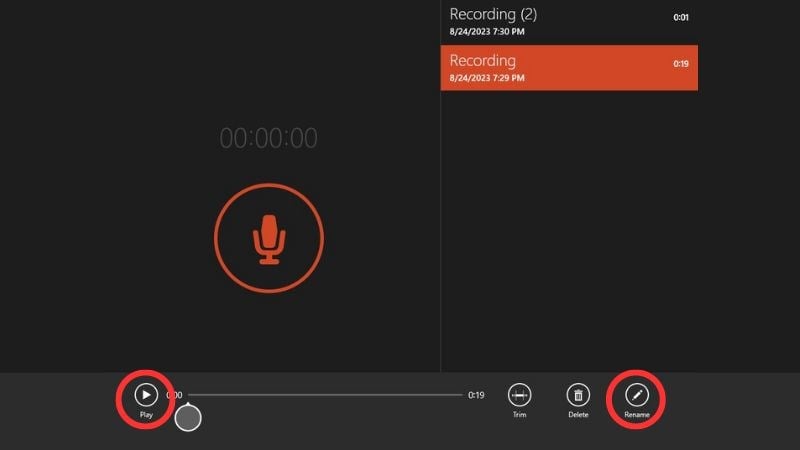
Step 5: Click the triangular Play button to listen to the recorded audio.
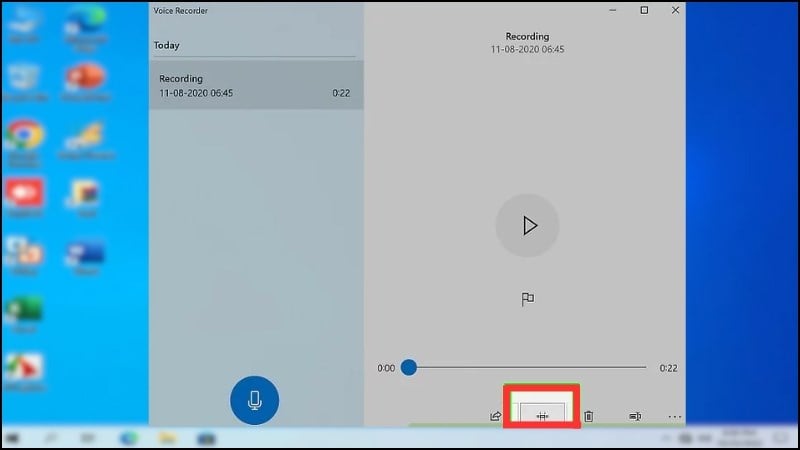
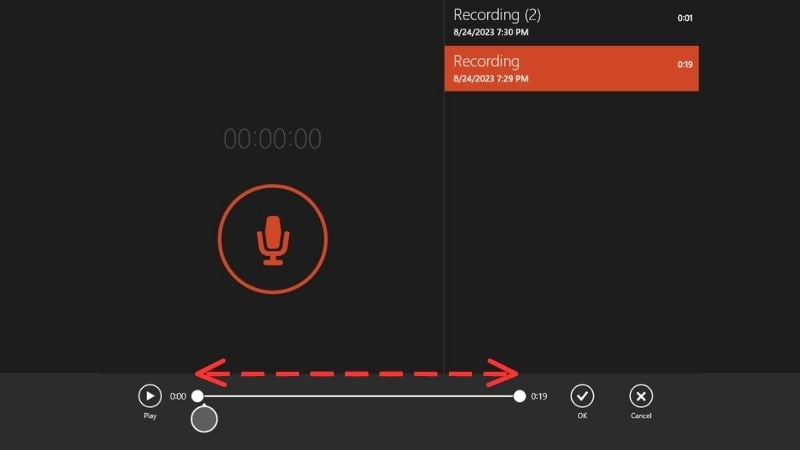
Step 6: Select Trim (the second icon from the left) to remove unwanted audio (if necessary). Use the slider to select the portion of the recording you want to keep > Click the disk icon to save.
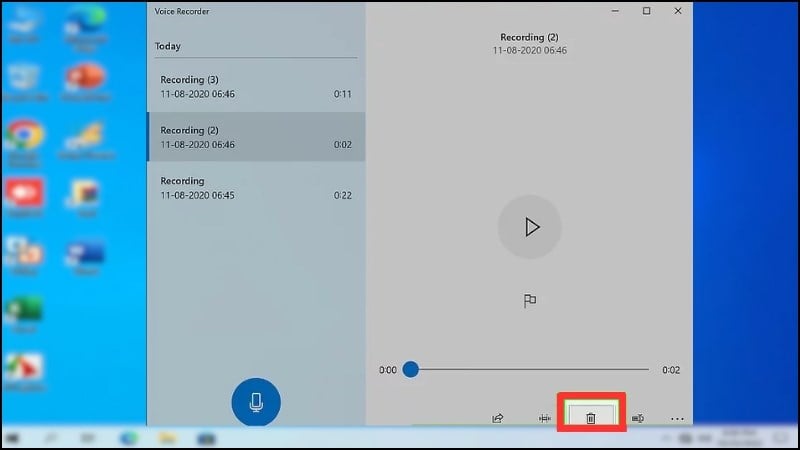
Step 7: Right-click on any recording to Share, Rename, Delete, or Open the recording file location.
3. How to record audio on a Windows 8.1 computer using Voice Recorder
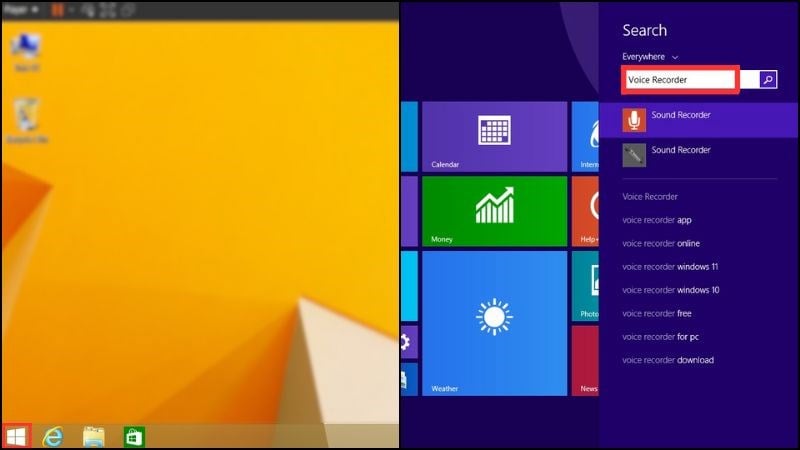
Step 1: Press the Windows key > Type "Voice Recorder" into the search bar > Select "Voice Recorder" to open the application.

Step 2: Select the red microphone icon to start recording.
Step 3: Press the Stop button (the red circle with a white square inside) to stop recording.
Step 4: Select Trim and use drag to cut the audio recording.
Step 5: Press the Play button to listen to the recording you just made, or select Rename to change the name of the recorded file (if needed).
By using the recording applications available on Windows PCs or the Xbox Game Bar, you can easily record and manage audio recordings on your computer. This is useful for many purposes, from creating multimedia content to recording important information during meetings. Try it now and take advantage of this feature!
Source


Comment (0)