 |
Using antivirus software helps protect your important information and data, and Windows 11 already has one of the best built-in antivirus programs: Windows Defender. However, in some situations, it's necessary to disable this feature. Below are detailed instructions on how to safely disable Windows Defender on Windows 11.
Step 1: First, click on the Windows icon on the Taskbar and select Settings.
 |
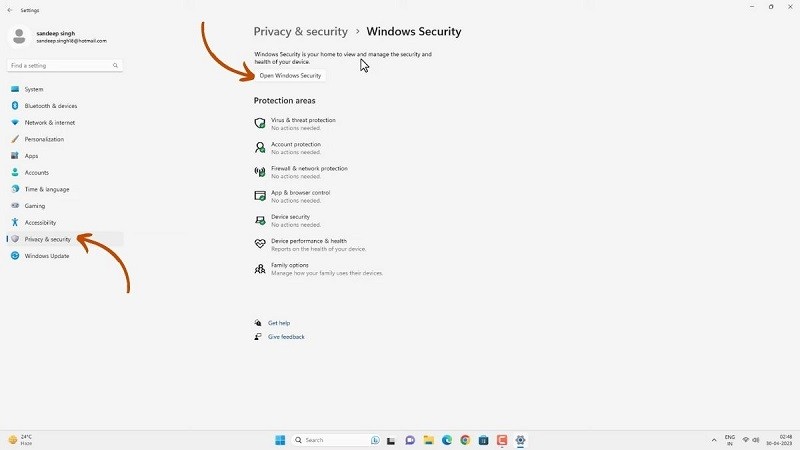
Step 2: Here, click on Privacy & Security in the left column of the screen. Then, select Windows Security. Next, click Open Windows Security.
 |
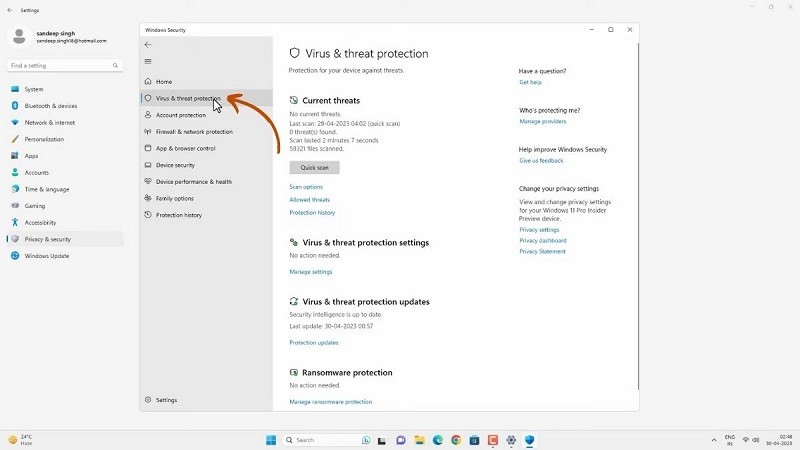
Step 3: The Windows Security screen will now appear; select Virus & threat protection.
 |
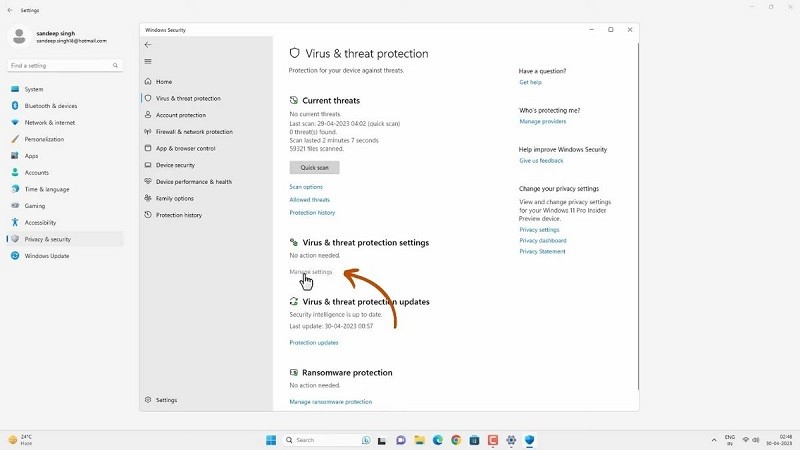
Next, select the Manage Settings option.
 |
Step 4: Here, click to turn off all the boxes marked in the image below, including: "Real-time protection, Cloud-delivered protection, Automatic sample submission, and Tamper Protection."
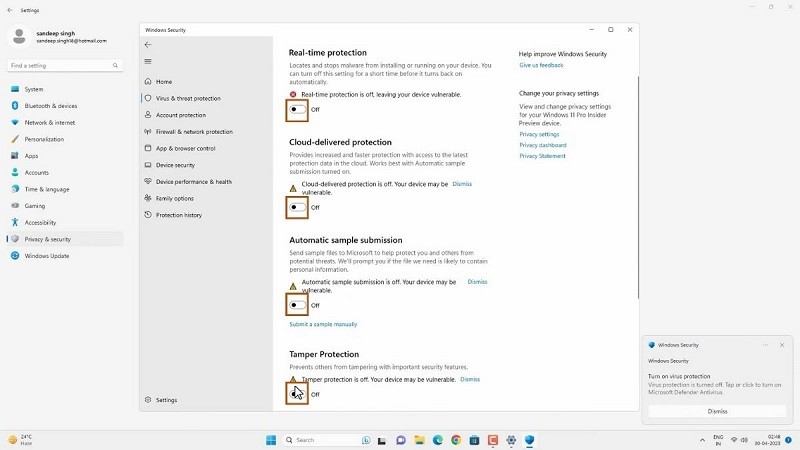 |
That's it, you've successfully disabled Windows Defender. However, please note that after completing these steps, you should repeat the process to re-enable Windows Defender, which will keep your computer protected.
Disabling antivirus software on Windows 11 can be helpful in certain situations, but it also poses some security risks. It's important to understand why you should disable it and to ensure you have other protective measures in place if necessary. Remember, security is the top priority when working with your computer and data.
Source


![[Photo] Prime Minister Pham Minh Chinh presides over a meeting on private sector economic development.](/_next/image?url=https%3A%2F%2Fvphoto.vietnam.vn%2Fthumb%2F1200x675%2Fvietnam%2Fresource%2FIMAGE%2F2025%2F12%2F20%2F1766237501876_thiet-ke-chua-co-ten-40-png.webp&w=3840&q=75)


Comment (0)