
Many iPhone users are interested in how to adjust the camera settings to take better photos. To achieve balanced and harmonious images, try applying this iPhone camera grid adjustment trick!
 |
This article will guide you on how to adjust your iPhone camera settings to take beautiful and sharp photos. If you want your photos to be more vibrant and stunning, don't miss these iPhone camera adjustment tips.
Instructions on adjusting camera settings for different shooting modes.
To get the most out of your iPhone's photography capabilities, you need to adjust the camera modes accordingly.
Step 1: Open the Settings app from your iPhone's home screen, then scroll down and select Camera .
 |
Step 2: Select the "Save settings" option in the iPhone's Camera settings, as shown in the image.
Step 3: Here, you will see 4 options, each offering a different photography experience.
This allows users to easily access basic camera settings such as regular photos, videos , portraits, etc., without having to readjust them. At the same time, all filter settings will be saved, allowing you to apply these iPhone camera adjustments to take beautiful photos anytime.
Instructions on how to enable grid mode in the camera.
To make your photos look more professional and perfect, try applying the following iPhone camera grid adjustment tip:
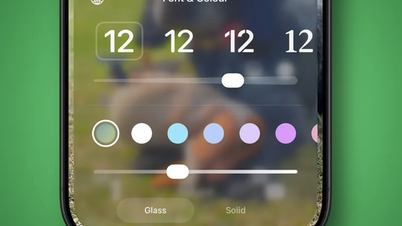
Step 1: Open the Settings app and scroll down to the Layout section under iPhone camera.
 |
Step 2: Slide the circular button to the right as shown above to activate the Camera Grid feature.
Step 3: The final step in adjusting your iPhone camera is to go back to the Camera app and start getting creative with the grid.
Instructions for using automatic HDR
Automatic HDR is also a popular way to make iPhone photos sharper. This feature helps improve photos that are backlit, bringing vibrancy and depth to the image.
Step 1: Open the Settings app and go to the Camera app in the iPhone's Camera section.
 |
Step 2: Next, slide the circular button to the right as shown in the image to activate the smart HDR feature.
Step 3: Return to the Camera app and begin taking photos with HDR enabled.
Instructions on how to enable Mirror Front Camera mode for flattering selfies.
If your iPhone is running iOS 14 or later, you can adjust the camera to avoid facial distortion in the following way:
Step 1 : First, open the Settings app and go to the Layout section in the Camera app on your iPhone.
 |
Step 2: Slide the circular button to the right to enable the Mirror Front Camera feature, as shown in the image below.
Step 3: Go back to the Camera app and confidently take a selfie using the front camera without worrying about your face being asymmetrical.
Guide to adjusting the lighting of photos
Adjusting the brightness and contrast of your iPhone camera correctly will create entirely new photos. Discover how!
 |
Step 1: First, open the Camera app from your iPhone's home screen as you normally would.
Step 2: Tap on the area of the image where you want to adjust the brightness or darkness.
Step 3 : Adjust the brightness of your iPhone camera screen to your liking by sliding the slider up or down.
Instructions on using the black and white filter.
With just a few simple steps on your iPhone camera, you can create artistic black and white photos.
Step 1: Open the Camera app from your iPhone's home screen.
 |
Step 2: Tap the three intersecting circles icon on the Camera toolbar.
Step 3: Finally, simply select the Black and White (Noir) filter to complete the process.
Guide to focusing on the subject when taking photos.
One way to adjust your iPhone camera to take beautiful photos is to focus on the subject, specifically as follows:
Step 1 : First, open the Camera app from your iPhone's home screen.
 |
Step 2: Next, move Camera A to focus on the subject or area you want to photograph.
Step 3: Then, press and hold to focus and lock the light, and take some impressive photos.
Guide to viewing photo filters
Understanding photo filters is one of the important ways to edit iPhone images for sharpness that you shouldn't overlook.
Step 1: Tap the Camera icon on your iPhone's home screen.
 |
Step 2: Tap the icon with three intersecting circles to explore a variety of color filters.
Step 3: Finally, choose a filter to your liking and start taking unique photos.
With the information above, hopefully you have mastered how to adjust your iPhone camera to take beautiful and sharp photos. Don't forget to experiment with adjusting the iPhone camera grid to create harmonious and impressive images.
Source: https://baoquocte.vn/cach-chinh-camera-iphone-chup-hinh-ro-net-va-sang-tao-283383.html


![[Photo] Prime Minister Pham Minh Chinh attends the Conference on the Implementation of Tasks for 2026 of the Industry and Trade Sector](/_next/image?url=https%3A%2F%2Fvphoto.vietnam.vn%2Fthumb%2F1200x675%2Fvietnam%2Fresource%2FIMAGE%2F2025%2F12%2F19%2F1766159500458_ndo_br_shared31-jpg.webp&w=3840&q=75)


Comment (0)