 |
Getting a blue tick on Facebook is quite simple, anyone can do it. However, you must go through Facebook's approval process. If Facebook accepts the request, the blue tick will be displayed right next to the account. Here's how to register to create a blue tick on Facebook.
Instructions on how to register a blue tick for Fanpage
For Fanpage, you follow the instructions below:
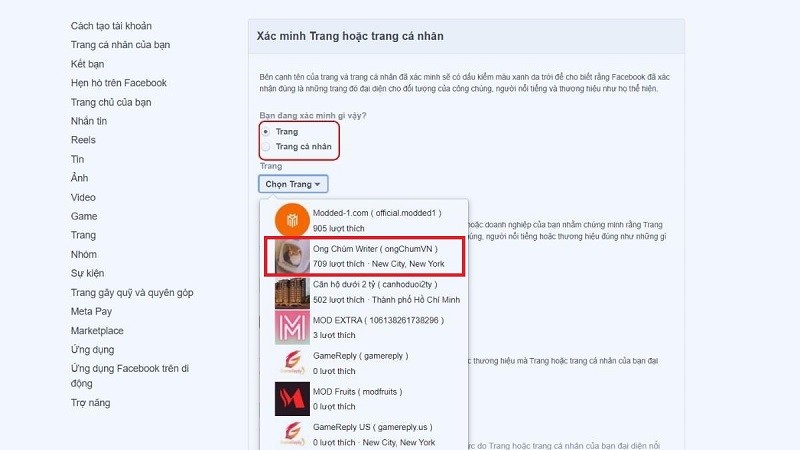
Step 1: Go to the address below to register (https://www.facebook.com/help/contact/295038365360854). Then, click on “Page”. In the Select Page section, select the page you want to register to create a Facebook blue tick.
 |
Step 2: Provide documents:
If the Fanpage represents an individual, you can choose to provide one of the following documents: driver's license, passport, CCCD.
If the Fanpage represents an organization or company, you can choose to provide documents such as: Tax declaration, Company charter, certificate of establishment, etc. with the copyright seal of the organization/company.
Then, click on the “Choose File” button. Upload the selected document to continue registering to the Facebook blue tick.
 |
Step 3: Next, select the “Category” that suits your Page. It could be entertainment, media/news channel, etc. Then, fill in the country name in the blank box.
 |
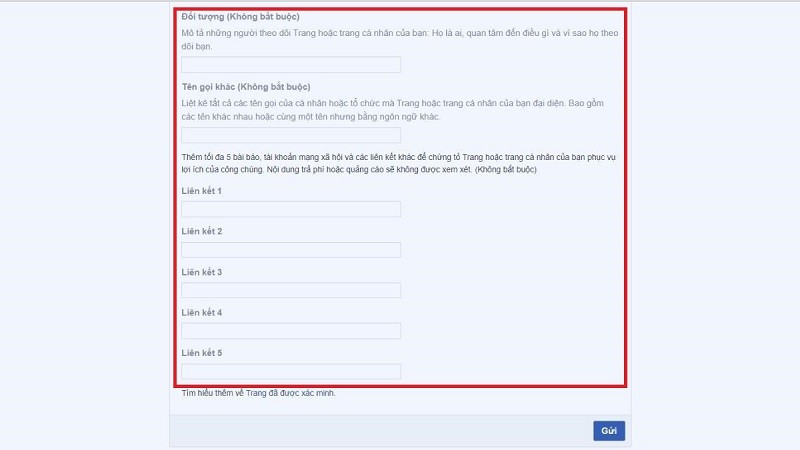
Step 4: In the “Optional” sections such as Subject, Other Name, you can fill in or skip. Then, fill in 5 links (can be social network accounts, articles, ...) as required. Finally, click “Submit” to complete the steps in how to register for Facebook blue tick.
 |
Instructions for registering for a personal Facebook blue tick
The way to register to create a blue tick on Facebook for a personal account is basically not much different from registering for a Fanpage. Below are the detailed steps:
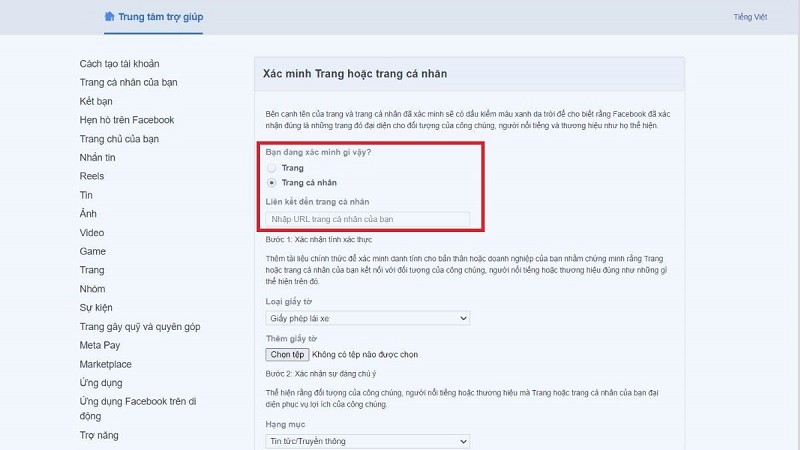
Step 1: You also access this address (https://www.facebook.com/help/contact/295038365360854). Then, in the section "What are you verifying", you select "Personal page". Then, you insert the link to your Personal page into the blank box.
 |
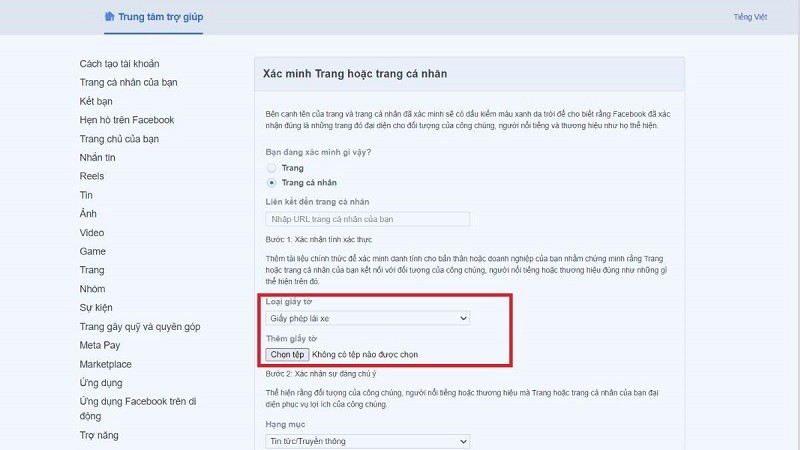
Step 2: Next, you choose the type of document to verify your identity, then click “Choose file” and upload the corresponding document. These documents include passports, driver's licenses, CCCD,...
 |
Step 3: Then, you proceed to select the "Category" that matches your Personal Page. And enter the country name in the blank box.
 |
Step 4: You can fill in “Optional” information such as Subject, Other Names and required links. Finally, click the “Submit” button to complete the steps to register for a Facebook blue tick.
 |
Note: After submitting the registration, users will have to wait a few hours or days for Facebook to verify and respond.
Source


![[Maritime News] Treasury Department Targets Diverse Networks Facilitating Iran's Oil Trade](https://vphoto.vietnam.vn/thumb/402x226/vietnam/resource/IMAGE/2025/7/14/43150a0498234eeb8b127905d27f00b6)


Comment (0)