
Microsoft is continuing its operating system modernization roadmap by gradually moving older administration tools to the Settings app. In the latest Windows 11 update, the company introduced the “Virtual Workspaces” page, allowing users to comprehensively and intuitively control virtualized components quickly.
Virtual Workspaces: A modern virtualization management center.
Previously, to enable or disable features like Hyper-V or Windows Sandbox, users had to access the "Windows Features" dialog box, which had an interface reminiscent of Windows 7. With the introduction of Virtual Workspaces, this process has been significantly simplified and deeply integrated into the unified Settings interface of Windows 11.
Instructions on enabling virtualization on Windows 11
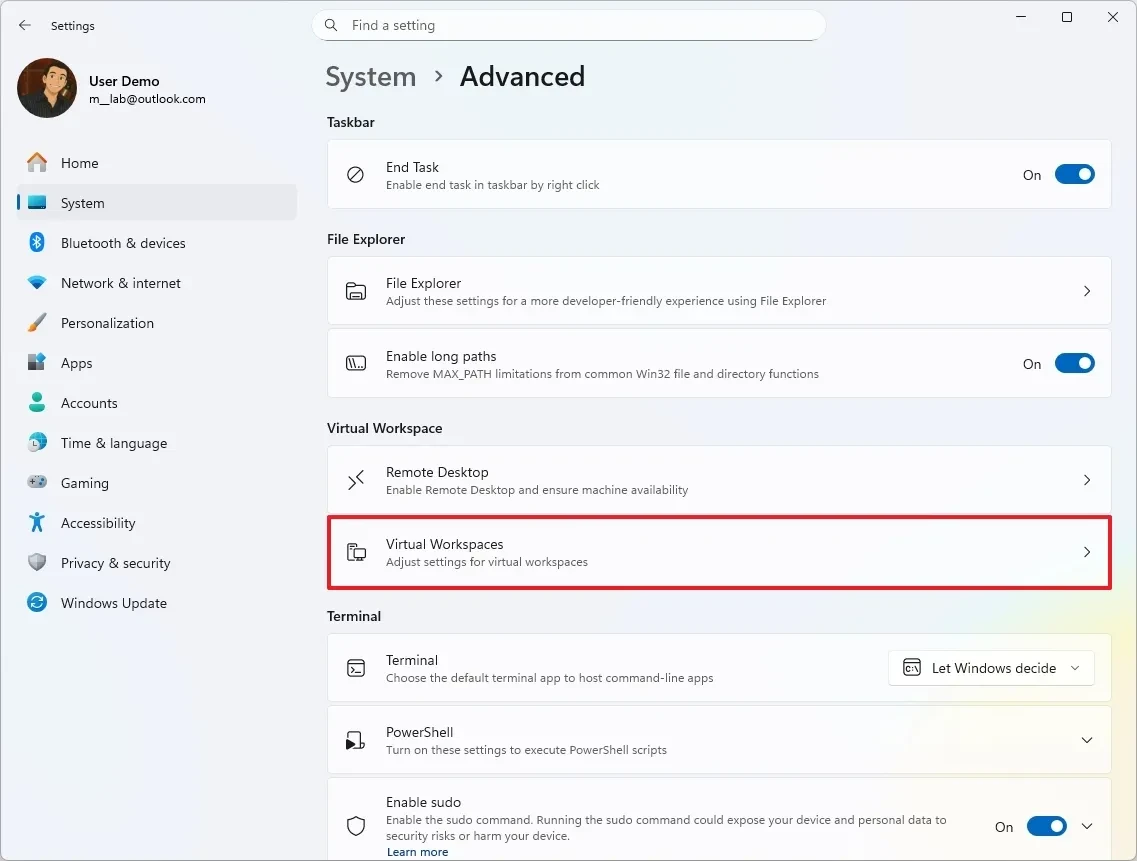
To activate virtualization tools through the new interface, users can follow these steps:
- Open the Settings app.
- Select the System option in the left-hand column.
- Click on the Advanced page in the right-hand pane.
- Find and select the Virtual Workspaces settings.

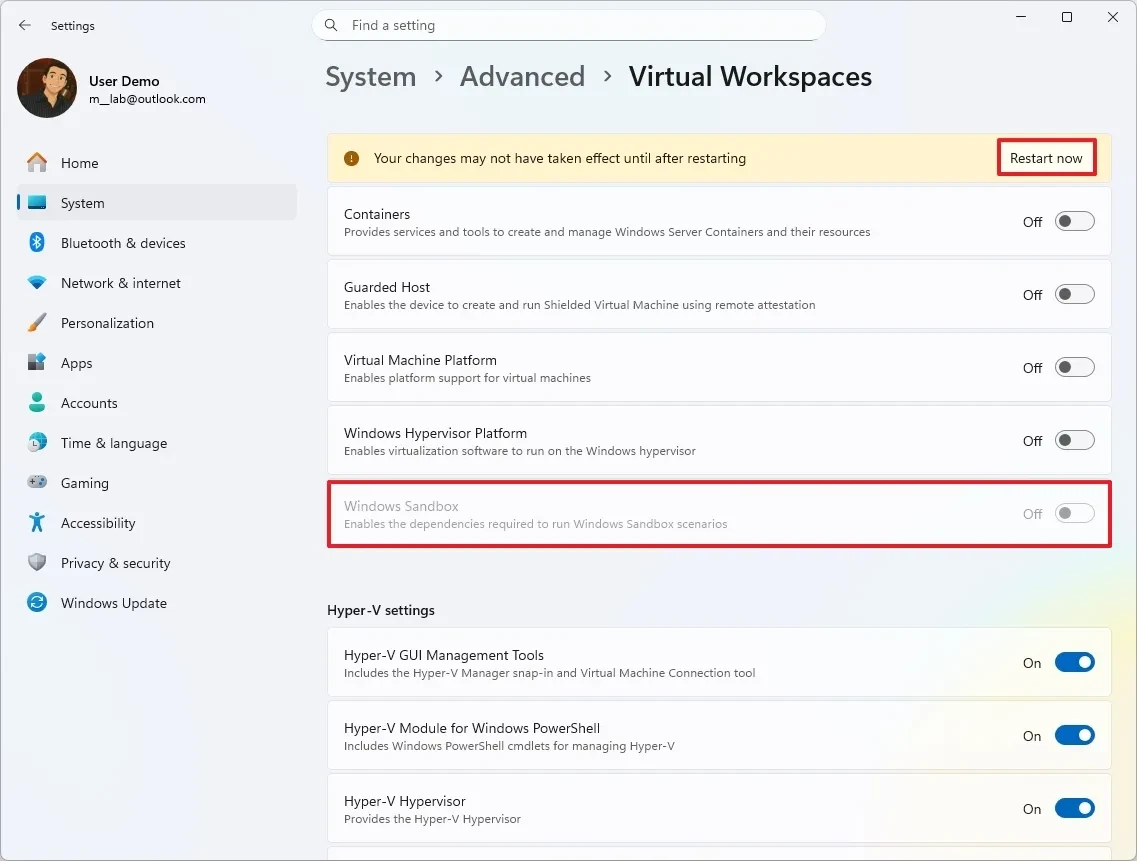
Here, you can choose to enable specific components according to your needs:
- Containers: We provide services for creating and managing Windows Server containers.
- Guarded Host: Supports running protected virtual machines (Shielded Virtual Machines).
- Virtual Machine Platform: The fundamental platform for virtual machines.
- Windows Hypervisor Platform: Allows third-party virtualization software to run on the Windows hypervisor.
- Windows Sandbox: Create a secure virtual machine environment for testing software.

Advanced Hyper-V Management
In addition to basic features, Virtual Workspaces also allows detailed management of Hyper-V components, including: the GUI management tool (Hyper-V Manager), the Hyper-V module for Windows PowerShell, the Hyper-V Hypervisor, and accompanying services. After making your selections, you need to click Restart now for the system to apply the changes.
How to turn off virtualization when not in use.
Disabling virtualization features when not needed can help free up system resources and enhance security. The process is similar to enabling them:
- Go to Settings > System > Advanced .
- Select Virtual Workspaces .
- Switch the status of the features you want to turn off to Off .
- Press Restart now to complete.
Important notes
Although Virtual Workspaces offer convenience, users can still use the traditional method via the “Windows Features” dialog box or PowerShell commands if they wish. It's important to note that advanced features like Hyper-V often require Windows 11 Pro, Education, or Enterprise versions and must be supported by the hardware (virtualization enabled in BIOS/UEFI).
Centralizing virtualization management into a single page saves time for developers and IT professionals, and reflects Microsoft's direction in making Windows 11 a more flexible and modern platform.
Source: https://congluan.vn/quan-ly-ao-hoa-tren-windows-11-cach-dung-virtual-workspaces-moi-10324133.html


![[Photo] General Secretary and President To Lam and the President of the Philippines hold talks.](https://vphoto.vietnam.vn/thumb/1200x675/vietnam/resource/IMAGE/2026/06/01/1780286997787_anh-man-hinh-2026-06-01-luc-11-09-43.png)


![[Photo] Reception to welcome General Secretary and President To Lam and his wife on their State visit to the Philippines](https://vphoto.vietnam.vn/thumb/1200x675/vietnam/resource/IMAGE/2026/06/01/1780295488620_vna-potal-chieu-dai-chao-mung-tong-bi-thu-chu-tich-nuoc-to-lam-va-phu-nhan-tham-cap-nha-nuoc-toi-philippines-8798060-7855-jpg.webp)


Comment (0)