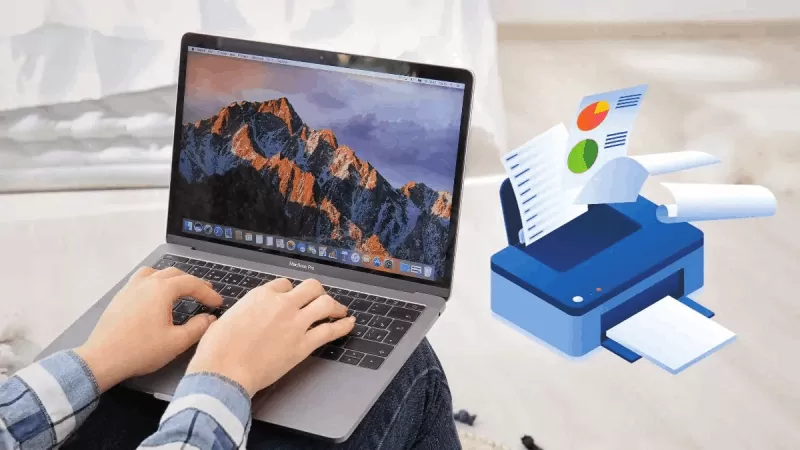
Are you looking for instructions on how to install a printer on your MacBook using a USB drive? In this article, I will show you how to connect your MacBook to a printer via USB!
 |
| A guide on how to easily install a printer on your MacBook using a USB drive. |
In this method, you will follow a total of 7 steps to connect the printer to your MacBook. The detailed steps are as follows:
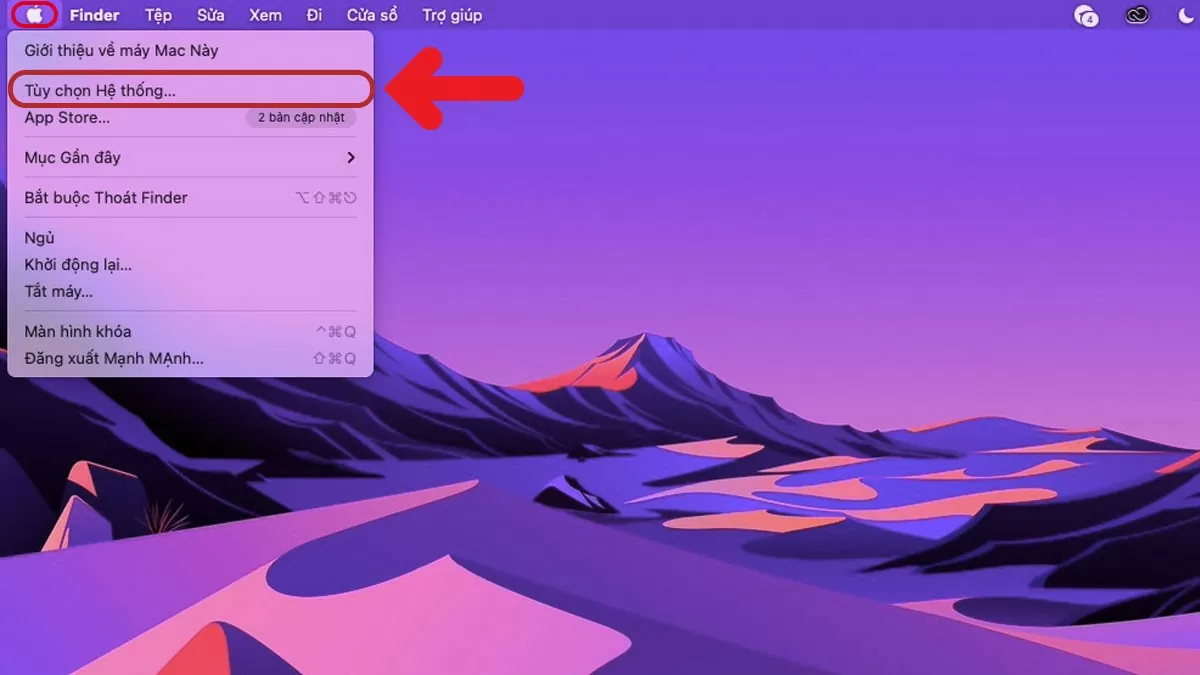
Step 1: Plug one end of the USB cable into the printer and the other end into your MacBook. Next, turn on the printer, open your MacBook, go to the Apple Menu, and click on System Preferences.
 |
| A guide on how to easily install a printer on your MacBook using a USB drive. |
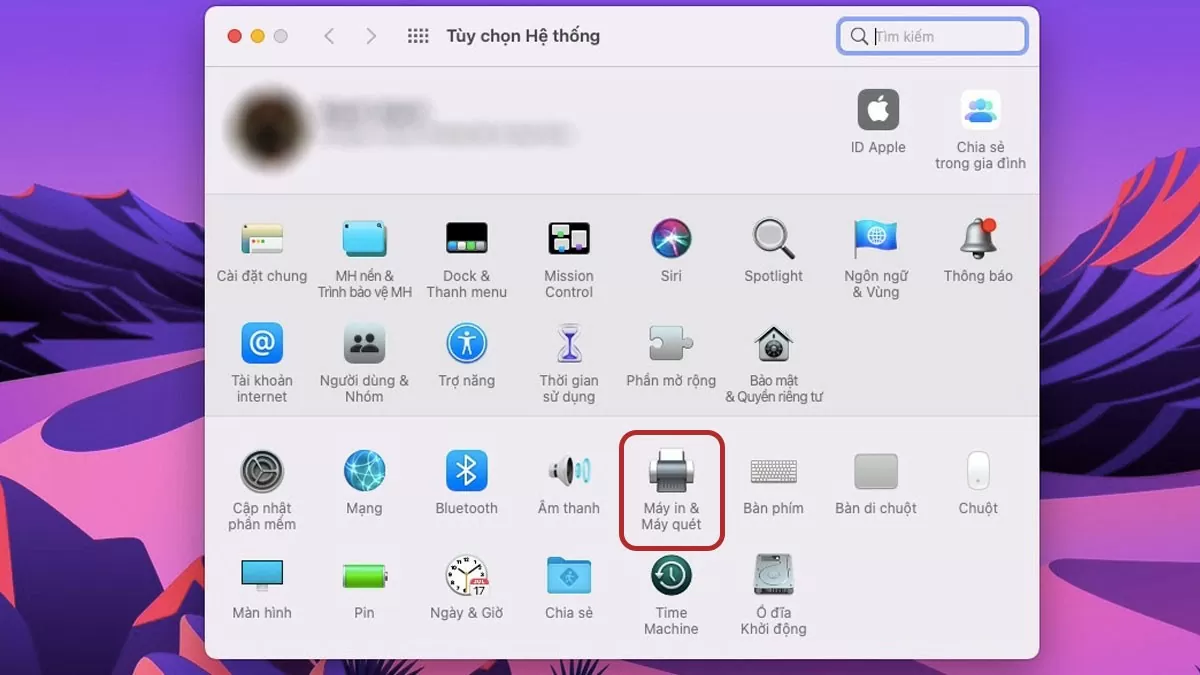
Step 2: When the interface appears, select the Printers & Scanners option.
 |
| A guide on how to easily install a printer on your MacBook using a USB drive. |
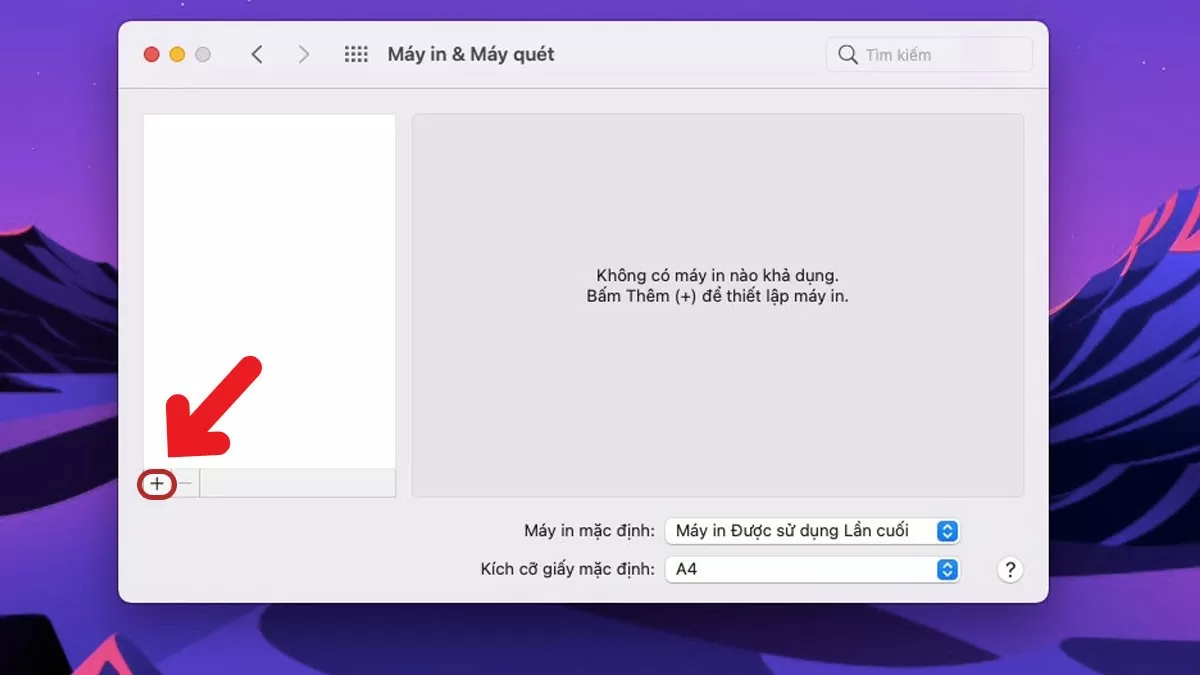
Step 3 : Click on the "+" icon in the top left corner as shown in the image.
 |
| A guide on how to easily install a printer on your MacBook using a USB drive. |
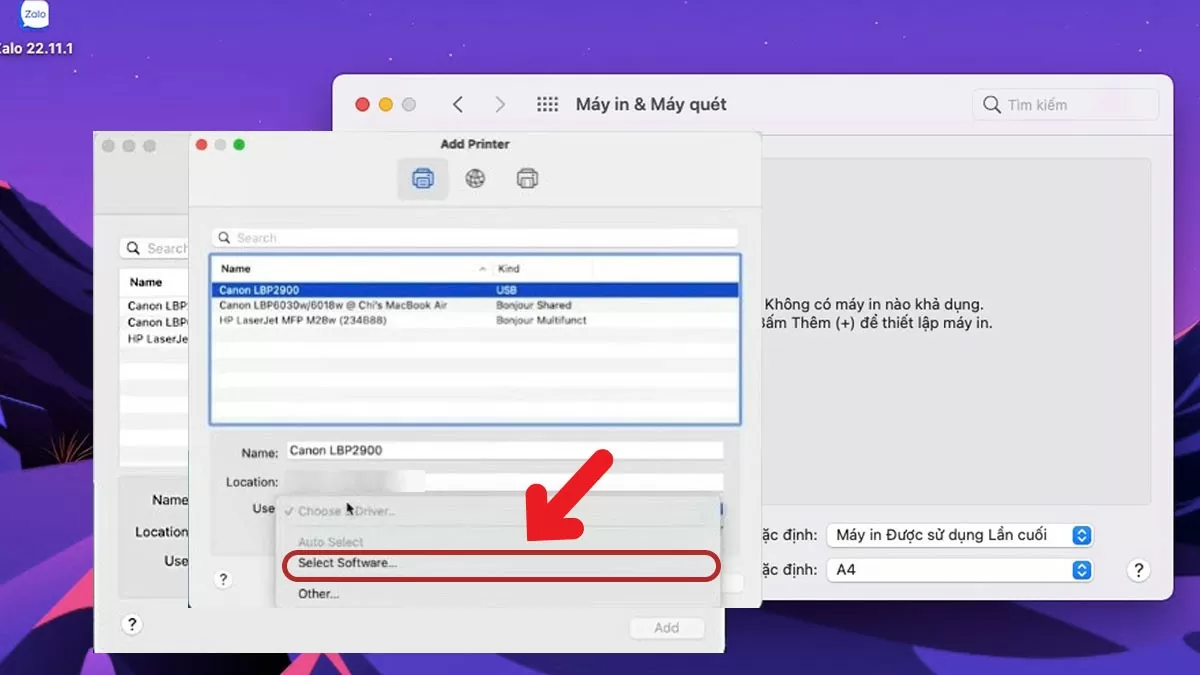
Step 4: Click on "Use" and then select "Select Software".
 |
| A guide on how to easily install a printer on your MacBook using a USB drive. |
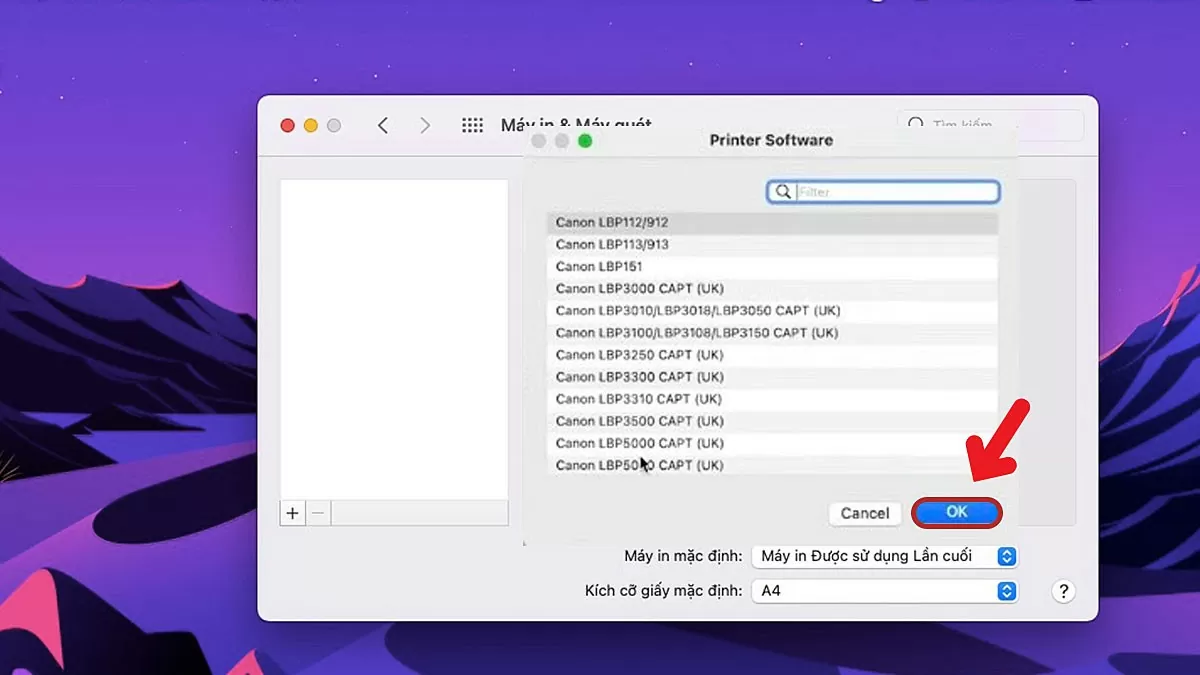
Step 5: Enter the name of the device you want to install the printer on your MacBook, then click OK.
 |
| A guide on how to easily install a printer on your MacBook using a USB drive. |
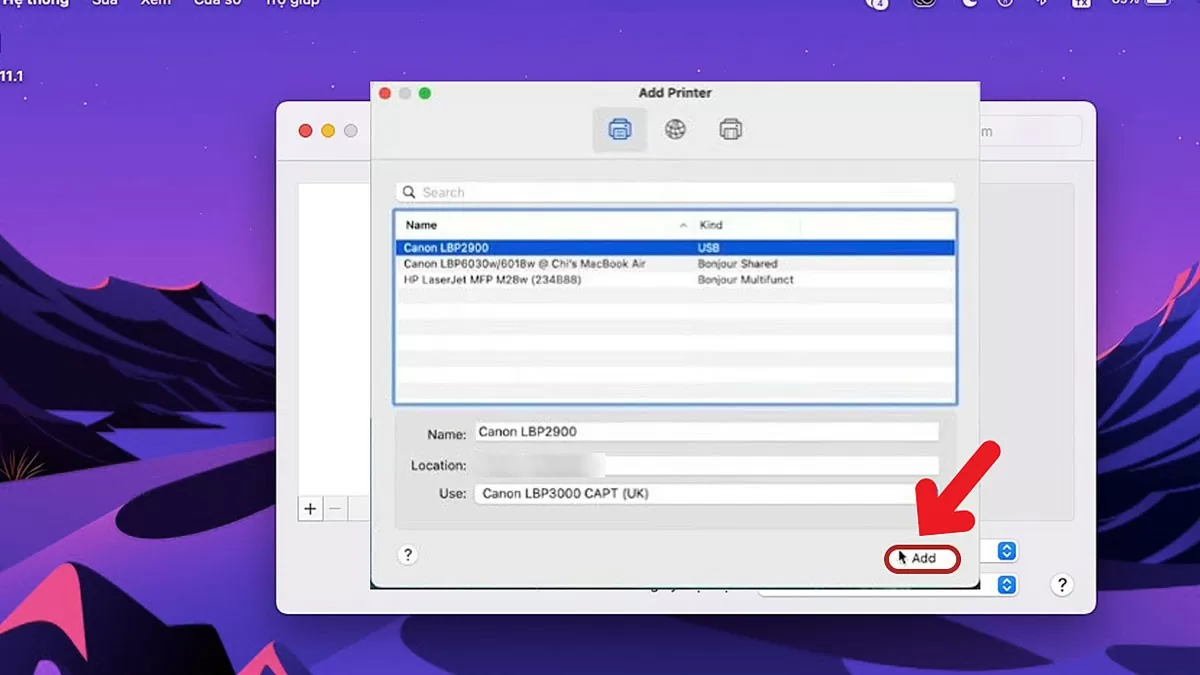
Step 6: Then, click on the Add button to complete the installation process.
 |
| A guide on how to easily install a printer on your MacBook using a USB drive. |
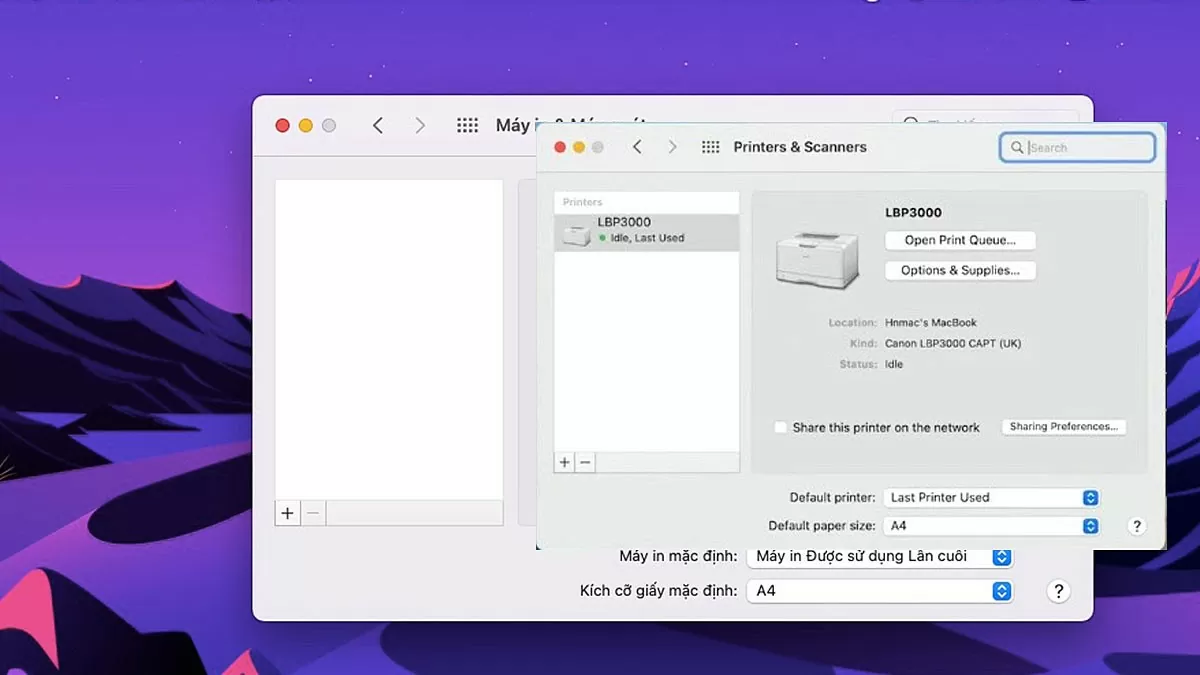
Step 7: Once the connection is successful, the MacBook screen will display as shown in the image below.
 |
| A guide on how to easily install a printer on your MacBook using a USB drive. |
This article has guided you through 7 simple steps to set up a printer on your MacBook, making it incredibly easy to follow. We hope you successfully complete the steps shared above!
Source: https://baoquocte.vn/huong-dan-cach-cai-may-in-cho-macbook-bang-usb-de-dang-278225.html







![[Photo] Prime Minister Pham Minh Chinh holds a phone call with the CEO of Russia's Rosatom Corporation.](/_next/image?url=https%3A%2F%2Fvphoto.vietnam.vn%2Fthumb%2F1200x675%2Fvietnam%2Fresource%2FIMAGE%2F2025%2F12%2F11%2F1765464552365_dsc-5295-jpg.webp&w=3840&q=75)


Comment (0)