1. What is an anti-slip stair strip?
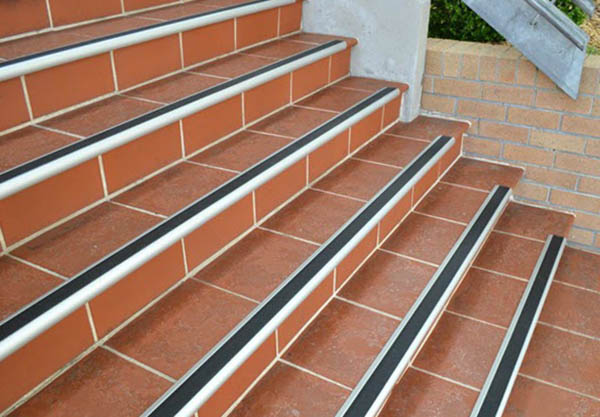
Stair anti-slip strips are a type of strip that is often installed on the edges or steps of stairs to increase friction for the steps, avoiding slipping when moving. For families with the elderly and children, stair anti-slip strips are a useful solution to ensure safety, especially on humid or rainy days.
Anti-slip stair treads are a design solution that helps ensure safety when moving.
2. Classification
2.1. Classification by material
Copper strip
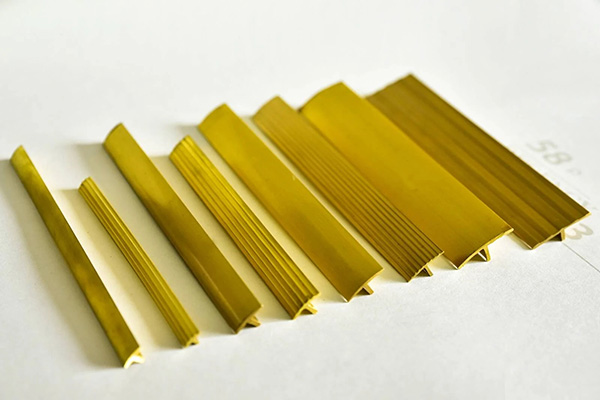
T-shaped copper moldings come in many sizes to choose from.
Anti-slip copper stair trim (also known as ribbed copper T trim) is used to construct on the surface of the stairs to increase friction for people walking. Compared to stainless steel trim, copper trim has a more complicated construction method when it is necessary to cut grooves on the stone surface to connect with the trim and has only one color.
However, copper moldings also have the ability to create high decorative accents with many sizes including T10mm, T15mm, T20mm, very suitable for use on steps in homes, hospitals, hotels, apartments, schools,...
Stainless steel strip
Stainless steel strip with shiny silver tone, helps to highlight the lines of the stairs.
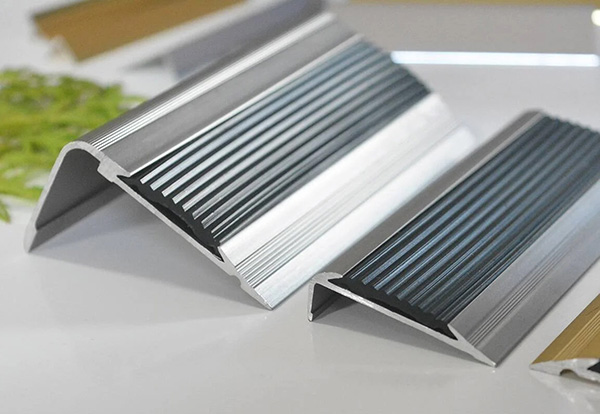
If you are looking for an anti-slip material with high aesthetics, the stainless steel anti-slip stair strip is an option you should consider. Made from high-quality 304 stainless steel, the stainless steel anti-slip stair strip has many advantages in color, hardness and good rust resistance.
The shiny surface of stainless steel strips not only helps you express your own class, but also easily combines in modern and luxurious works such as restaurants, hotels, luxury apartments,...
PVC plastic strip
Although it has the cheapest price, PVC plastic strip still has stable anti-slip ability.
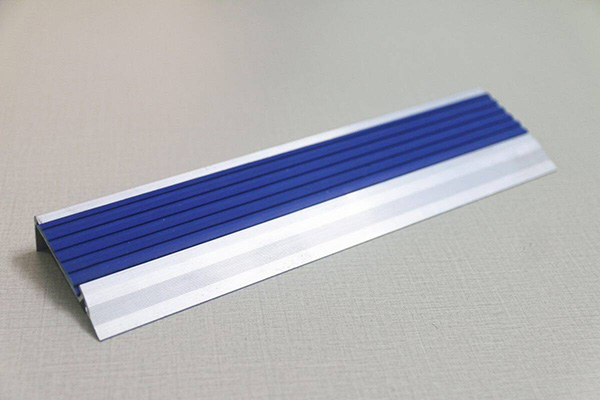
PVC anti-slip stair strip is a low-end product with a cheap price, but its anti-slip effect is not inferior to the above products. The strip is made from high-quality PVC plastic, so it is durable. The design of the plastic stair strip is similar to the stainless steel anti-slip stair strip with an L-shaped structure.
2.2. Classification by construction method
Screw-in construction bracket
This is a type of strip that is constructed by making holes in the nose of the step and then screwing to fix the strip to the nose of the stair. The strip is used after the stairs have been tiled. You can easily recognize this type of strip because the body of the strip has holes for screws, and there is an anti-slip rubber part attached to the body of the strip.
Construction strip with specialized glue
This is the type of strip that has the simplest and quickest construction method. The strip is constructed by using specialized glue to attach to the nose of the step. This type of strip has a simple structure, V or L shape with anti-slip ribs on the surface.
Construction strip by slitting and gluing
This is a type of strip constructed by cutting a slot on the stair tread, then injecting glue and attaching the strip. The strips are usually T-shaped with small sizes, and many strips can be combined to create a non-slip and decorative strip for the stairs.
Construction strip by inserting into bricks and stones
This is a type of molding that is installed at the same time as the stair tread tiling process by being installed into bricks or stones with cement mortar. The most recognizable feature of this type of molding is that it usually has a molding wing to be installed into the bricks or a molding foot to be inserted into the mortar to increase adhesion.
3. Installation location of anti-slip stair strips
Depending on the location of the anti-slip stair strip, you can choose the appropriate construction method.
Each location for installing anti-slip stair strips will bring different uses. Here are some necessary locations for installing indoor stair strips:
At the stair nose: The types of strips commonly used for this position are V-shaped stainless steel strips or L-shaped strips and should have fixing screws.
At the stair surface: The anti-slip stair strip at this position is usually attached directly to the groove on the stair surface. The types of strips commonly used for this position are T-shaped strips or TF strips, etc.
4. Construction instructions
4.1. Construction of anti-slip stair strips with screw-on strips
• Cleaning the step nose: After tiling the stairs, clean off excess mortar and dirt. Then wipe the step nose dry.
• Cutting the strip: Measure the size and cut the strip to the correct width of the step.
• Drill holes for screws: Place the strip on the step surface and use a pen to mark the strip hole positions on the step surface, use a drill to create holes to prepare for screws.
• Screwing: Place the strip on the step nose so that the strip hole coincides with the drilled hole on the step surface. Use a screwdriver or screwdriver to screw the strip to the step surface.
• Attach the anti-slip rubber surface: Cut and attach the anti-slip rubber surface to the body of the strip. You can use additional glue to make the rubber stick more firmly to the stainless steel strip.
• Clean the steps again: Use a damp cloth to clean the dirt in the area where the strip was just attached.
4.2. Construction of adhesive anti-slip stair strips
• Cleaning the step nose: After tiling the stairs, clean off excess mortar and dirt. Then dry the step nose to ensure good adhesion when applying glue.
• Measure and cut the strip: Measure the strip to the step nose, measure and cut the strip to the width of the step.
• Inject glue and stick the strip: Inject specialized glue along the inside of the strip and stick the strip to the stair nose. Continue to use your hands to adjust so that the strip fits tightly and evenly to the stair nose.
• Temporary fixation: While waiting for the glue to dry, temporarily fix the splint with tape. When the glue is dry, the tape can be peeled off. This is an important step to ensure that the splint does not peel off or shift from its original position.
• Clean again: After the glue dries, clean the area you just worked on.
4.3. Construction of anti-slip stair strip with slit and glue
• Slotting: Measure the strip into the step nose and mark the position. Then use a cutter to cut a slot on the step surface.
• Cutting the strip: Measure the size and cut the strip so that the length of the strip is equal to the size of the step surface.
• Cleaning: Clean the dirt at the slot where the strip is to be installed, then use a dry cloth to wipe the surface.
• Inject glue, attach the strip: Spread specialized glue along the gap, then place the T-shaped stair strip into the gap, adjust so that the strip sticks closely to the step surface.
• Temporary fixing of the strip: While waiting for the glue to dry, you can add more masking tape to temporarily fix the anti-slip copper strip to the stair nose.
• Cleaning: After the glue has dried, clean the entire area that has just been constructed and peel off the protective tape to finish.
4.4. Construction of anti-slip stair strips that are inserted into bricks and stones
• Measure the strip: First, you measure the strip against the stair tread, then cut the strip to the corresponding measured size.
• Tiling the step neck: Measure the tile into the step neck position, then cut the tile. Proceed to apply mortar and tile the step neck.
• Attach the strip: Use a trowel to apply mortar at the step nose, then place the strip in place. Use your hands to adjust it so that it fits securely into the strip foot.
• Tiling the steps: Cut and lay the tiles for the steps. Be sure to lay the tiles close to the edge of the strip first to ensure the strip does not shift.
• Attach the strips to the remaining steps: Proceed similarly from steps 1 to 4 for the remaining stairs.
• Cleaning: After installing the strip, use a damp cloth to clean off excess mortar and dirt on the strip.
5. Which method of installing anti-slip stair strips should be chosen?
To choose the appropriate anti-slip stair tread construction method for your project, you need to pay attention to the following two factors:
Construction at the same time or after tiling: Construction of anti-slip stair strips at the same time as tiling will help ensure the firmness and durability of the strips throughout the usage process.
Construction after tiling will have the advantage of being quick and easy to operate. Depending on the stage you are in, choose the appropriate method.
Depending on the type of molding used: Each type of molding will have a certain construction method. For example: If you choose a V-shaped molding, you will only construct it by gluing, if you choose a T-shaped molding, you will construct it by slitting.







Comment (0)