
If you own Apple's top iPhones, there are a number of tools and settings you can use to help you take better photos, especially during the Lunar New Year.
Use the rule of thirds
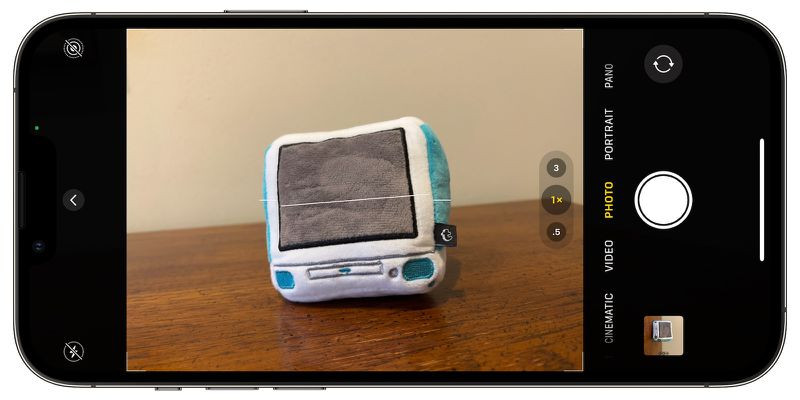
Apple's Camera app has long offered optional settings to help align photos. One of the standout features is the Grid , which is useful when applying the rule of thirds.
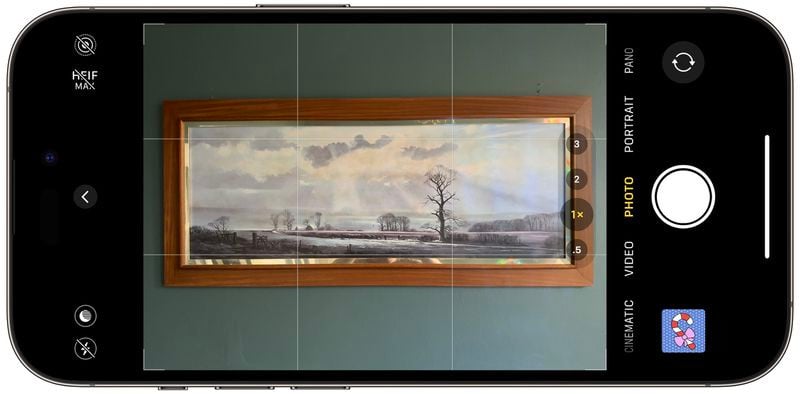
This rule divides the image frame into nine equal sections with two horizontal and two vertical lines, helping to guide the eye to the most important parts of the photo and creating a more harmonious composition.
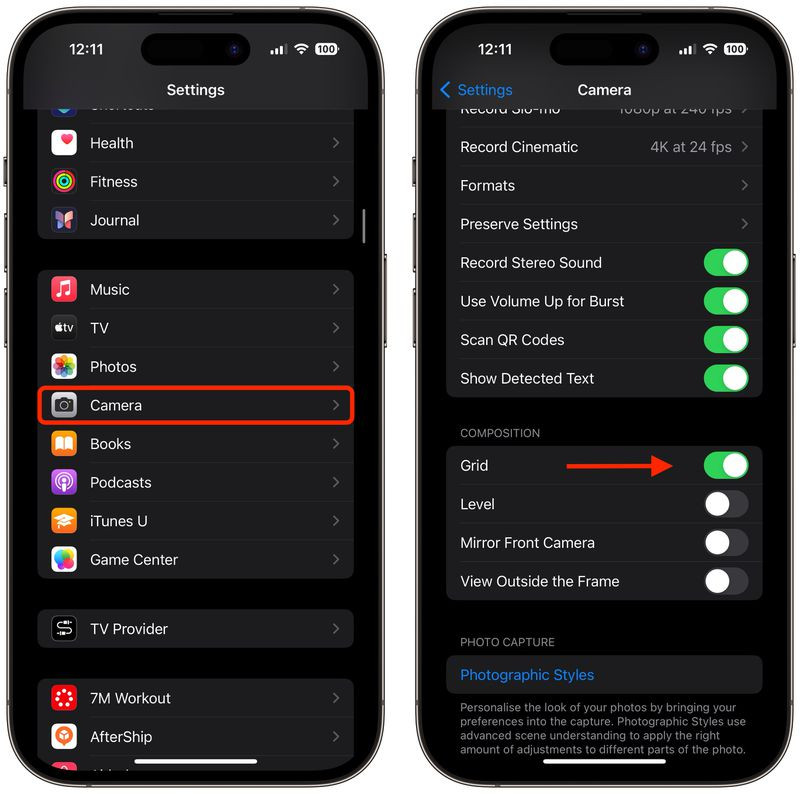
To enable Grid, open Settings > Camera . Here, under Composition , turn on the switch next to Grid .
Tips for using Grid effectively:
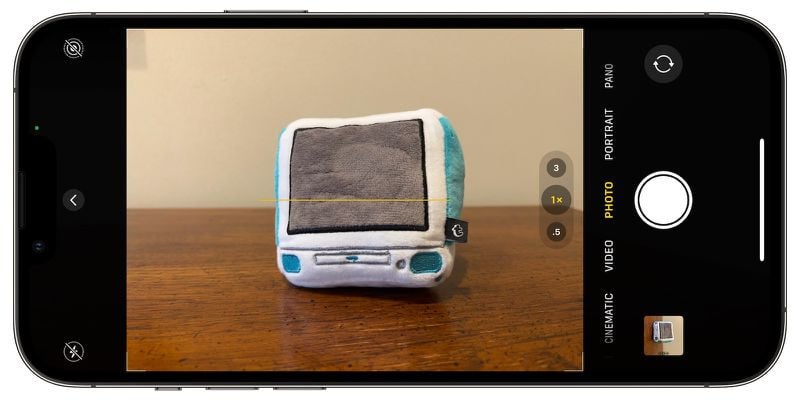
Identify the main elements: Identify the main subject in the scene you want to photograph, such as a person, building, or tree.
Subject Positioning: Place key elements along the grid lines or at intersections. For example, if you are photographing a person, you might place the subject along one of the vertical lines, rather than in the center of the frame.
Align Horizontal Elements: Align the horizon with one of the two horizontal lines. For a more dramatic sky, place the horizon on the bottom line. For more emphasis on land or sea, place it on the top line.
Visual Balance: If the subject is on the left, consider placing something less important on the right to create a sense of balance.
Experiment: While the rule of thirds is a guideline, it is not a hard and fast rule. Users are free to be creative to find the composition that works best.
Adjust the shooting angle from top to bottom
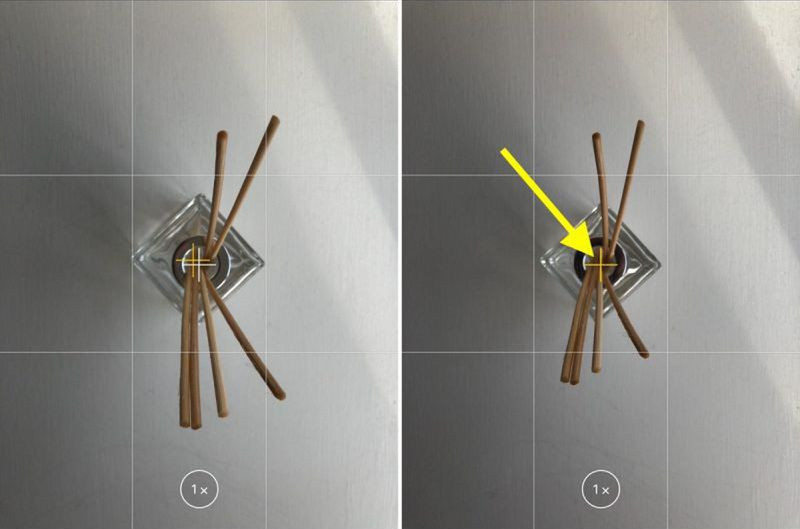
When taking photos from above, such as food or objects on the ground, you should use the Level tool to ensure a straight shot without a tripod. This mode is also useful when taking photos of something directly above you, such as objects on the ceiling or in the sky.
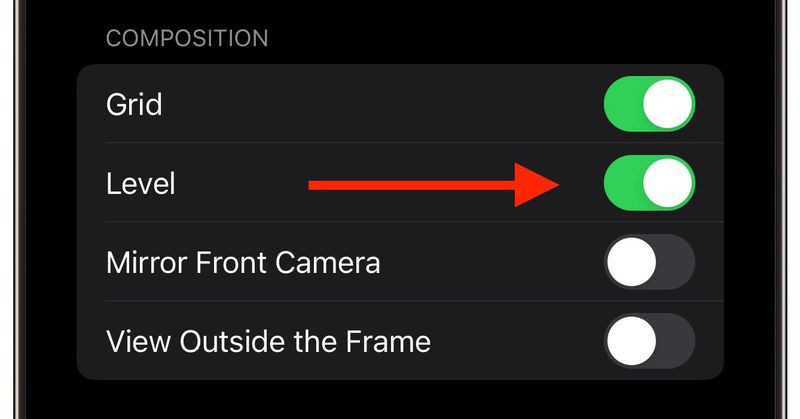
To enable this tool, go to Settings > Camera > Level and you're good to go. Open the Camera app and select a shooting mode (Photo, Portrait, Square, or Time Lapse), then point the camera straight down (or up).
Align the floating crosshair with the fixed crosshair in the center of the screen by adjusting the angle of the phone's camera. Both crosshairs will glow yellow when perfectly aligned. Now press the shutter button to save the photo.
Take a straight photo in landscape orientation
The Levels feature in iOS 17 and later also supports aligning traditional landscape photos. When your iPhone detects that you've taken a landscape photo that's not perpendicular, a broken horizontal line will appear.
To use, enable the Level feature as above. Open the Camera app and select landscape mode. Now, adjust the angle of the shot so that the dashed line becomes a straight yellow line.
Continuous shooting
Burst Mode allows the iPhone to take a series of photos in quick succession at 10 frames per second, which is useful when capturing fast-moving scenes.
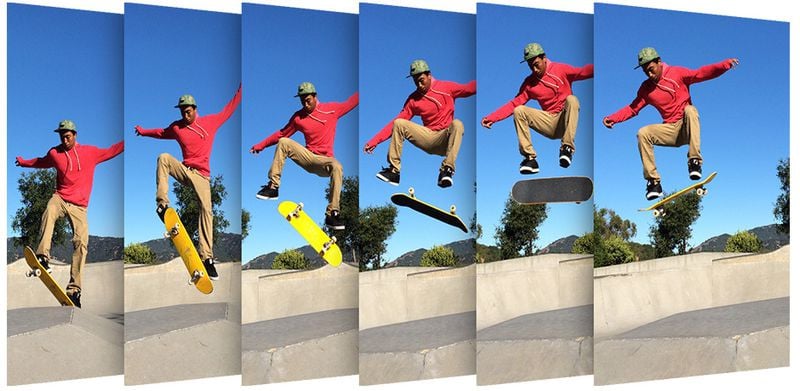
How to enable and use Burst Mode: Go to Settings > Camera , turn on Use Volume Up for Burst .
Press and hold the volume up key in the Camera app to take continuous shots.
Burst photos appear in the Bursts folder in the Photos app, where you can choose which ones to keep or delete.
Selfie Mirror
When taking a selfie, the iPhone automatically flips the photo upside down, making the photo look different from the preview frame.

How to enable mirror selfie mode: Go to Settings > Camera , turn on the switch next to Mirror Front Camera .
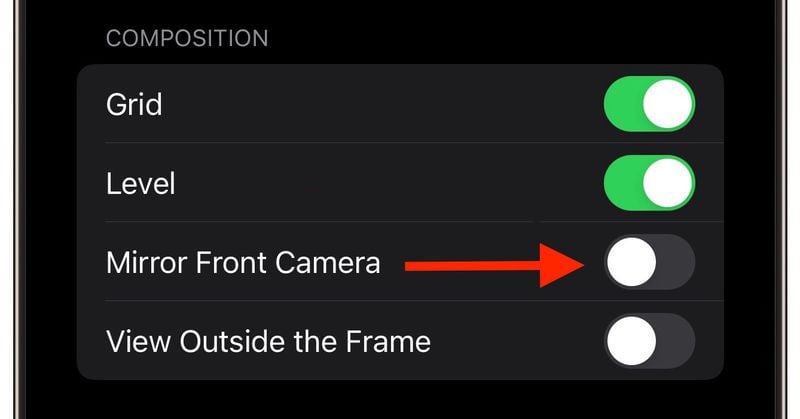
From now on, the selfie will stay as it is in the preview frame.
View out of frame
With iPhone 11 and newer models, this feature lets users see what's outside the frame of the shot, helping to align photos without cropping after taking them.
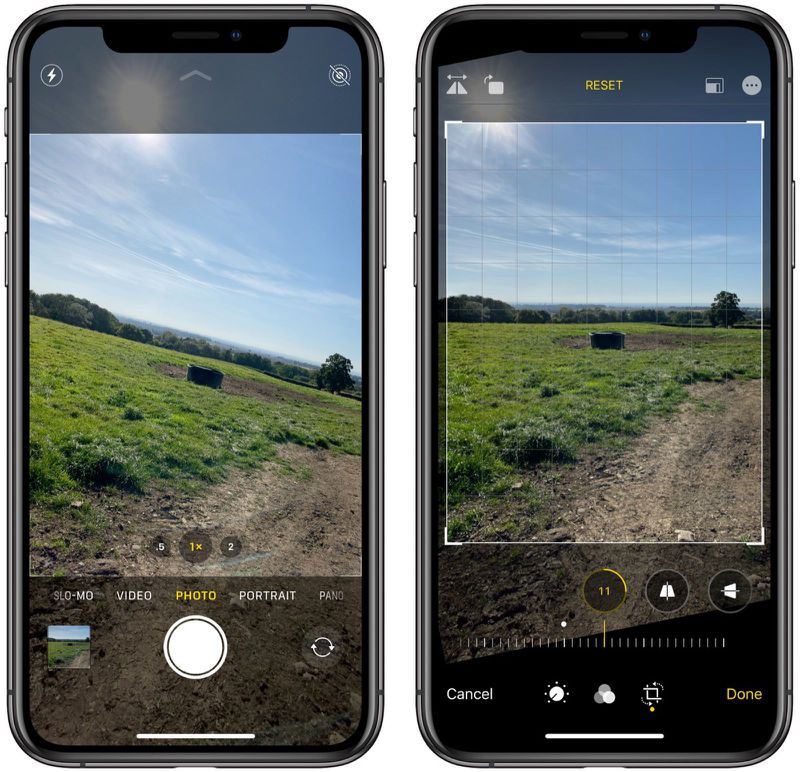
To turn this feature on, go to Settings > Camera . Under Composition , turn on the switch next to View Outside the Frame .

When in use, the camera interface will become partially blurred to show the area outside the frame, making it easier for you to adjust the composition.
With the above tips, users will maximize the photography capabilities of iPhone, from harmonious composition to more precise shooting angles, even for first-time iPhone users.
(according to Macrumors)
Source: https://vietnamnet.vn/6-meo-giup-co-nhung-buc-anh-dep-ngay-tet-chup-bang-iphone-2365146.html

![[Photo] Ho Chi Minh City holds funeral for former President Tran Duc Luong](https://vphoto.vietnam.vn/thumb/1200x675/vietnam/resource/IMAGE/2025/5/24/9c1858ebd3d04170b6cef2e6bcb2019e)


![[Photo] Party and State leaders visit former President Tran Duc Luong](https://vphoto.vietnam.vn/thumb/1200x675/vietnam/resource/IMAGE/2025/5/24/960db9b19102400e8df68d5a6caadcf6)


Comment (0)