Taking screenshots on iPad Pro and Air helps to preserve moments and share information. This article will guide you how to take screenshots on iPad with and without Home button!
 |
Instructions on how to take a specific iPad screenshot
We will not only provide one way, but also share many methods of taking screenshots on iPad for you to choose from. The detailed steps will be presented in the next content.
How to use swipe gestures
To take a screenshot on iPad Pro and Air without using a physical button, you can use a simple swipe gesture.
Step 1: First, open the "Settings" app on your iPad.
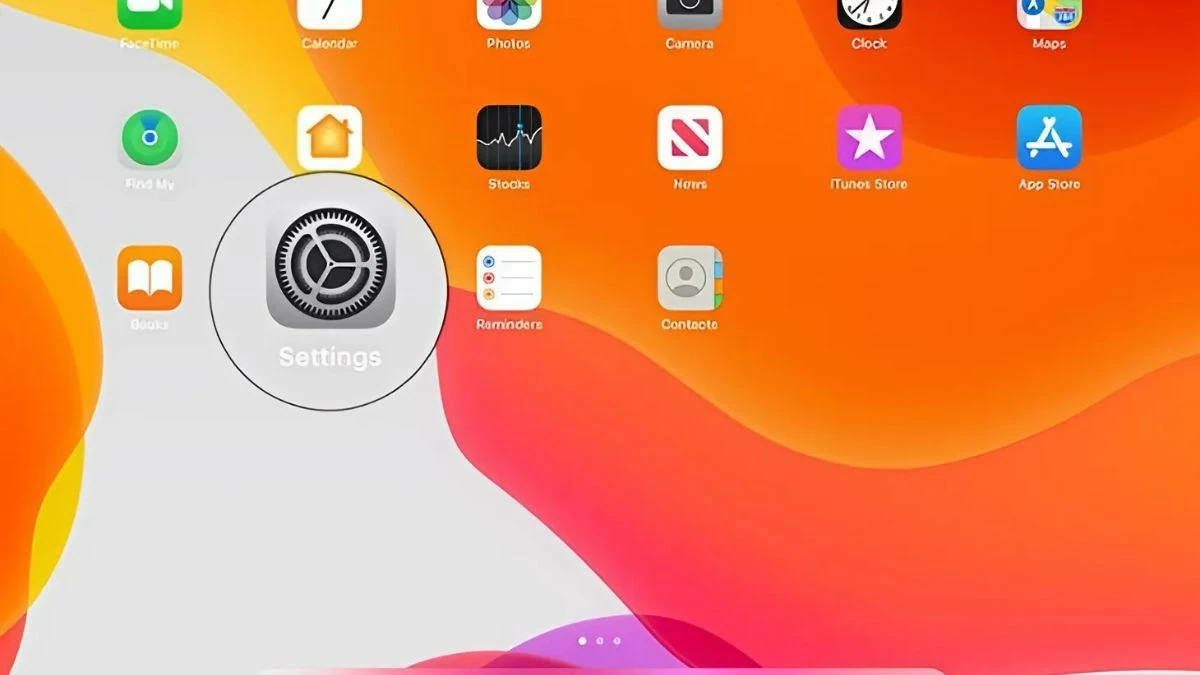 |
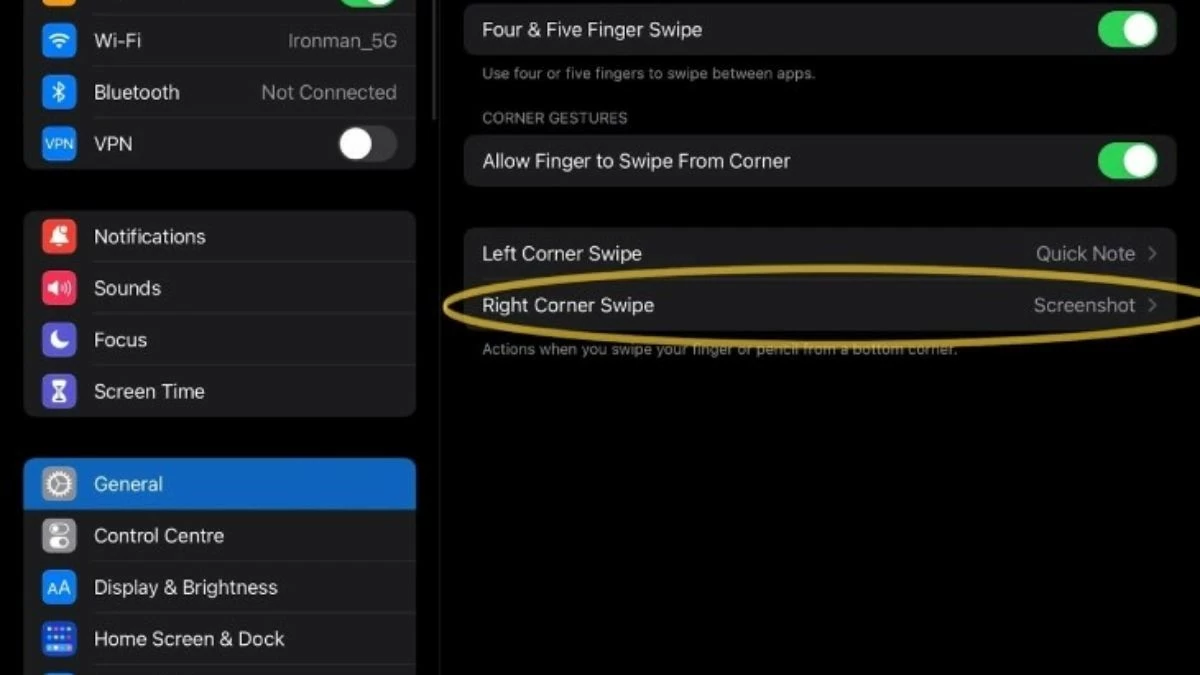
Step 2: Next, select the “General” menu. Then, scroll down and select “Gestures”. Here, you will make the necessary adjustments to set up the swipe gesture for taking screenshots.
Step 3: In the “Gestures” menu, find the “Allow Finger to Swipe From Corner” option and turn it on.
 |
How to use AssistiveTouch
To take a screenshot on iPad using AssistiveTouch, you can follow these detailed steps:
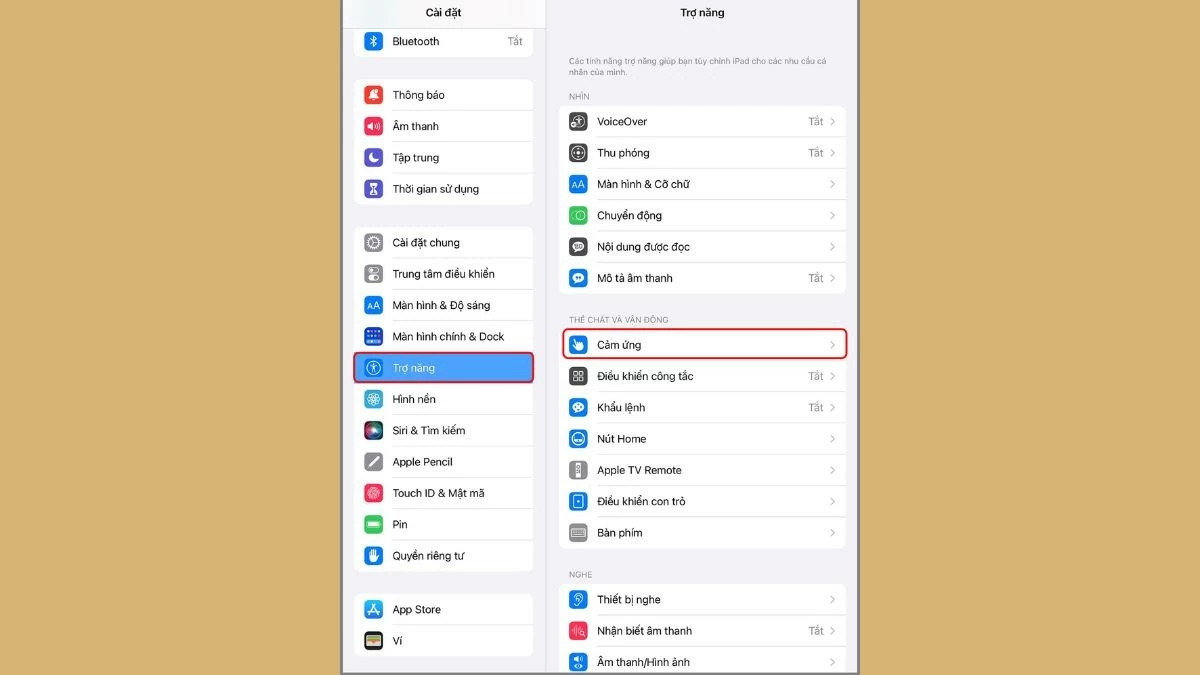
Step 1: Select "Touch" to open the virtual Home button accessibility on iPad.
 |
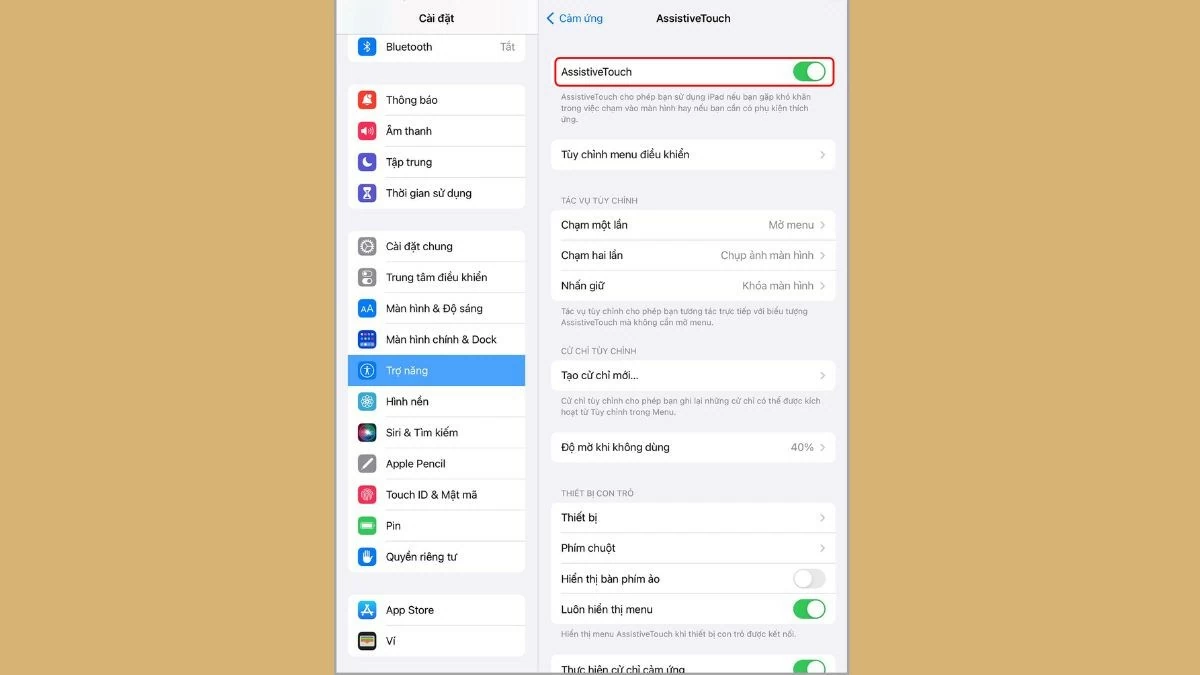
Step 2: Next, turn on AssistiveTouch. When this feature is enabled, a small circular icon will appear on the screen. Tap on that circular icon to open the control menu.
 |
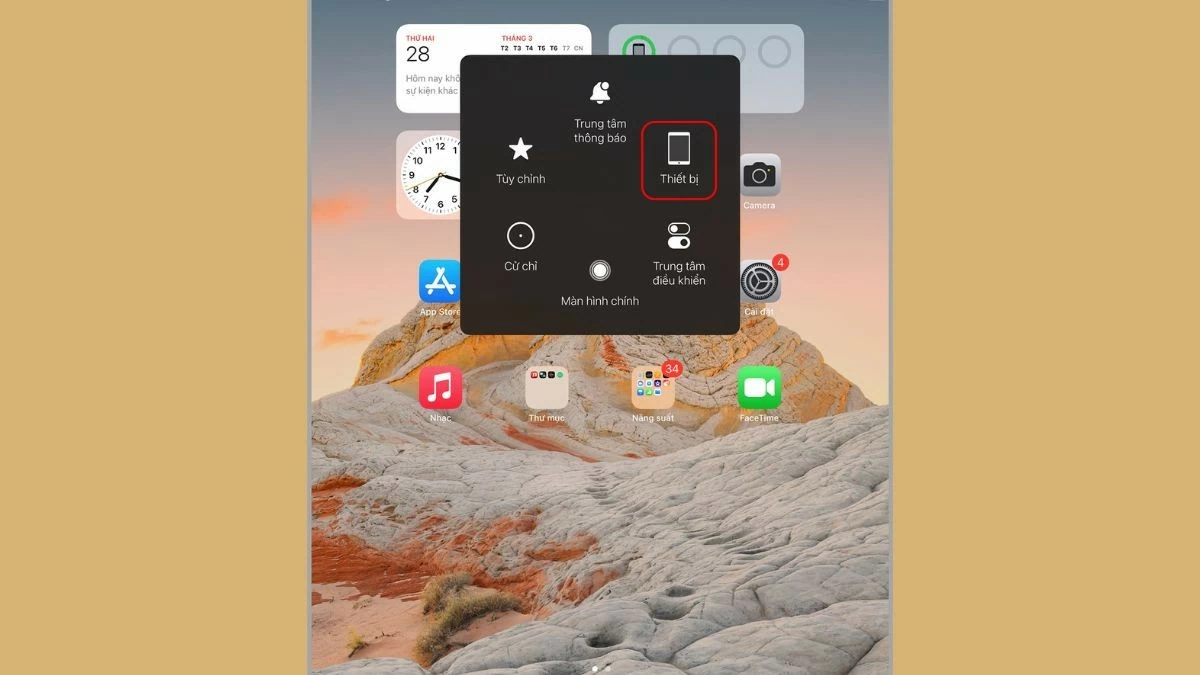
Step 3: In the AssistiveTouch menu, select "Devices" to access device-related control options.
 |
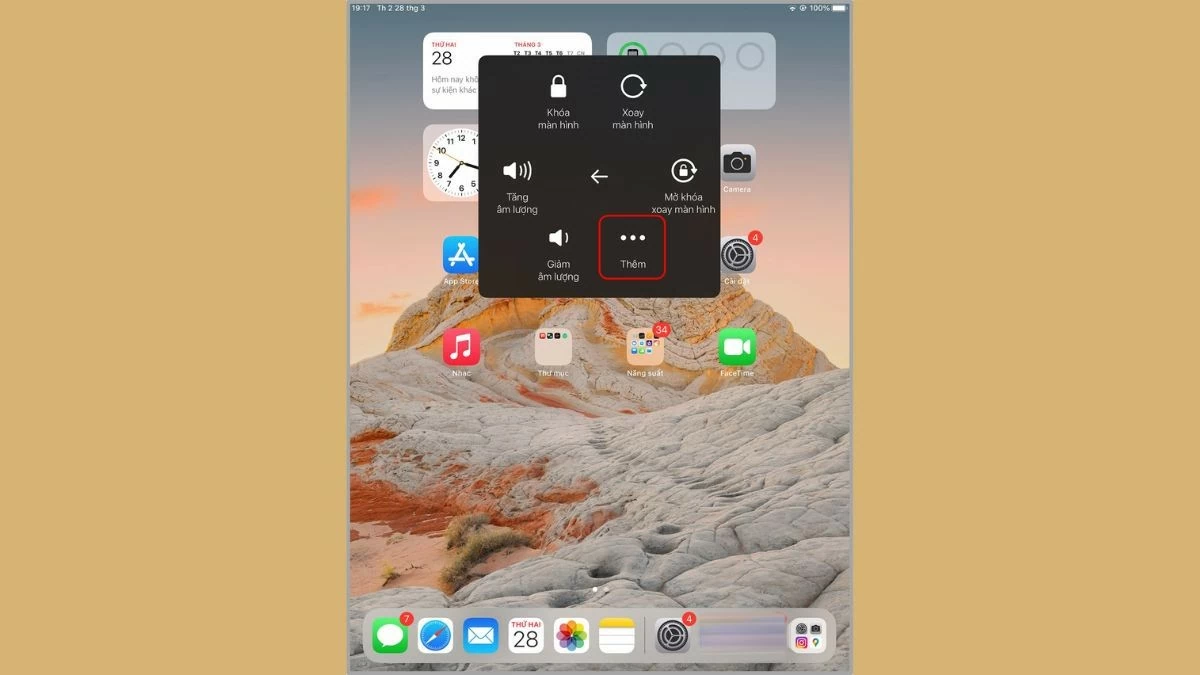
Step 4: Click on “Add”.
 |
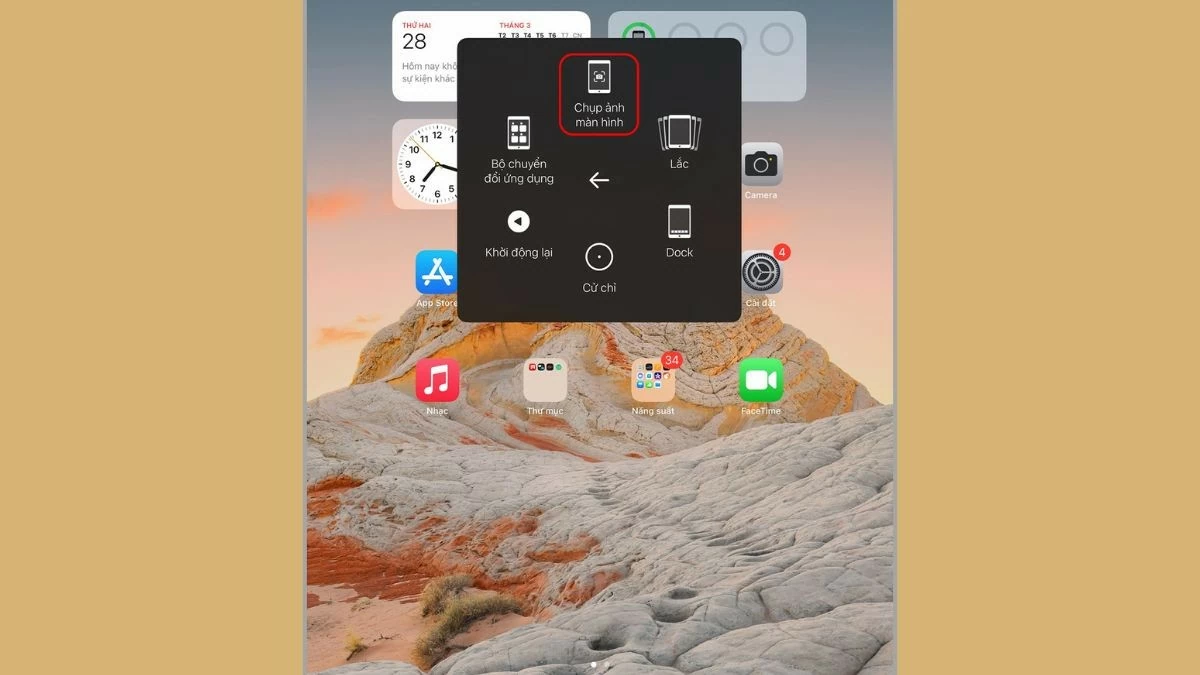
Step 5: Next, click “Take a screenshot”. The current screen will be captured immediately and saved to your photo library. So, you can take a screenshot on an iPad without a Home button in just a few seconds.
 |
How to use key combinations
To take a screenshot on your iPad using a keyboard combination, you can apply the method that suits the type of iPad you are using. If your iPad has a Home button, simply press the power button and the Home button at the same time to take a screenshot.
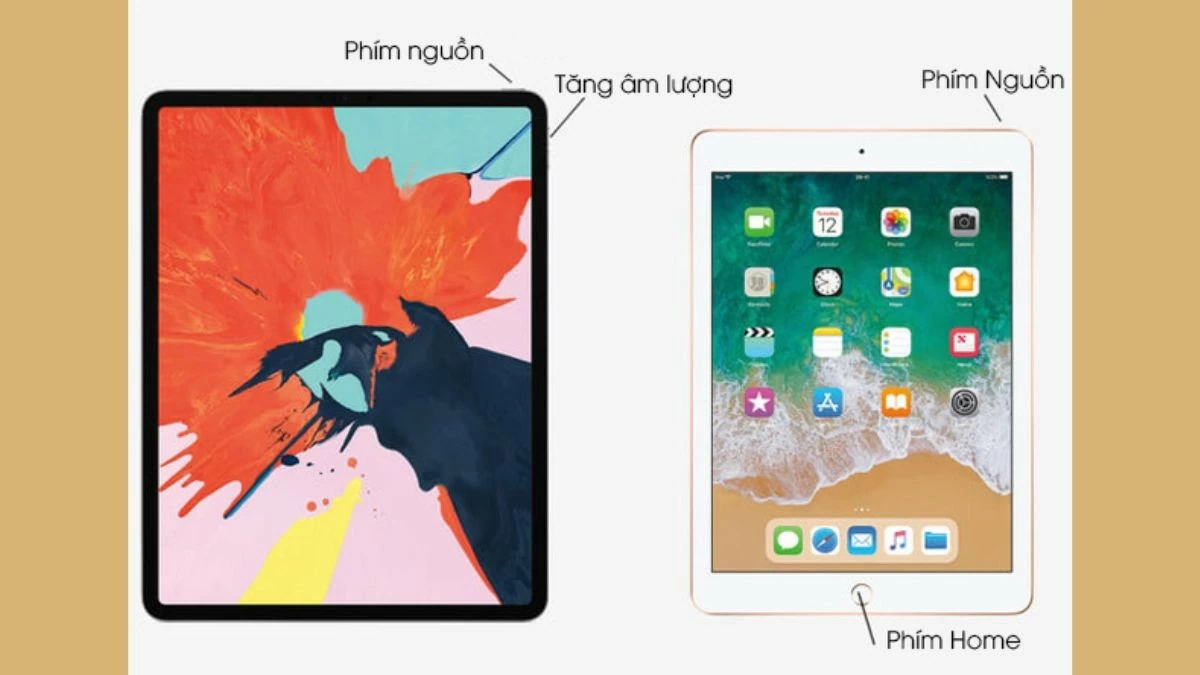 |
Alternatively, if your device doesn’t have a physical Home button, you can press the power button and the volume up button at the same time. This method of taking a screenshot on iPad Pro and Air will also record the current interface and automatically save it to your photo library. Alternatively, you can perform the steps mentioned in the previous section on how to take a screenshot on iPad.
How to find photos taken on iPad screen simply
To find screenshots on iPad, you can follow these simple steps:
Step 1: First, open the Photos app on your iPad. This is where all your photos and videos are stored.
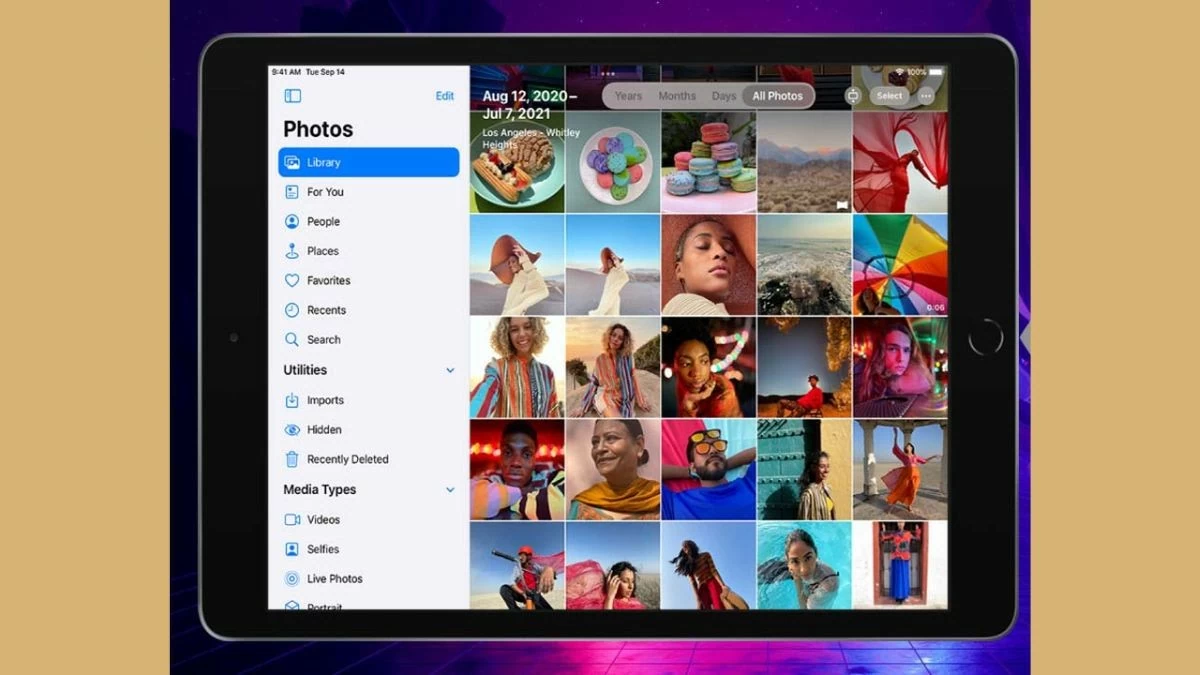 |
Step 2: Next, in the main interface of the Photos application, find and select the album named "Screenshots".
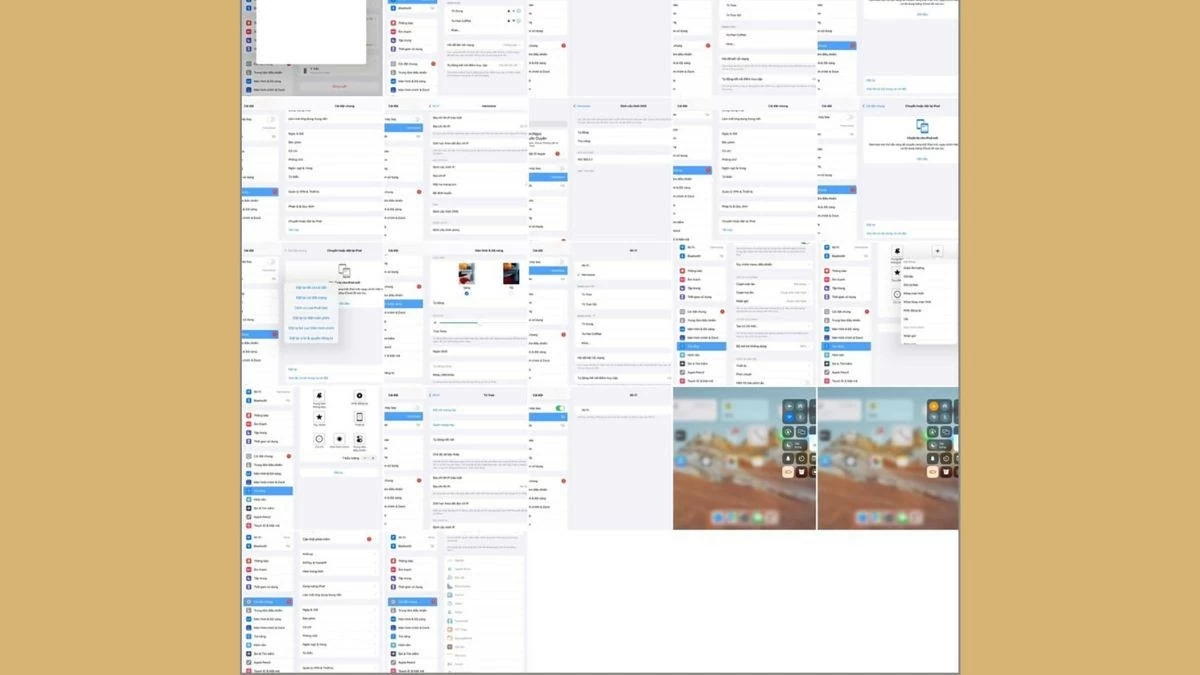 |
Step 3: Find the image in this album, as it is automatically created and stores all the screenshots you have taken.
With the above sharing, hopefully you have mastered how to take screenshots on iPad, both with and without the Home button, quickly and effectively. Using the screenshot function on iPad will become a useful tool in work, study and information sharing.
Source: https://baoquocte.vn/huong-dan-chup-man-hinh-ipad-va-air-nhanh-chong-va-don-gian-nhat-287742.html


![[Photo] Cutting hills to make way for people to travel on route 14E that suffered landslides](https://vphoto.vietnam.vn/thumb/1200x675/vietnam/resource/IMAGE/2025/11/08/1762599969318_ndo_br_thiet-ke-chua-co-ten-2025-11-08t154639923-png.webp)











![[Video] Hue Monuments reopen to welcome visitors](https://vphoto.vietnam.vn/thumb/402x226/vietnam/resource/IMAGE/2025/11/05/1762301089171_dung01-05-43-09still013-jpg.webp)





Comment (0)