Adjusting margins in Excel helps make your documents neater and more professional. This article will guide you on how to set margins before printing to get a clear and beautiful printout!
 |
Guide to effectively adjusting margins in Excel
If you're familiar with Microsoft software, aligning text in Excel will be simple. Just follow these steps, and you'll easily create a neat and easy-to-read spreadsheet. Try it now for a more professional document!
Quick guide
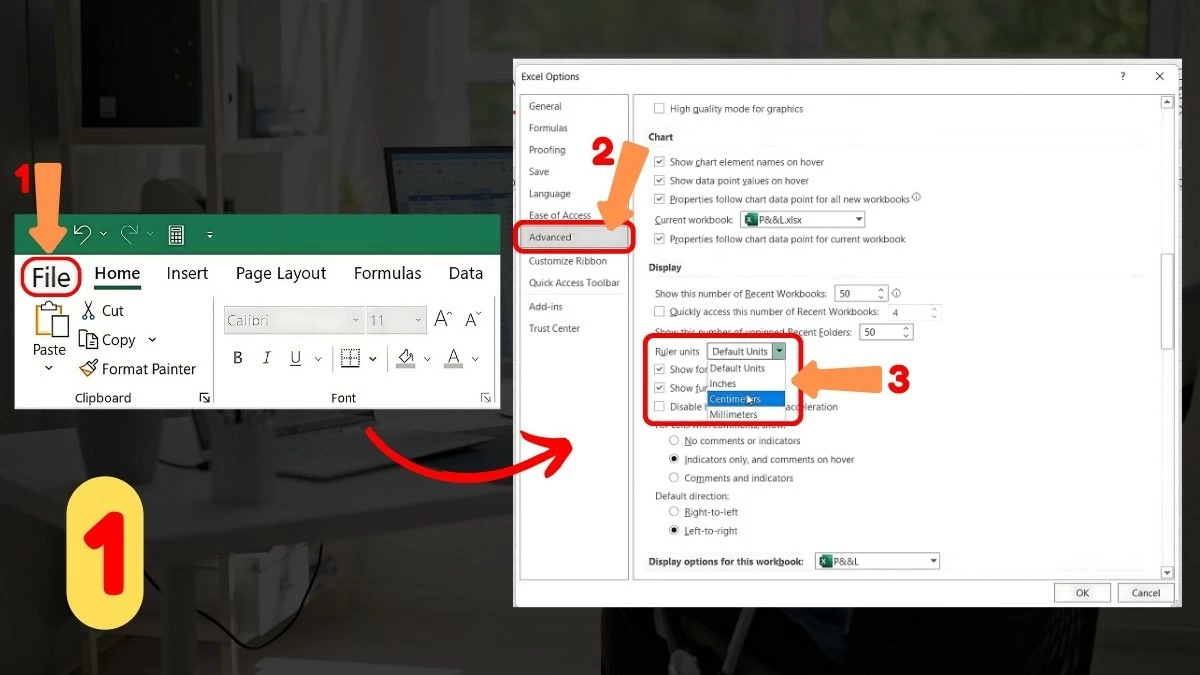
Adjusting margins in Excel is easy, no need to worry! First, you need to change the default unit of measurement to centimeters. Open your Excel document, select File, then click Options. In the Excel Options window, select the Advanced tab, change Ruler units to centimeters, and then click OK.
 |
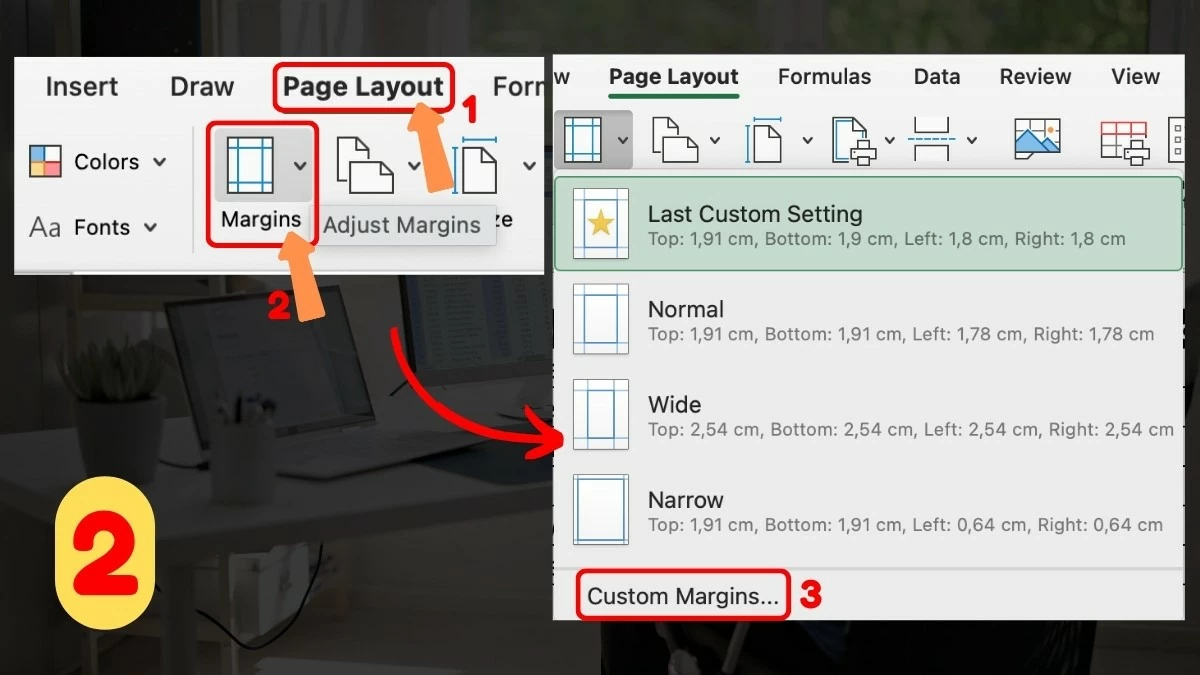
Next, go back to the spreadsheet, select the Page Layout tab, choose Margins, and click Custom Margins. Here, you can adjust the margin size as desired and then click OK. These are the steps to quickly set margins in Excel.
Detailed instructions
Step 1 - Change the margin unit: Open the spreadsheet file, go to File, select Options. In the Advanced tab, change Ruler units from the default unit to Centimeters and click OK to save.
 |
Step 2 - Setting Margins: Return to the spreadsheet, go to the Page Layout tab, select Margins, then click Custom Margins to customize the margins as desired. This is an important step in setting margins in Excel.
 |
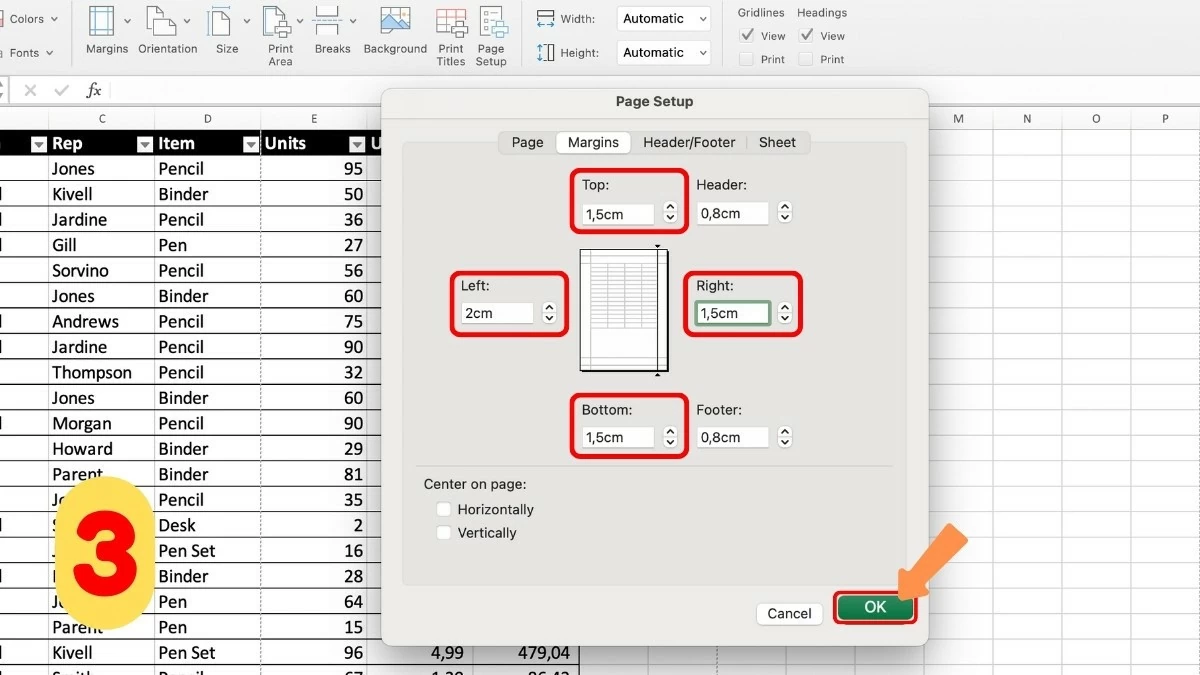
Step 3 - Adjust Margin Size: In the Margins window, enter the margin size parameters into the appropriate cells. Then, click OK to save the changes. This completes the process of effectively adjusting margins in Excel.
 |
How to quickly adjust margins in Excel before printing a document.
Before printing, you should check that the margins in Excel are properly adjusted and review the page breaks. This is crucial to ensure that the content is not cropped and displays clearly. If you don't know how, this article will guide you through the steps to adjust print margins in Excel to optimize your document!
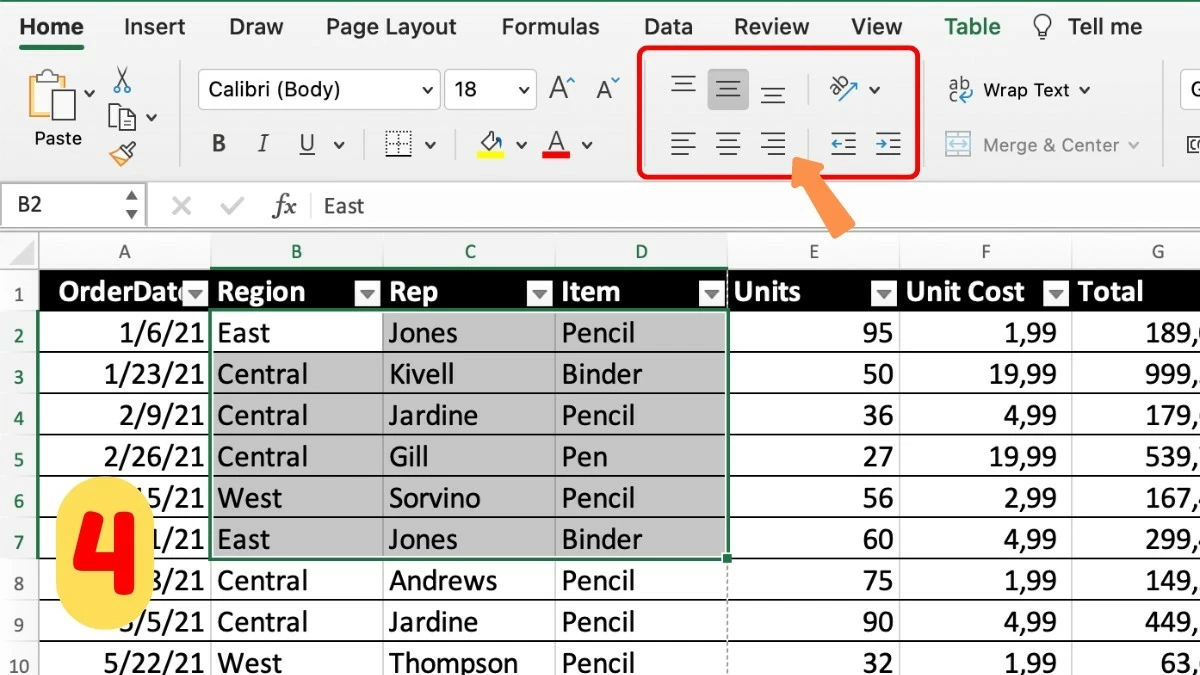
Step 1 - Choose the page break preview mode: First, go to the View tab and select Page Break Preview. This mode will give you an overview of how the pages will display in the document.
 |
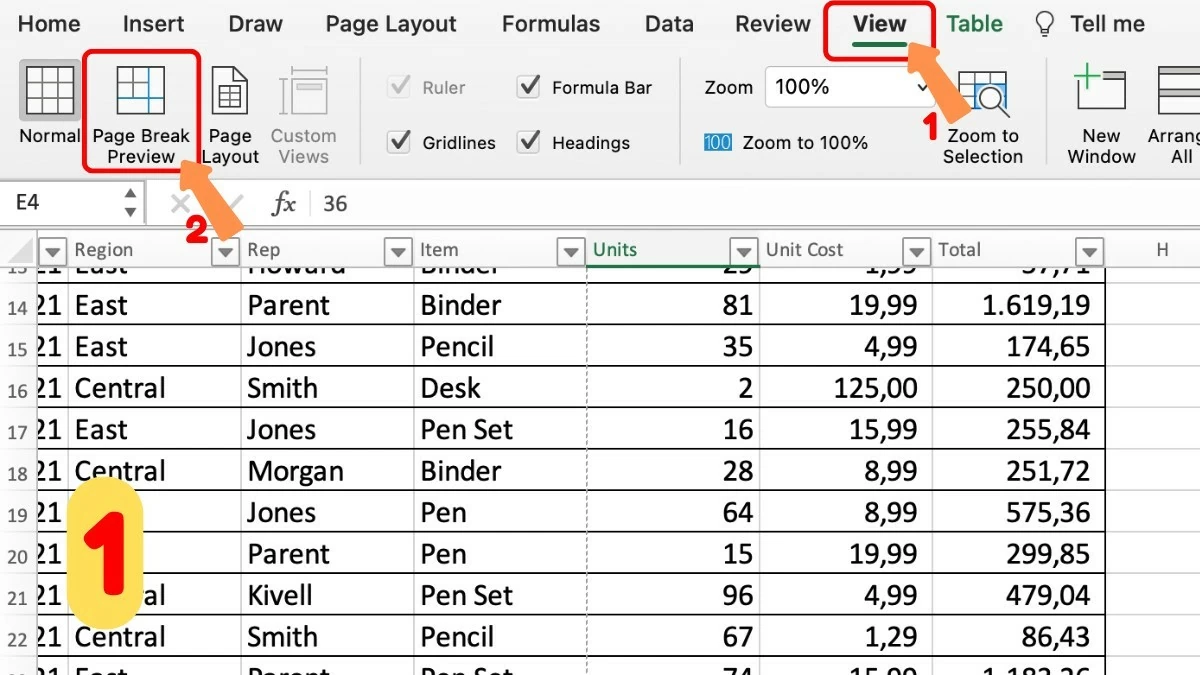
Step 2 - Adjust page breaks as desired: In Page Break Preview mode, you can change the position of page breaks to ensure the content is properly arranged on the printed pages. This is an important step to complete the print alignment in Excel.
 |
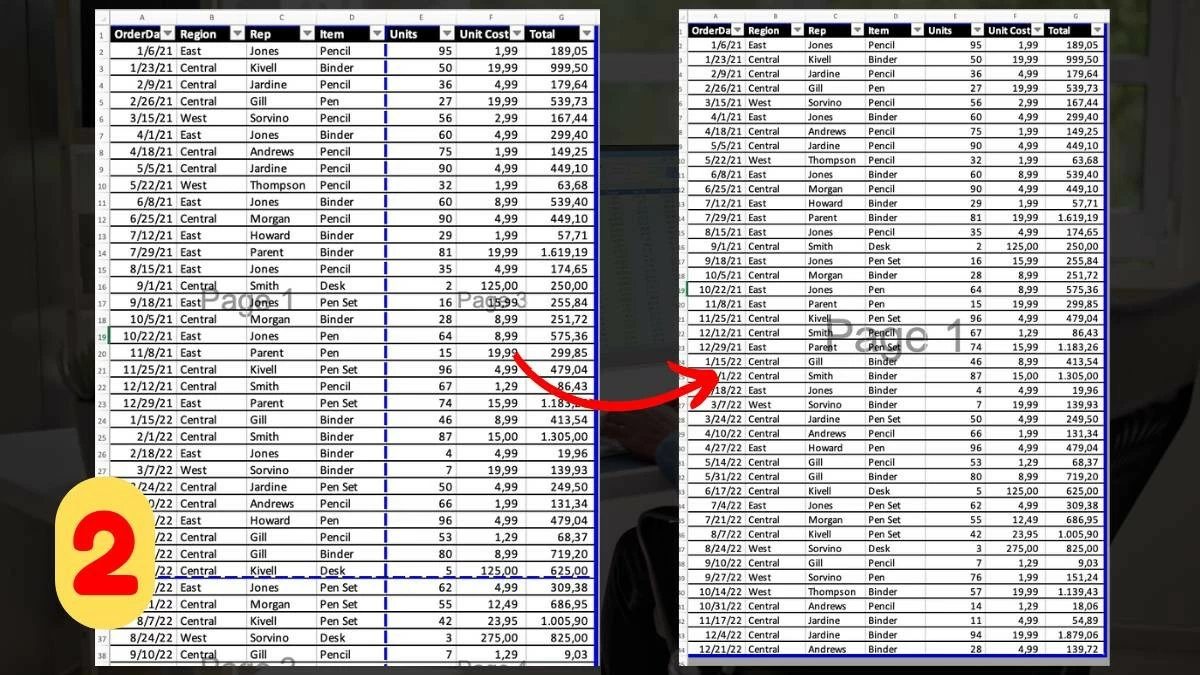
Step 3 - Check Margins: To ensure margins are set correctly, especially for documents with notes or headings, go to the Page Layout tab, select Margins, and double-check the margin settings.
 |
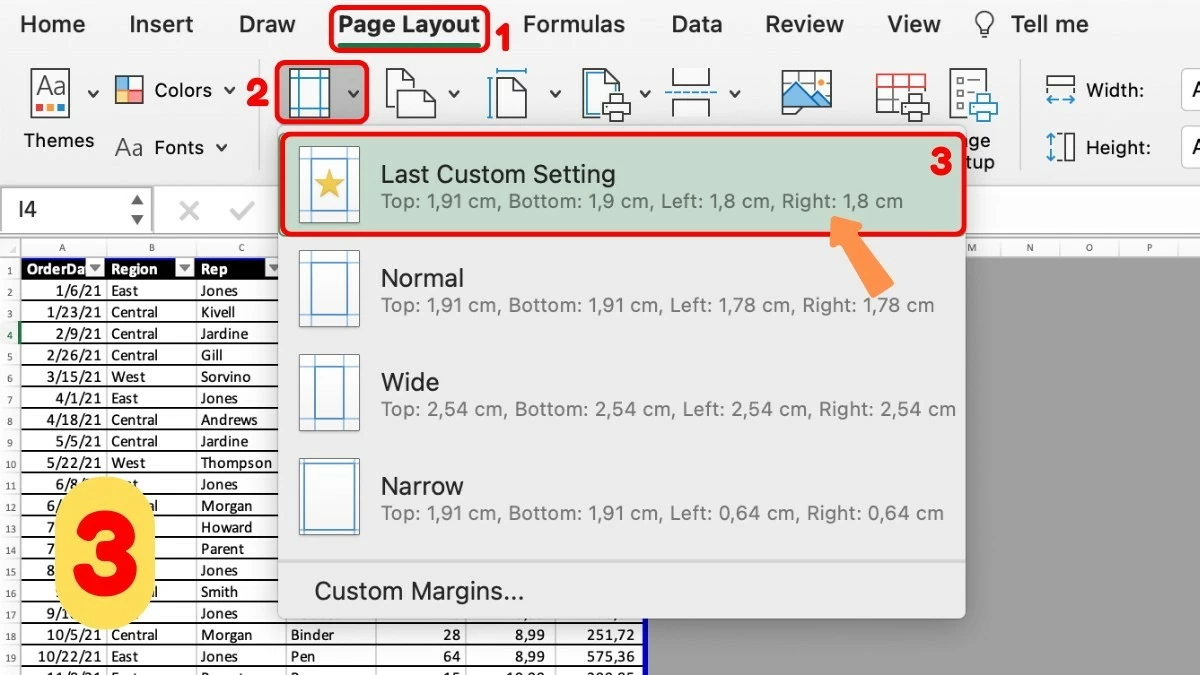
Step 4 - Preview before printing: Before printing, click File and select Print. Use the preview function to check the printout, helping to detect errors and avoid wasting paper and ink.
 |
Hopefully, this article has helped you understand how to adjust margins in Excel effectively in your work. Adjusting margins before printing not only keeps your document neat but also ensures a professional and clear printout. Follow these simple steps to optimize your spreadsheets quickly and efficiently!
Source


![[Photo] Prime Minister Pham Minh Chinh receives the Governor of Tochigi Province (Japan)](/_next/image?url=https%3A%2F%2Fvphoto.vietnam.vn%2Fthumb%2F1200x675%2Fvietnam%2Fresource%2FIMAGE%2F2025%2F12%2F16%2F1765892133176_dsc-8082-6425-jpg.webp&w=3840&q=75)

![[Image] The tenacious fighting spirit of Vietnamese women's football](/_next/image?url=https%3A%2F%2Fvphoto.vietnam.vn%2Fthumb%2F1200x675%2Fvietnam%2Fresource%2FIMAGE%2F2025%2F12%2F17%2F1765990260956_ndo_br_4224760955870434771-copy-jpg.webp&w=3840&q=75)
![[Live] 2025 Community Action Awards Gala](/_next/image?url=https%3A%2F%2Fvphoto.vietnam.vn%2Fthumb%2F1200x675%2Fvietnam%2Fresource%2FIMAGE%2F2025%2F12%2F16%2F1765899631650_ndo_tr_z7334013144784-9f9fe10a6d63584c85aff40f2957c250-jpg.webp&w=3840&q=75)


Comment (0)