Using grid lines in Word allows you to create lines like in a student's notebook, making note-taking and content alignment easier. This method is quick and convenient!
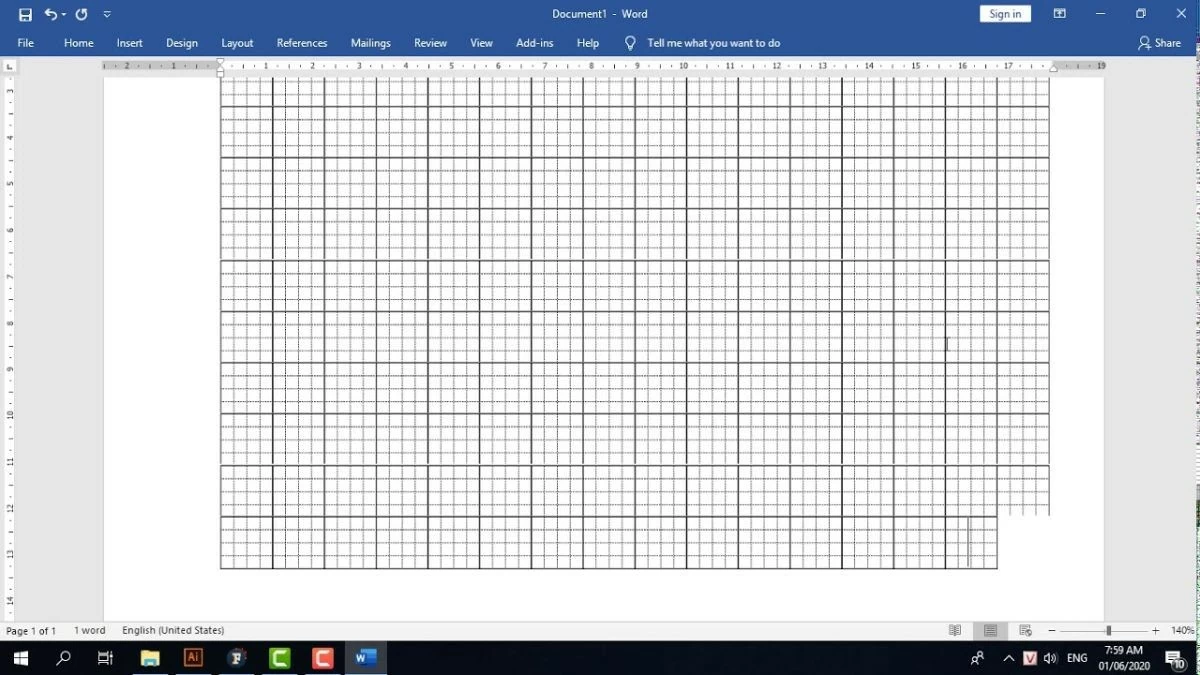 |
Drawing grid lines in Word is a simple but useful operation, creating lines similar to those in a student's notebook. Creating a 4-grid grid pattern makes note-taking and content alignment easier. You can do this quickly and conveniently.
Draw grid lines in Word using Tables
Using Tables to create grid lines in Word is a simple and effective method, especially suitable when you need to create evenly spaced grids like the 4-grid grid pattern.
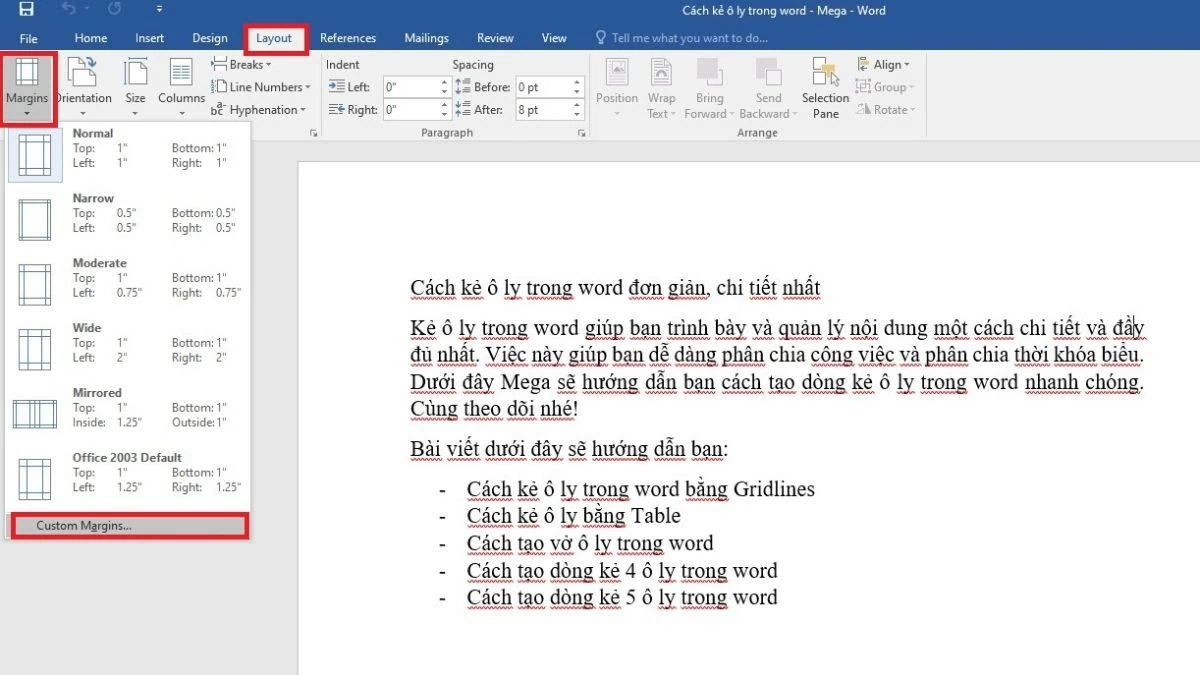
Step 1: Open Word, go to Page Layout, select Margins, then select Custom Margins and set the paper margins to 0.
 |
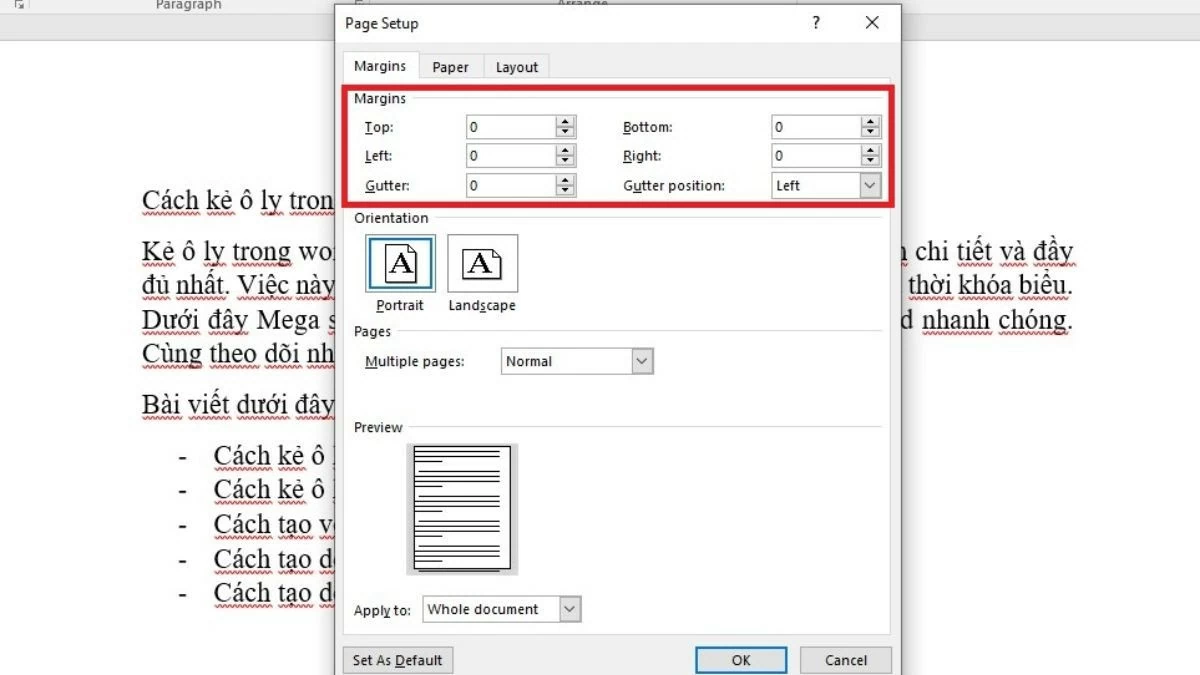
Next, set all the values to 0.
 |
Step 2: Insert a table by going to Insert, selecting Table, then selecting Insert Table and entering the desired number of columns and rows.
 |
To adjust the squares to be evenly spaced, click the crosshair icon and select Table Properties.
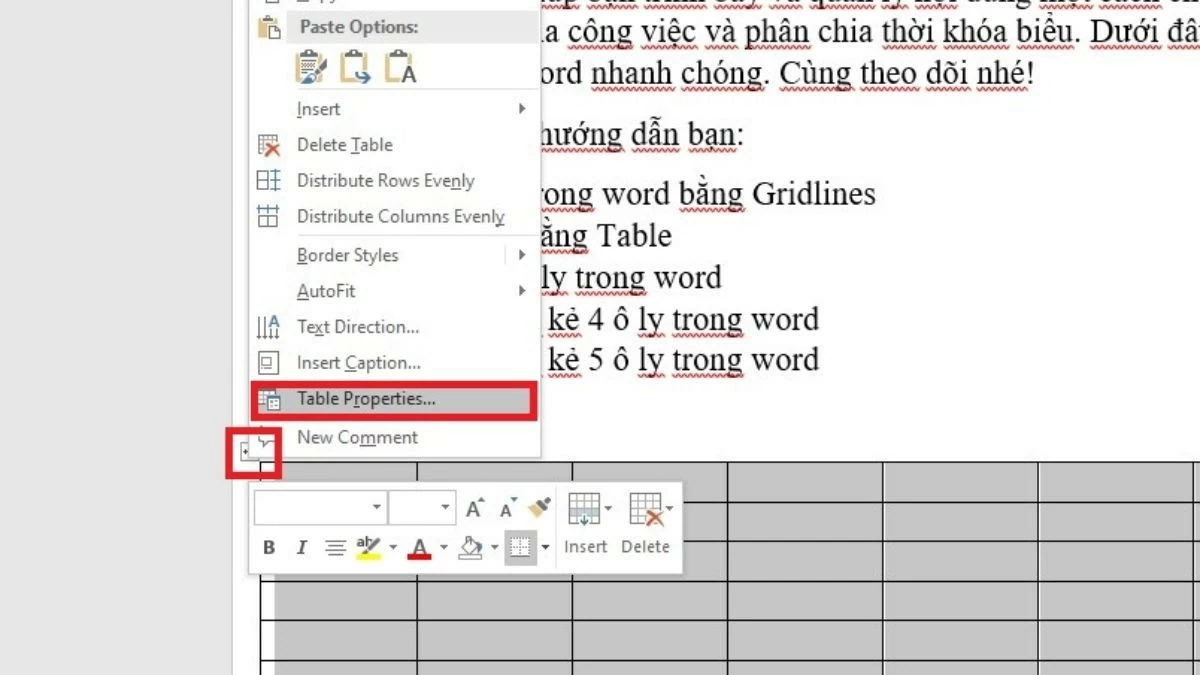 |
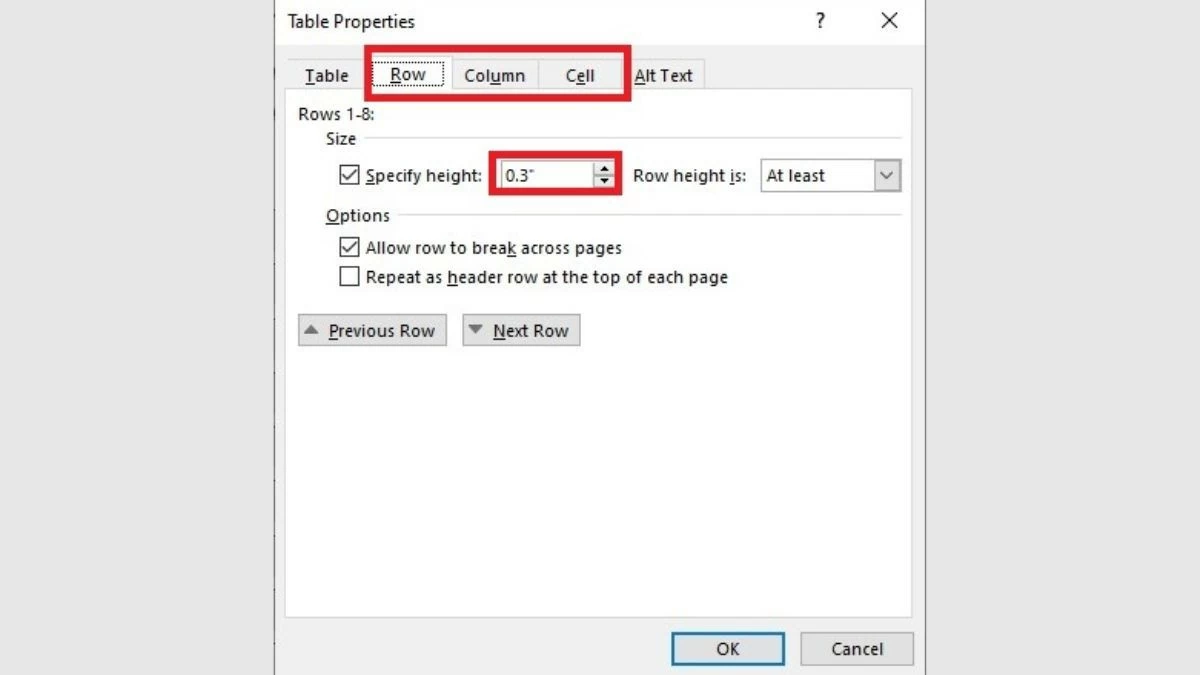
In the Row tab, select Specify height and enter the desired value, then select Exactly. Do the same in the Column and Cell tabs to set consistent values.
 |
Step 3: Duplicate the table to create a grid.
Draw grid lines in Word using the simple Line feature.
Creating a four-line grid in Word using the Line feature is another method that helps you create grid lines quickly and easily.
Step 1: In Word, move your mouse to the location where you want to create the grid lines.
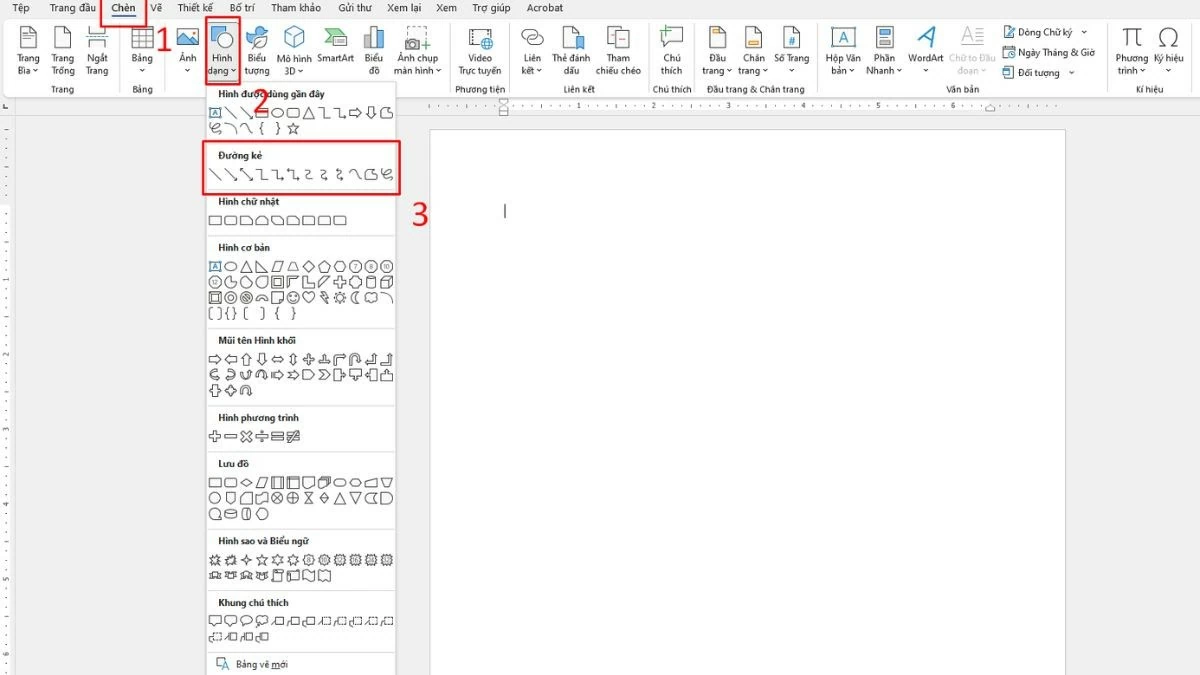 |
Step 2 : Select Insert, then click the "Shapes" icon and select "Line".
Step 3: Draw lines by dragging your mouse from one point to another in the document to create horizontal or vertical lines.
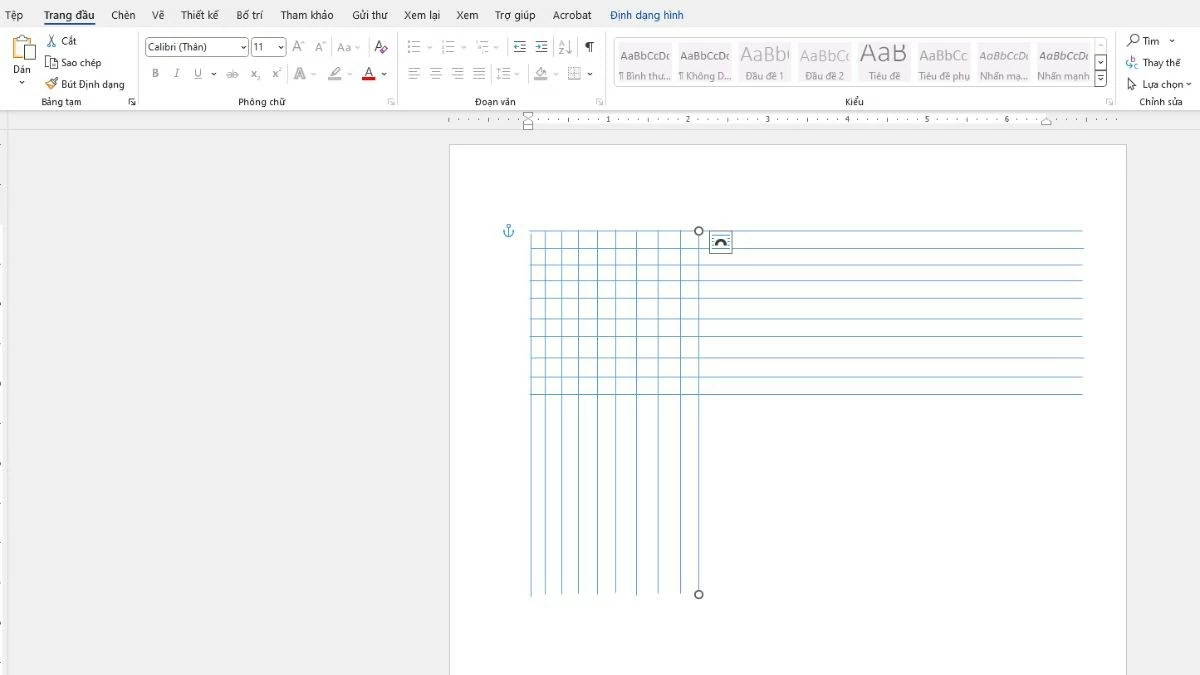 |
Step 4: Duplicate and paste the lines to create a grid. You can use the "Copy" and "Paste" commands to quickly create multiple lines with equal spacing.
Quickly create grid lines in Word using Gridlines
Using the Gridlines feature in Word allows you to accurately align your content without having to create a table.
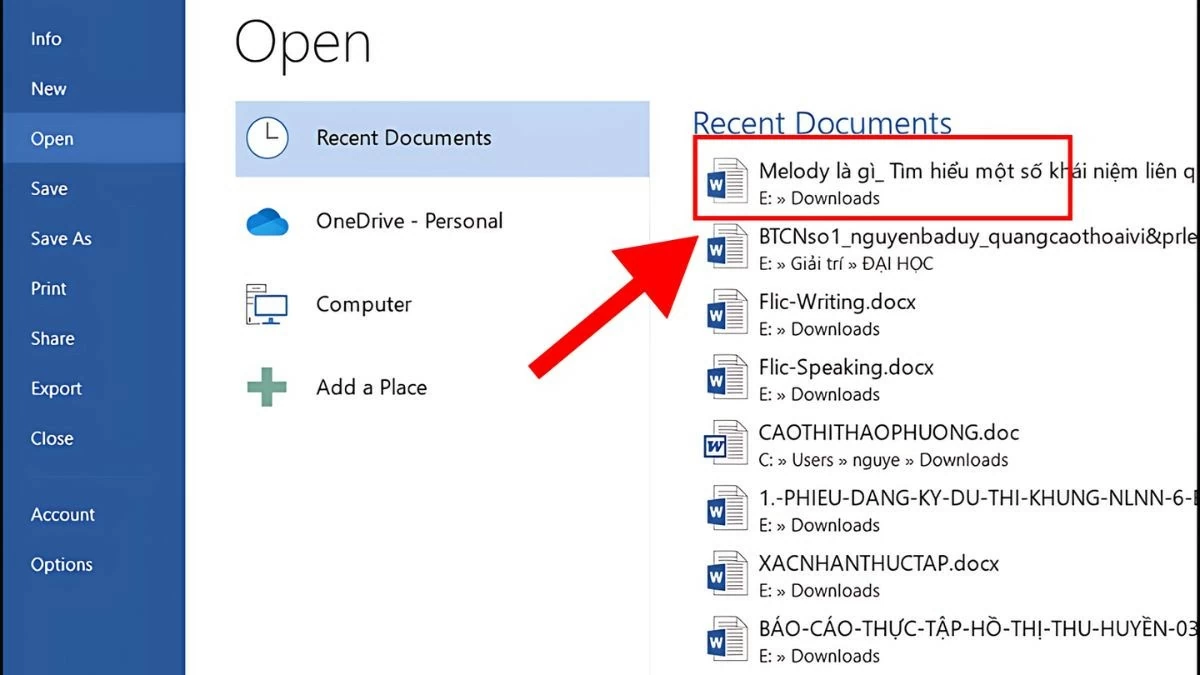
Step 1: Open your Word document and navigate to the area where you want to create grid lines.
 |
Step 2: Select the "View" tab.
Step 3 : Next, check the "Gridlines" box in the "Show" group. Gridlines will then appear on the screen, making it easy to align the content within each grid square.
 |
Step 4: Next, customize the gridlines size if needed. Although Word won't allow you to change the default gridline size, you can adjust the spacing or use other tools like the "Ruler" for more precise alignment.
The grid lines in Word resemble an efficient notebook.
This method of drawing ruled lines in Word is often used when you need to create a structured document similar to a student's notebook, with clear lines for writing or taking notes.
Step 1: Download and install appropriate fonts for elementary school students on your computer.
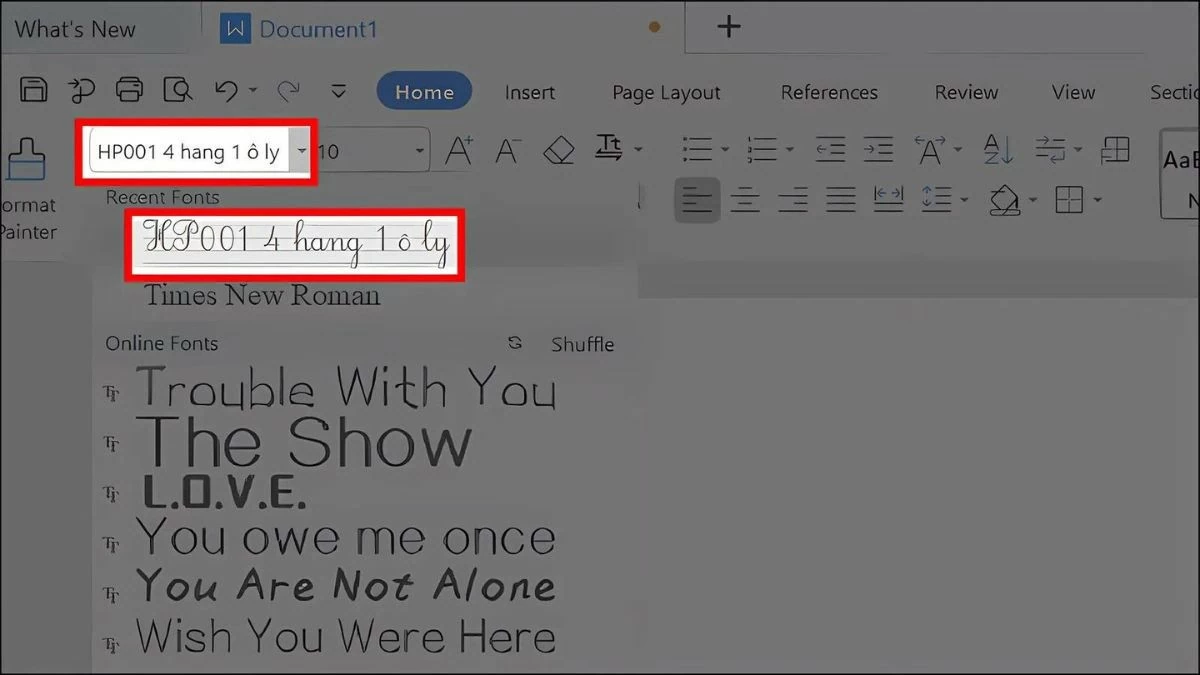 |
Step 2: Open a new Word document. In the Font box, select the font you have installed. Then, click on Insert, select Symbol, and choose More Symbols to search for the desired font.
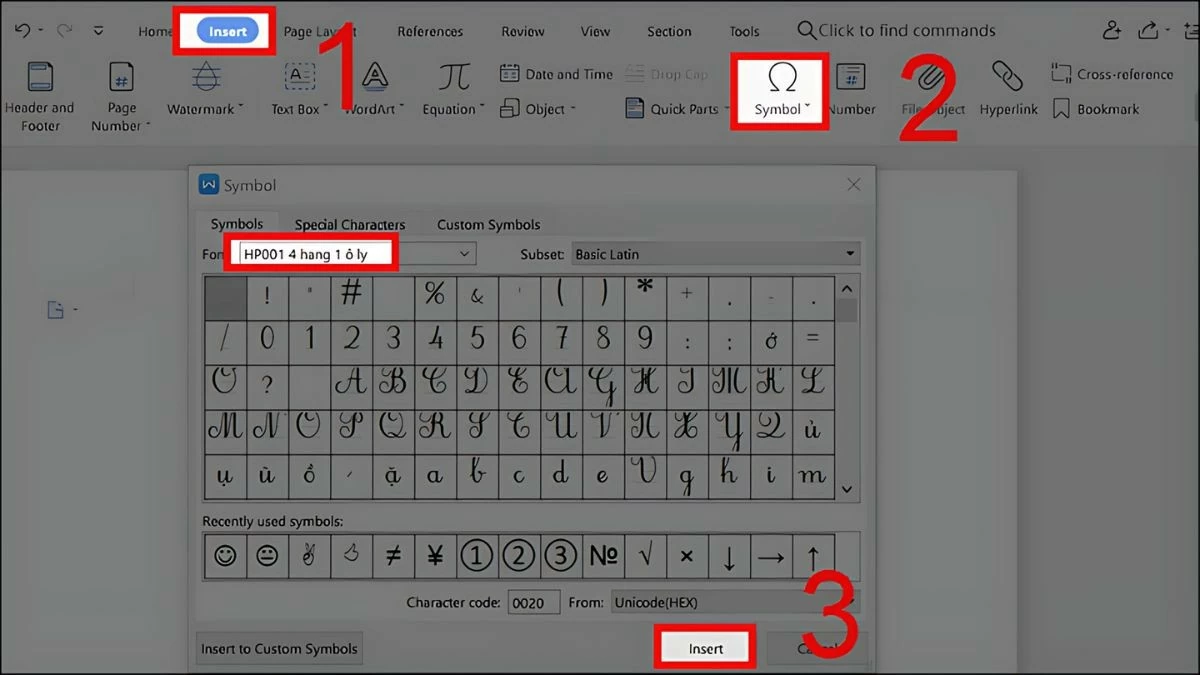 |
Step 3 : To draw grid lines, select the font and grid symbol, then click Insert to add it to the document.
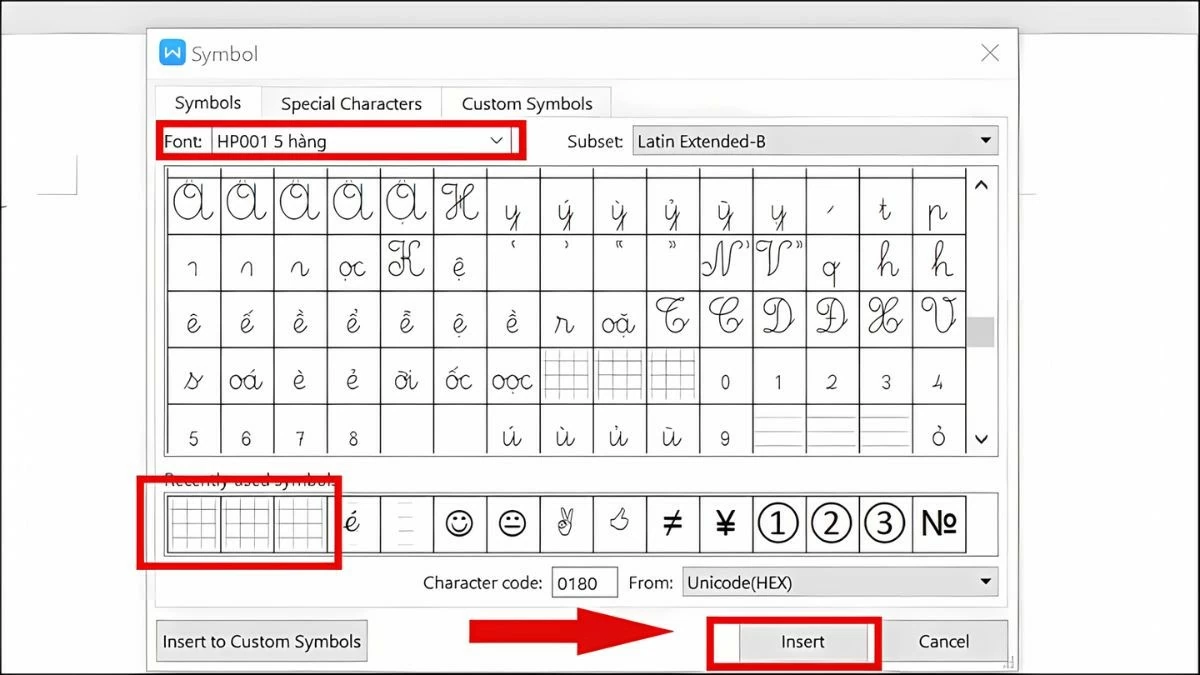 |
Step 4: Duplicate and paste the grid lines to create a grid similar to that in a notebook.
Draw grid lines in Word using effective shapes.
Using shapes is a flexible method for drawing grids in Word, allowing you to customize the size and shape of the cells to your needs.
Step 1: In Word, move your mouse cursor to the location where you want to create the grid lines.
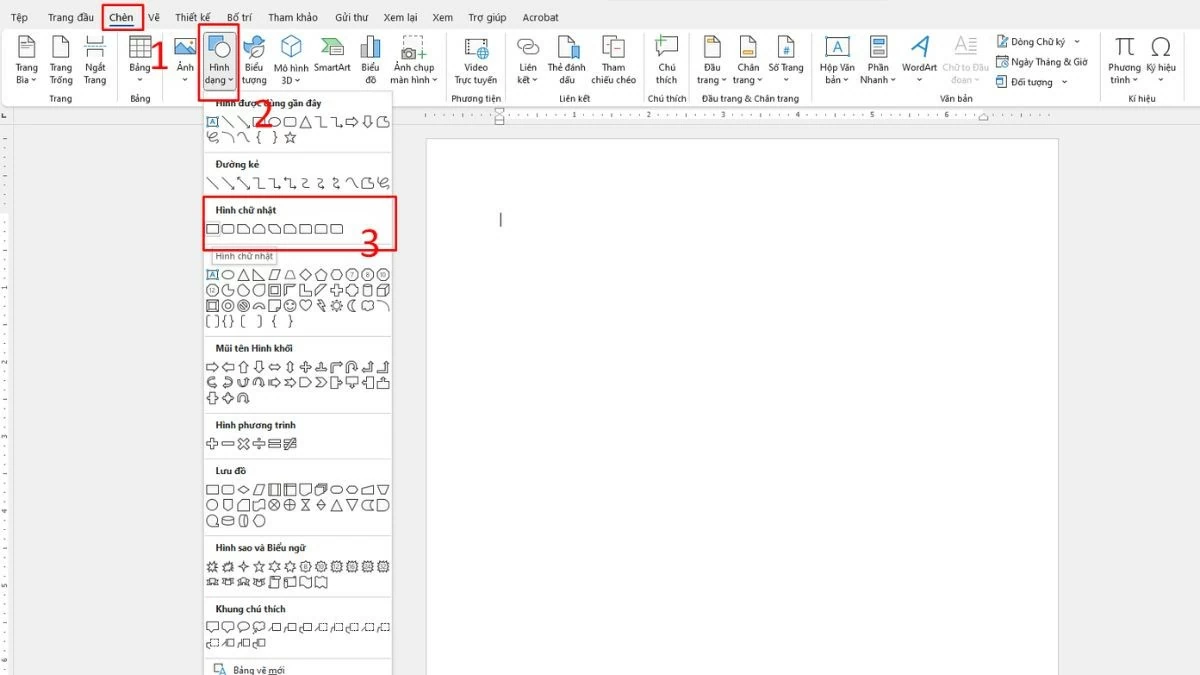 |
Step 2: Click on "Insert," then select "Shapes" and choose a square or rectangle from the list of available shapes.
Step 3: Draw shapes by dragging and dropping your mouse on the document to create squares or rectangles as desired. You can also resize them by dragging the corners of the shape.
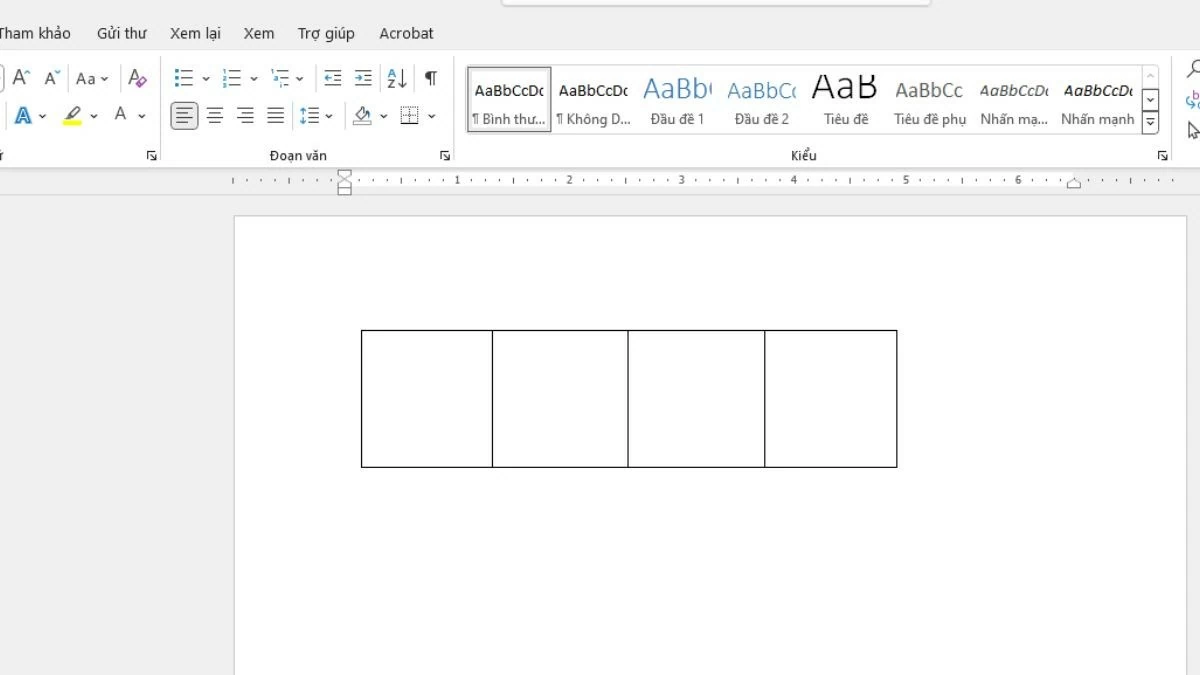 |
Step 4: Next, copy and paste this shape to create multiple grids. Then, use the keyboard shortcut "Ctrl + C" to copy and "Ctrl + V" to paste the shape multiple times, and then arrange them into rows and columns as desired.
Instructions on changing the grid style in Word
If you want to create a grid-lined page in Word, similar to a bulleted journal, or adjust the aesthetics, you can easily customize the grid design. There are many design templates to choose from, helping to personalize your grid layout.
Step 1: On the toolbar, select "Design".
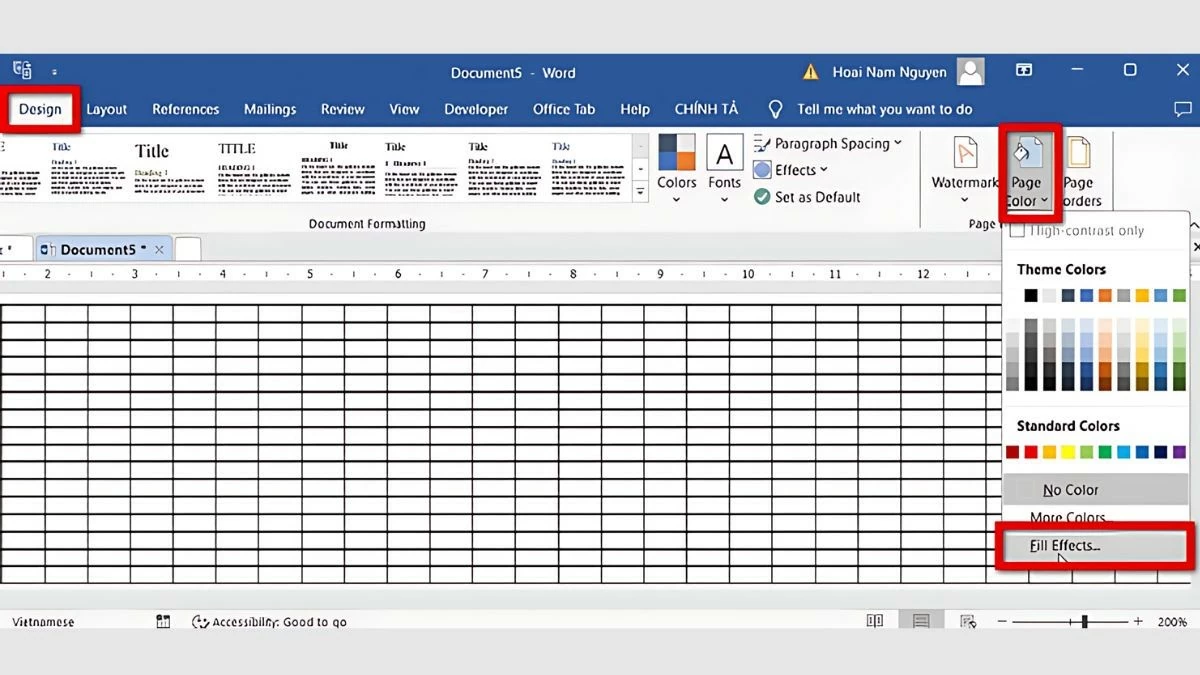 |
Step 2: Click on "Page Color" and select "Fill Effects" from the dropdown menu.
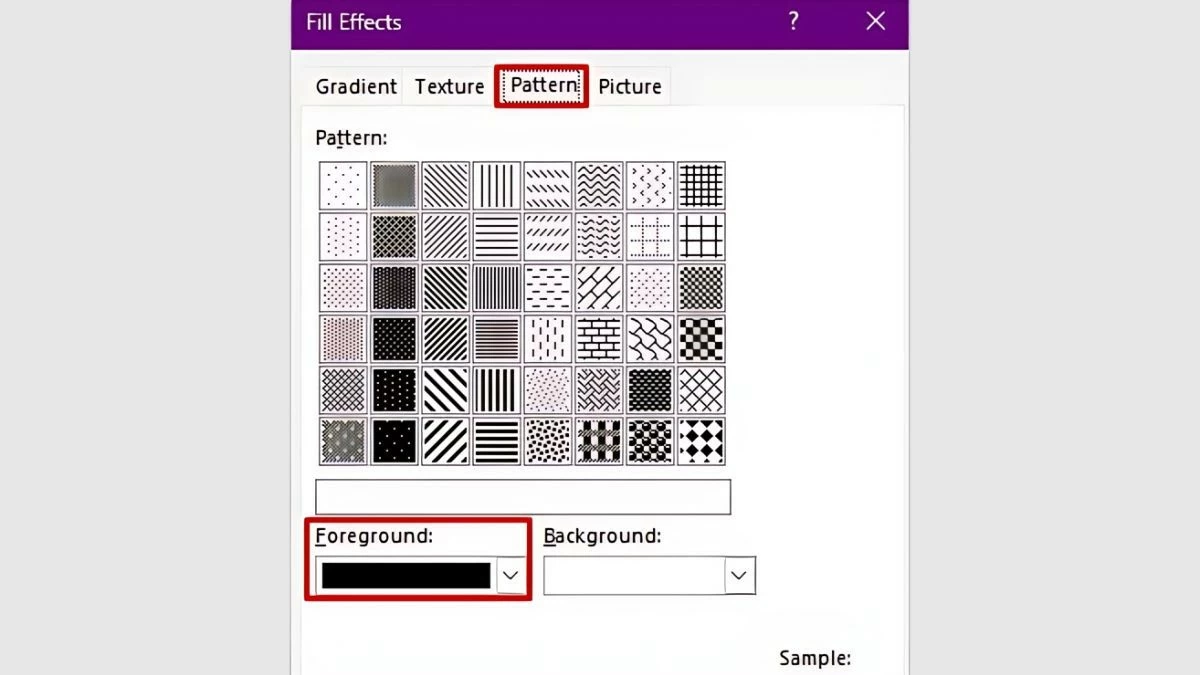
Step 3: In the "Fill Effects" window, select the "Pattern" tab and find the grid pattern you want in the Pattern section. To change the grid color, select a color in the "Foreground" section.
 |
Step 4: Click "OK" to apply, and the grid will be displayed across the entire page.
This is a detailed guide on how to quickly and easily create grid lines in Word. With these clear instructions, you will easily succeed. These methods for creating 4-grid lines in Word allow you to customize your documents flexibly and serve many different purposes.
Source: https://baoquocte.vn/5-cach-ke-o-ly-trong-word-vo-cung-don-gian-va-de-thuc-hien-nhat-289436.html


Comment (0)