 |
To be able to remove sun shadows using Photoshop on your computer, follow these steps:
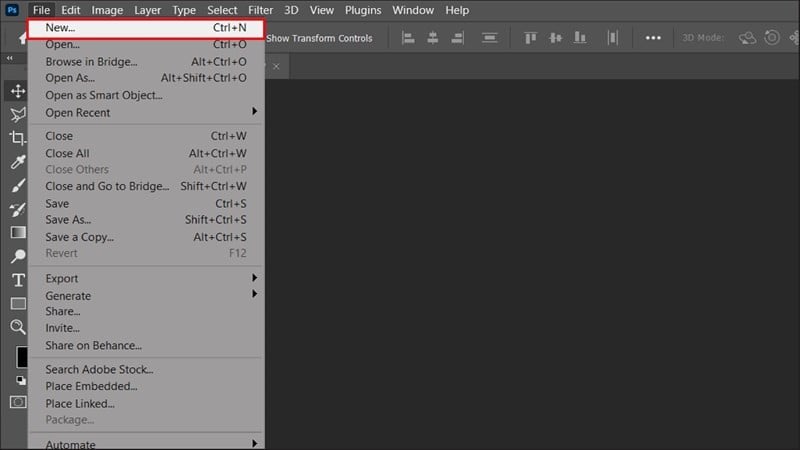
Step 1: You create a new Photoshop file by selecting File on the Menu bar and clicking New or using the key combination Ctrl + N to open a new file.
 |
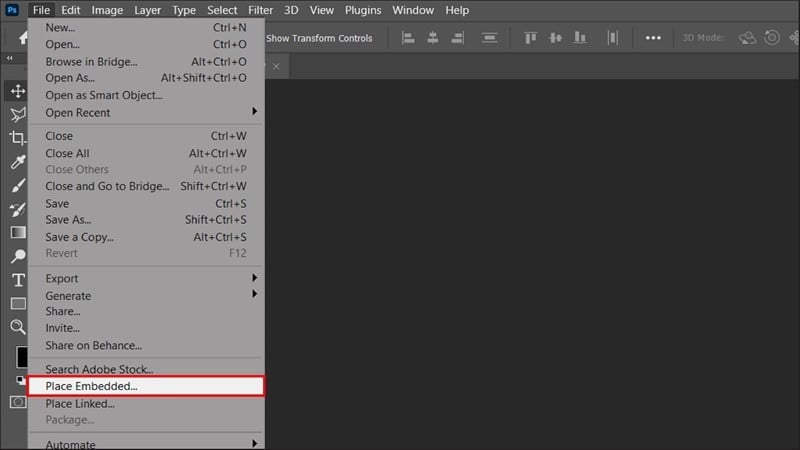
Step 2: After opening the new file, insert the photo you want to convert into a watercolor painting by clicking on File, then select Place Embedded and select the photo you want to insert from the library.
 |
Below I have successfully inserted the image into the Photoshop working frame.
 |
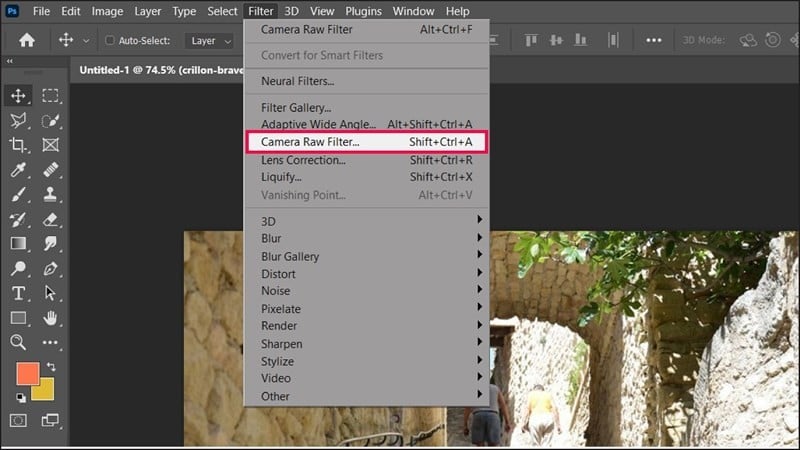
Step 3: After successfully inserting the photo, on the Menu bar, select Filter and click on the Camera Raw filter or use the combination Ctrl + Shift + A to open the Camera Raw dialog box.
 |
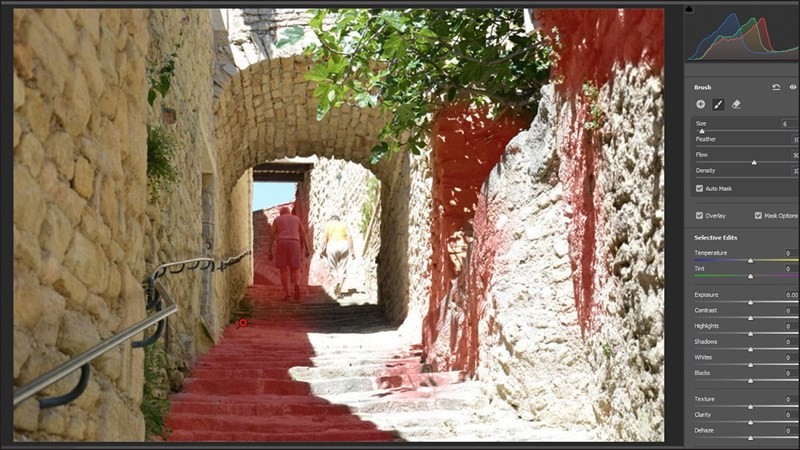
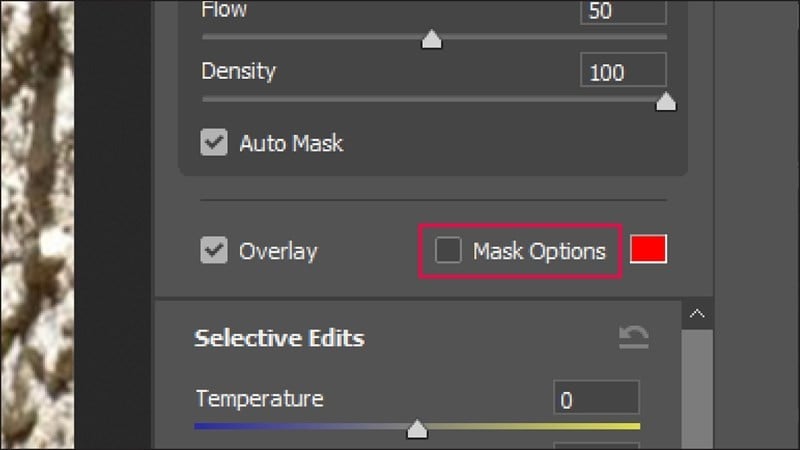
Step 4: When the dialog box opens, click on Brush (pen icon). Then, check the Auto Mask and Mask Options boxes as shown below.
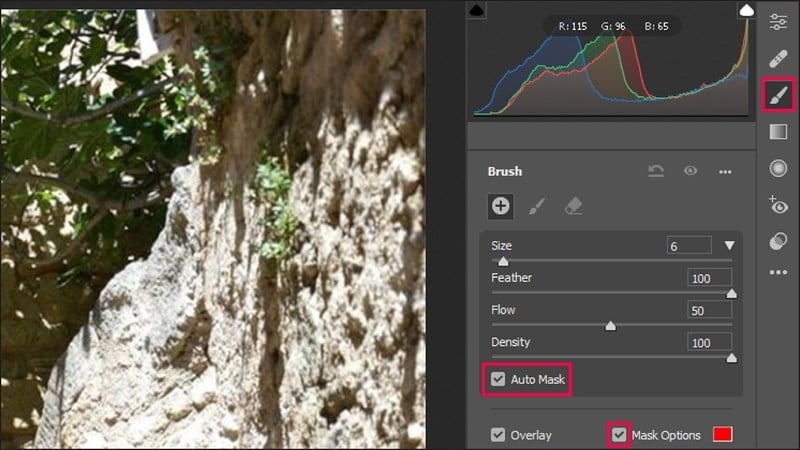 |
Next, use your mouse to paint over the shadow areas you want to erase. Now, you will see the areas you painted over because you have turned on Mask Options.
 |
Step 5: Once you have filled in all the areas you want to erase, turn off Mask Options to hide the selected shadow and start erasing.
 |
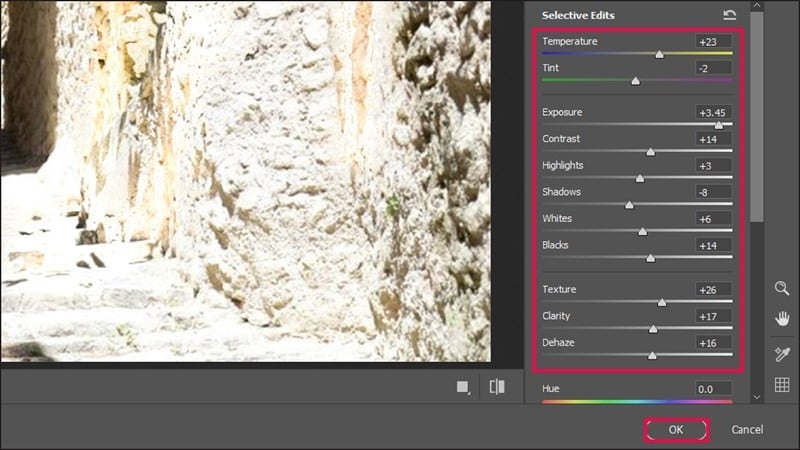
Step 6: Next, set the parameters as shown below to adjust the color of the shaded areas so that it is similar to the remaining sunlight in the photo. You can also leave other parameters so that it suits your eyes for the entire photo. Once you have set the parameters, just press OK to apply the effect of Camera Raw to your work.
 |
Step 7: Then, create a new layer to remove the border separating the dark and light areas (you can stop at the above step if you are satisfied with your photo).
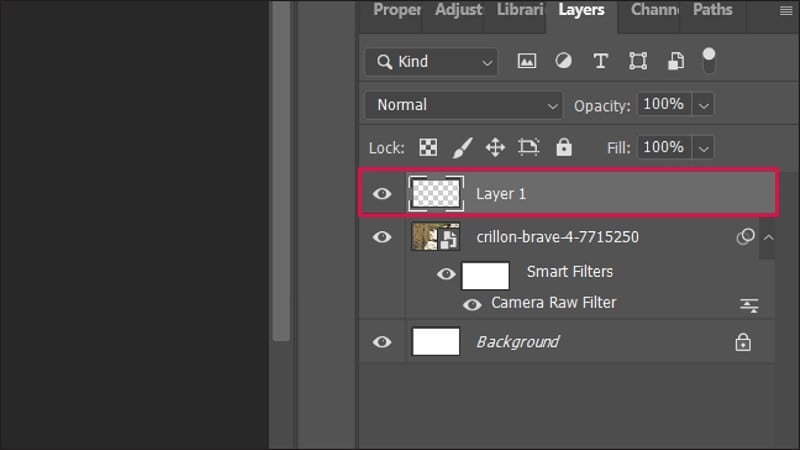 |
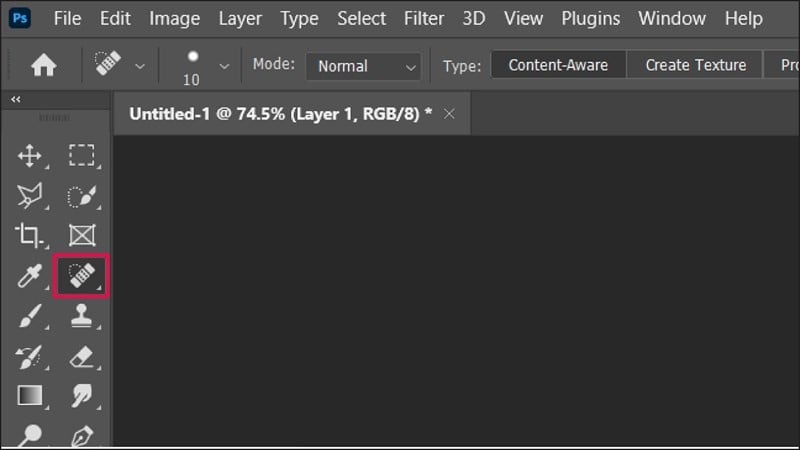
Here, on the toolbar, click on the Healing Brush Tool to erase the borders to make the photo more realistic. Hold down the Alt key and hold the mouse at the light position you like to outline the separating lines and you're done.
 |
And here is the photo step after completion.
 |
The above article has detailed instructions on how to remove sun shadows using Photoshop with extremely simple and easy-to-understand operations. Thank you for following the article.
Source









![[Photo] Da Nang: Hundreds of people join hands to clean up a vital tourist route after storm No. 13](https://vphoto.vietnam.vn/thumb/1200x675/vietnam/resource/IMAGE/2025/11/07/1762491638903_image-3-1353-jpg.webp)




Comment (0)