The Battery Saver feature on Windows 11 is a useful tool for your laptop. Enabling Battery Saver will give you extra usage time. This article will show you how to enable Battery Saver on Windows 11 with a few simple steps.
 |
The Battery Saver mode in Windows 11 is designed to extend the battery life of mobile devices, such as laptops or tablets. When activated, this mode reduces background activity, limits notifications, and adjusts system performance to reduce power consumption.
 |
Additionally, screen brightness will automatically decrease to save battery power more effectively. This feature usually turns on automatically when the battery level drops to a certain threshold, but you can also activate it manually.
Method 1: Enable battery saver on Windows 11 in the Quick Settings menu.
First, click on the Wifi, speaker, and battery icons, or press the Windows + A key combination to quickly open Quick Settings. Then, click on Battery Saver to manually enable this mode.
Method 2: Turn on Battery Saver in settings
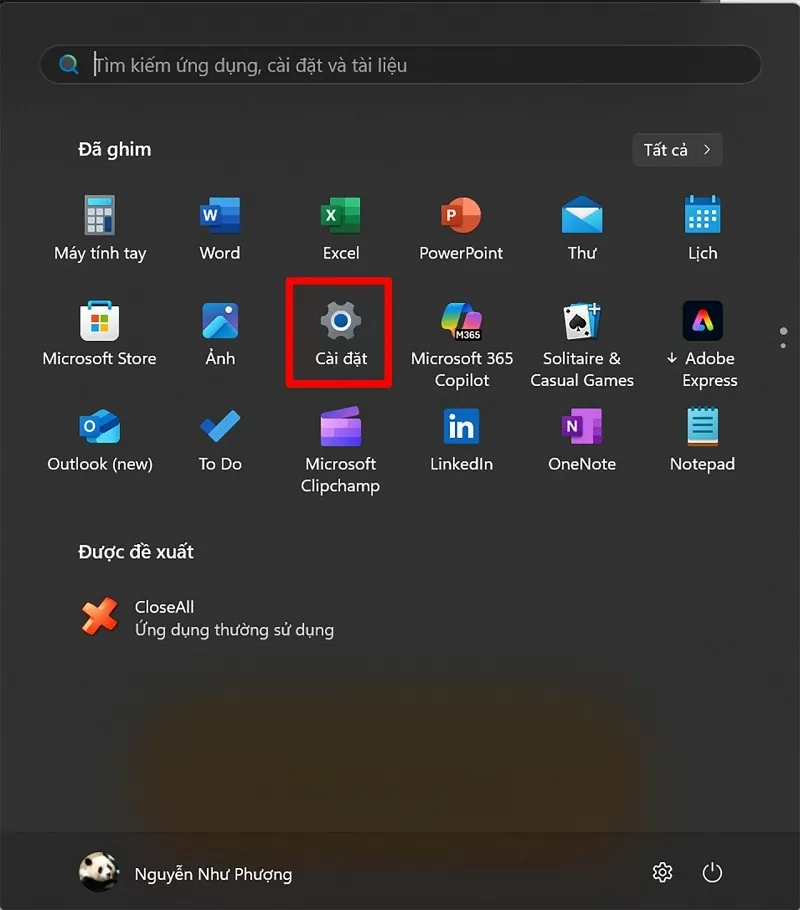
Step 1: Press the Windows + I key combination to quickly access Settings on your computer.
 |
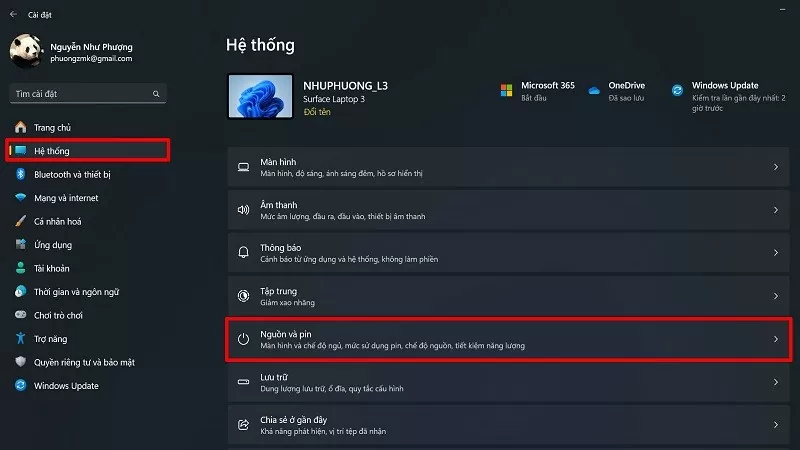
Step 2: Next, click on System, then select Power and Battery to activate battery saver mode on your Windows 11 computer.
 |
Step 3: Once you've accessed this section, find the "Power Saver" option and select "Activate Now" to turn on battery saver.
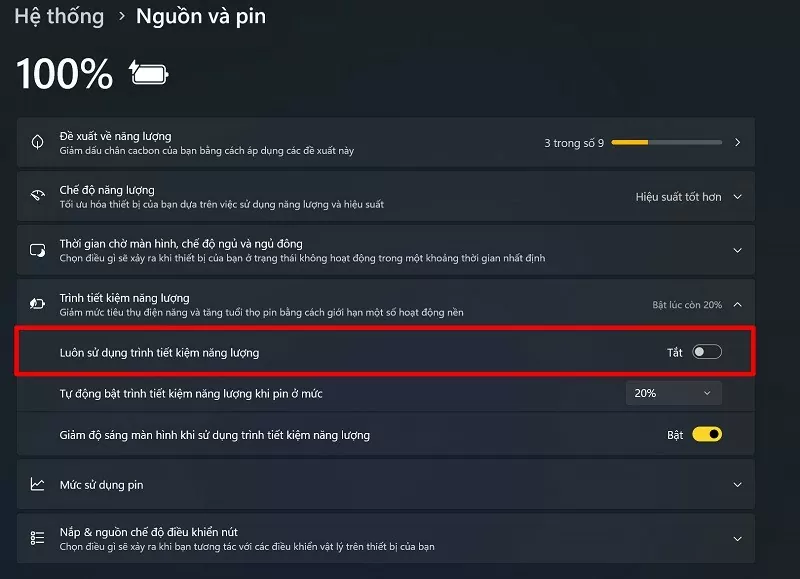 |
Additionally, you can also set Battery Saver to automatically turn on when the device's battery level drops below your desired percentage in the automatic settings as shown in the image below.
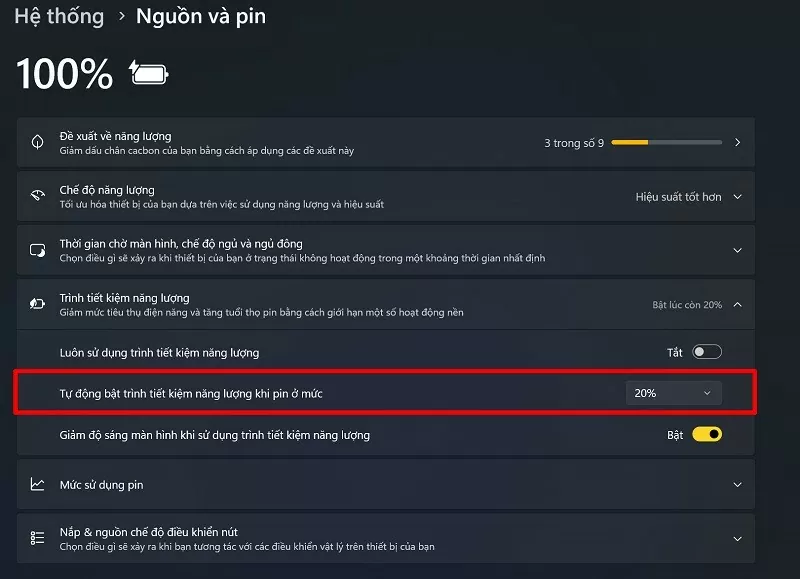 |
Above is a guide on how to enable battery saver mode on Windows 11 with a few simple steps. Good luck!
Source


![[Photo] Closing Ceremony of the 10th Session of the 15th National Assembly](/_next/image?url=https%3A%2F%2Fvphoto.vietnam.vn%2Fthumb%2F1200x675%2Fvietnam%2Fresource%2FIMAGE%2F2025%2F12%2F11%2F1765448959967_image-1437-jpg.webp&w=3840&q=75)


![[Photo] Prime Minister Pham Minh Chinh holds a phone call with the CEO of Russia's Rosatom Corporation.](/_next/image?url=https%3A%2F%2Fvphoto.vietnam.vn%2Fthumb%2F1200x675%2Fvietnam%2Fresource%2FIMAGE%2F2025%2F12%2F11%2F1765464552365_dsc-5295-jpg.webp&w=3840&q=75)























![[OFFICIAL] MISA GROUP ANNOUNCES ITS PIONEERING BRAND POSITIONING IN BUILDING AGENTIC AI FOR BUSINESSES, HOUSEHOLDS, AND THE GOVERNMENT](https://vphoto.vietnam.vn/thumb/402x226/vietnam/resource/IMAGE/2025/12/11/1765444754256_agentic-ai_postfb-scaled.png)























Comment (0)